Showing posts with label Hero Arts dies. Show all posts

Monday, 31 August 2026

White on White with One Colour: Heartfelt Wishes.

It’s the last day of August, which means it’s time to share my card for the Die Cut Divas August Challenge. This month’s theme is White on White with One Colour, and our wonderful sponsor is Birch Press Design. If you enjoy intricate and elegant die cuts, their website is full of beautiful inspiration.


For my card, I reached for a lovely Birch Press flower set called Star Flowers Contour Layering Die.

It was the perfect starting point for this challenge, giving me a delicate focal image while still leaving plenty of room for that soft white-on-white background.

I began by die cutting the flower die twice from white card. Using a selection of pinky-red Altenew inks, I blended colour onto the flower pieces and layered them together to create two large flowers and two small flowers. For the white-on-white background, I embossed a panel of white card with the Craft Concept Leavy Flourish embossing folder, which added just the right amount of texture and interest. I then created a die-cut frame using two dies from the Hero Arts Infinity Arches set and adhered it to the embossed panel. The flowers were arranged with three in the bottom left-hand corner and one in the top right-hand corner, giving the card a balanced yet graceful look. To finish, I stamped the sentiment in the same pinky-red colour using a Hero Arts stamp from the  All Occasions (retired) set, then die cut it and added a few white pearls for an elegant final touch. All in all, I’m really pleased with how this card came together—it feels soft, pretty, and fitted the challenge theme perfectly.

I hope you’ll join us at Die Cut Divas this month and share your own White on White with One Colour creation. We can’t wait to see how everyone interprets this elegant theme!  Just remember to use your die cut machine to cut or emboss. 

Monday, 17 August 2026

Christmas Cardmaking: Silver Sparkle and a Festive Poinsettia

Over the weekend I managed to create a couple of Christmas cards. The first one started out as an entry for a Time Out Challenge, but I soon realised I had not read the theme quite correctly. The challenge was to choose two items from a list, and I had only chosen one: monochromatic. Even though it did not quite fit the brief, I was still really pleased with how elegant the card turned out.

I was inspired by a YouTube video I watched on the Altenew channel, where Erica created cards in white and silver. I loved the elegance of that colour combination and decided to try something similar.

I had recently purchased a Christmas die from my local stationery store, which included a snowflake edge die and an ornament. Using Altenew Stirling Glitter cardstock, I die cut both pieces, then added the snowflake edge down the left side of the panel and placed the ornament on the right.

For the sentiment, I used one from Rosie’s Studio Home & Hearth set and embossed it with Altenew Antique Silver powder.  I used some holographic card to mat the panel.  To finish the card, I used some of the tiny stars left over from the snowflake edge die cut as embellishments. They were perfect little details and tied the whole design together beautifully.

My second card was a quick one I made on Saturday. I am still trying to find my missing Poinsettia die set, but while searching I came across my Hero Arts Woodblock Antique Poinsettia stamp and the matching dies, so I decided to put them to use.

I stamped the poinsettia twice on red card and once on green shimmer card. The coordinating dies include three pieces, which made it easy to cut the layers and build up the flower. Once assembled, I added a gold gem to the centre for a little festive shine.

For the background, I embossed a white panel with a Christmas folder and added a scrap of music paper that I had used on another recent project. I matted the white layer onto red card, and in the end, I decided the design did not need a sentiment.

It was lovely to get a little festive crafting done over the weekend, even if the first card did not quite work for the original challenge. I now have two more Christmas cards ready to go, and both have a very different feel: one elegant and sparkly, the other traditional and warm.

Friday, 28 February 2025

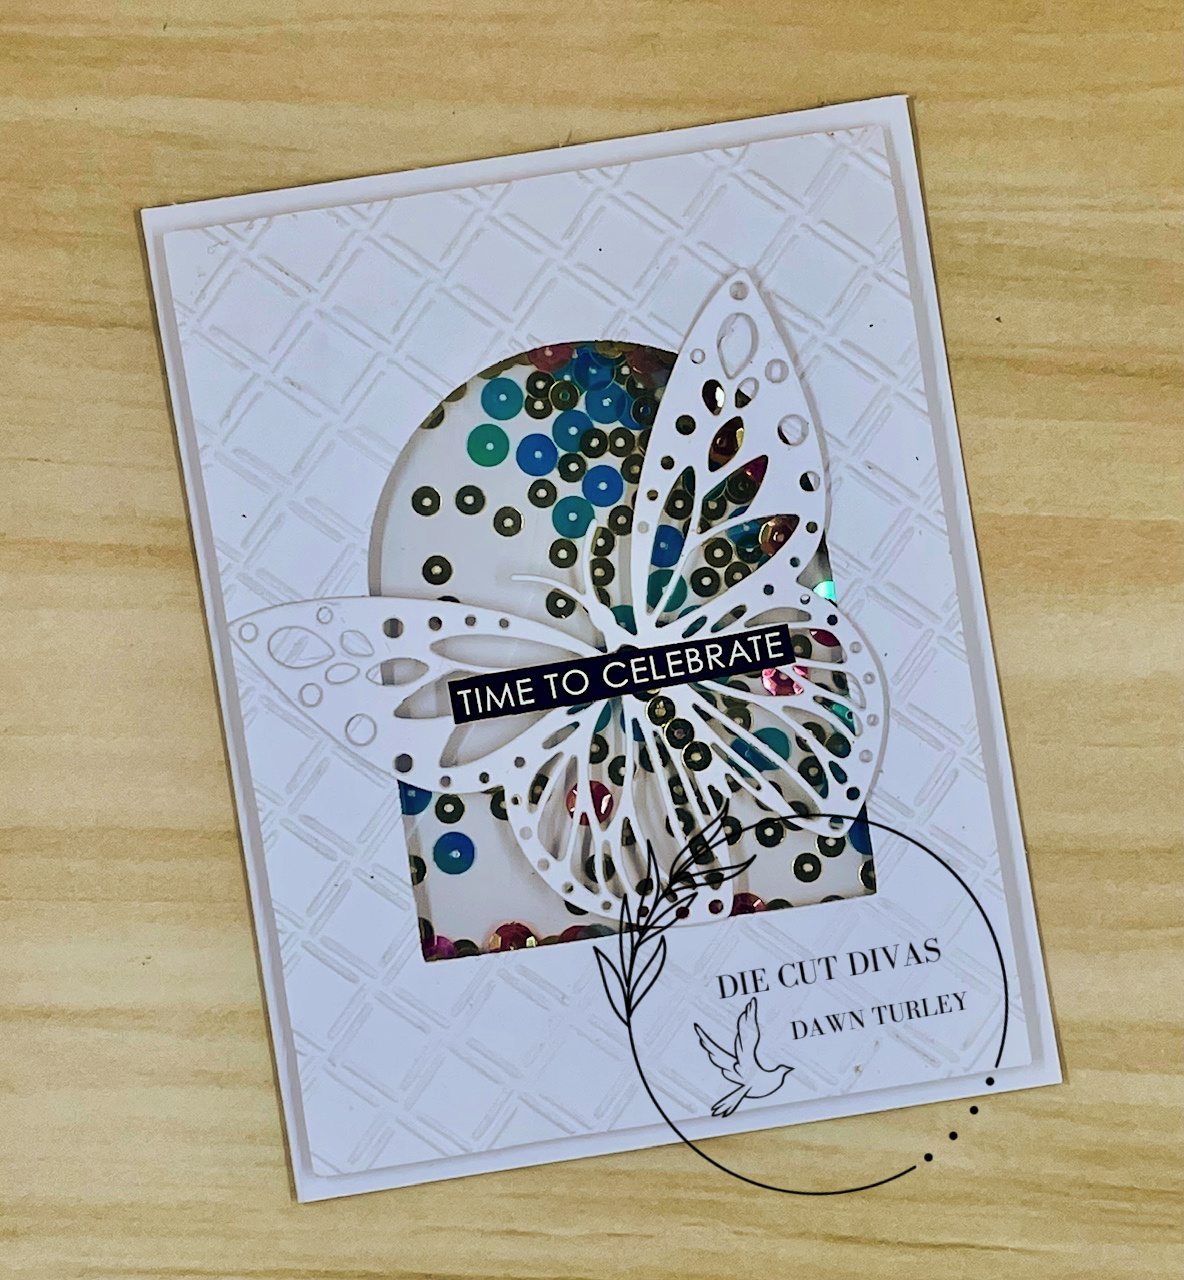
Shaker Butterfly card with Die Cut Divas

Hi all, 

It's the last day of the month, so time for my card for Die Cut Divas.   Our lovely sponsor is Hero Arts 


And our challenge is to make a Shaker card. 


 I have used an older die and a new die for this one.   The new die is the Infinity Arch die for cutting my aperture.  And the older one is the Hero Arts Butterfly Die (circa 2015)  I used a Cuttlebug embossing folder for some texture.   I added some mixed sequins in gold, blue and pink and added the Butterfly die to the front.  And finished with a sentiment from a Wordies set. 

Do come and join us at Die Cut Divas. 

Tuesday, 24 October 2023

Merry Christmas Poinsettia

I finished up the card I was working on yesterday, later in the evening.  I took me ages to do... but I love the way it turned out. 

This card was quite the labour of love!   The beautiful sentiment - from Carta Bella, was cut with some green Mirri card.  Each letter was cut separately apart from the "AS".. which meant trying to get them added to the embossed layer was a bit difficult.   I die cut one from white card to use as a template to stick them through.    I started by trimming a white panel for the background - embossed it with an unnamed folder which had the embossing around the edges.  Think it may have come from a magazine.  Next up was to print the patterned paper.   I pop the download onto Word and was then able to recolour the red to green before printing it out.   I used a Hero Arts Infinity Arch die set to cut it out.  I used a smaller die from the Arch set to cut the centre panel which was embossed with a snowflake folder.  The poinsettia is by Spellbinders - Layered Poinsettia, cut from white card for the three smaller layers and lightly ink blended with green ink from the brush I used.  The last layer was cut from some textured green card which I also used to die cut some of the Pinkfresh Curvy leaves dies.  The entire panel was then layered onto some of the green Mirri card before adding to the white base.   I have to say the Mirri card is hard to get a good photo of.    Well worth the time it took.                                                   


Sunday, 27 August 2023

Add Spots or Stripes...

Hi there.   I have been chock full of a cold I caught before I came home and it's not improved much this week.   I had Monday and Friday off sick... I haven't done much crafting till this weekend.   I had to make my Dad's Father's Day card (3rd September) and his birthday card (10th September) so I could get them in the post.... I'll share these later.. and then I had to make my sample card for Die Cut Divas for the 31st August.   Once that was done I thought I'd make a card for The Flower Challenge.... Add spots or stripes... made it and them realised the challenge finished two days ago!!!!!  Oh well, another card for my stash!!


I started by taking a piece of gold foiled stripe card and using my new Hero Arts Infinity Arched dies I cut the card.  I took some rose gold card and used the dies to make a frame.  Next up was to do the embossed background.   I have a Spellbinders M-Bossibility Reversable Embossing folder (circa 2012) and used the dotted chevron side.  I haven't used this folder for such a long time!  At the recent SENZ fair I picked up the a Spellbinders die called Layering Cherry Blossoms.   I die cut the flowers from some paint chips and added some inking.  The branches were cut from kraft card and I used some Altenew Sea Form ink to add shading.   The leaves were cut from green card and blended with the same ink.  Added the branches and flowers over the frame.   I had the Cherish sentiment already stamped and die cut (From Couture Creations "For You" stamp and die mini set) and added along the bottom of the frame.

All in all, a good weekend of crafting.