Showing posts with label Hero Arts. Show all posts

Friday, 28 February 2025

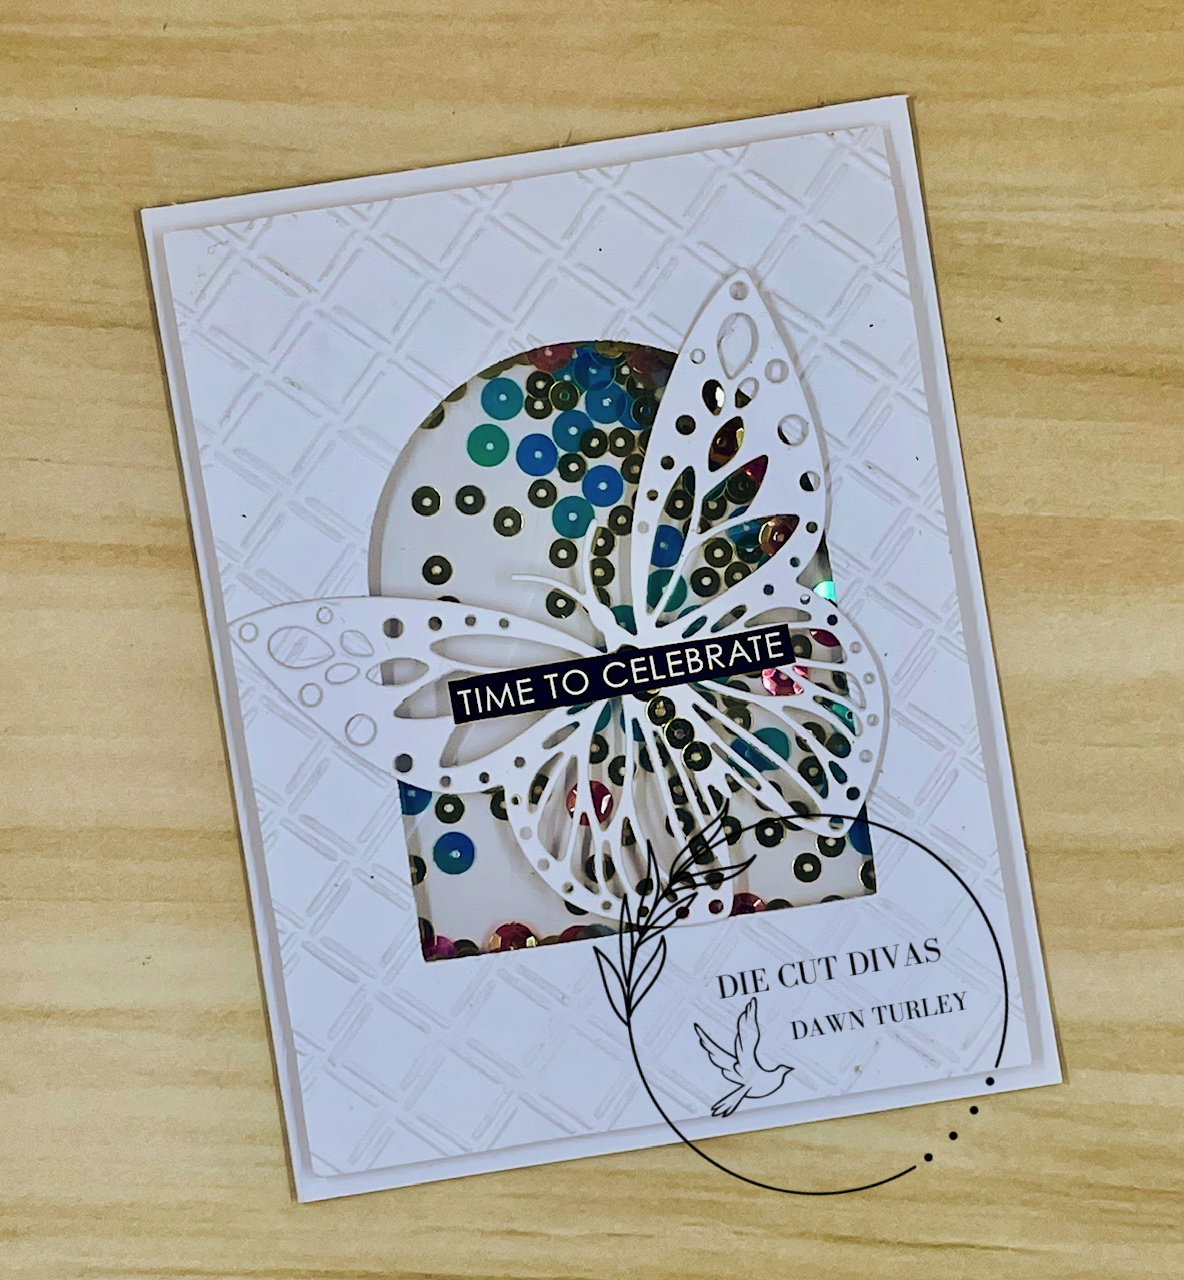
Shaker Butterfly card with Die Cut Divas

Hi all, 

It's the last day of the month, so time for my card for Die Cut Divas.   Our lovely sponsor is Hero Arts 


And our challenge is to make a Shaker card. 


 I have used an older die and a new die for this one.   The new die is the Infinity Arch die for cutting my aperture.  And the older one is the Hero Arts Butterfly Die (circa 2015)  I used a Cuttlebug embossing folder for some texture.   I added some mixed sequins in gold, blue and pink and added the Butterfly die to the front.  And finished with a sentiment from a Wordies set. 

Do come and join us at Die Cut Divas. 

Saturday, 2 November 2024

Woodblock Wednesday - Oct 2024

 I did this card for Woodblock Wednesday on Thursday this week, but have been soooo busy that I didn't get time to share it till now!  


I love this challenge from Amy - a good reminder to use those woodblock stamps I have.   At the moment I seem to be on a Christmas blitz... so here's another one!


I used a Hero Arts Poinsettia stamp and the sentiment is from a company called Paper Inspirations.  It's a really old stamp as I can't find if this company still exists.    I started by stamping the Poinsettia all around the edges of the panel - using Altenew Heartbeat red ink.   I stamped the sentiment with some Festive Berries Distress ink.  Added a little blending around the edges.  Added some Nuvo drops in a red and cream and some gold Kindyglitz to the centre of the poinsettias.  

Really happy with this monochromatic card.  

Monday, 2 September 2024

Woodblock Wednesday - August 24

 Just sneaking last minute for Amy's Woodblock Wednesday Challenge at her blog 


I was away in the weekend so just before bed last night I got this CAS card done - Inspired by Justine Hovey. 

I masked off a strip in my card panel and then used some Distress Oxides in Mowed Lawn, Cracked Pistachio and Evergreen Bough.   I then used the Hero Arts Woodblock stamp- Big Pine Bough stamped in Versafine Onyx Black ink.  The sentiment is from Crafter's Choice.  A few Altenew green enamel dots and it's done!

A simple but pretty card.  Justine's YouTube video had lots of tips and tricks for stamping and making quick cards.  

Saturday, 10 August 2024

CMSS - Inspired by Juliana Michaels... not one but three cards!

 Yeap, I loved the presentation by Juliana Michaels and made not one card, but three!   Her technique was using stamping foam and an embossing folder.   This is a favourite technique, but one I don't use all that much.  

As I am doing mostly Christmas Holdiay cards this summit - I chose an Altenew folder.  Classic Pinecones Slim 3D folder.  I heated my foam and pressed it into the folder.   Chose the "sticky up" side (although hard to determine with a 3D folder)  

First card I inked the foam with some Vintage Photo Oxide ink.   I used some 240gms Fabriano Start Mixed Media paper.  It says it is white... but it is really an off white colour.  It's A4 size so my card bases become 4 1/8" x 5 3/8" - just a smidgeon less than a US A2 size card.  

Love the colour I got with the Vintage Photo ink.  I trimmed the stamped panel leaving a tiny white border.  Matted the panel with some brown card - the same colour as my pinecones.   I used an Elizabeth Craft Designs die set - Christmas Accents.  It's an older die set, with two sizes of pinecones and two sizes of the poinsettia flowers and leaves.   I used two tones of brown for the cones, and some red paper.  I made my own green paper by using Distress ink in Pinecone direct to the paper.  A little fellow centre finished my poinsettias.   I made these cards yesterday and fortuitously my order from Krafters Cart arrived - with the Concord & 9th - Big on Christmas stamps and die set.  I stamped the big FA LA LA and used the die to cut it... and added the sub-sentiment directly on the card. 

Card two- I used Weathered Wood Distress Oxide to stamp the foam, trimmed and added to a dark green mat.  

This time I chose an older stamp and die set from Hero Arts- Holly Jolly.  We have been tidying up the storage space under the stairs - where I store some of my stamps... ones I haven't used in forever!  Saw this set and thought it would be perfect against the background.  I used more of my own green paper to stamp on and die cut the holly leave.  Added some Altenew enamel dots for the berries.  The sentiment is from the same stamp set.  

For my third card, I reheated the foam and used the other side of the folder.  Used the Weathered Wood Distress Oxide ink and definitely got a totally different look. 

I trimmed a larger border around the panel and used a Gold Sharpie to add a faux mat.  I stamped another of the stamps from Concord & 9th set - gold embossed directly onto the panel.  Added some die cut stars (from the same die set) with a little gold gem in the centre. 

The stash of Christmas cards is growing quickly with the inspiration from the Card Makers Success Summit.. and I still have nearly 40 more presentations to watch.  

Thursday, 25 April 2024

Woodblock Wednesday - April 2024

 Amy's April edition of Woodblock Wednesday has started.    Once a month, she has a challenge to use Woodblock Stamps.  I try and play along each month - to give my Woodblock stamps some love. 

Earlier today I watched Jennifer McGuire and Aaron Leventhal from Hero Arts doing a live FB about the history of stamping - and it inspired me to get out some of my Hero Arts stamps.  I must say the majority of my Woodblock stamps are from Hero Arts.  

The focal image for this one was inspired by Shari Carroll.  I remembered seeing her fussy cut the floral image I used so decided I liked the idea. 


The card started with the background stamping of Hero Arts Designer Woodgrain stamp.  I used Altenew Silver Sage Fresh Dye ink.  I then stamped one of the stamps from the Peeking Posies set with Versafine Onyx Black ink and used Zig Markers to colour it.  I then did the fussy cutting using both my craft knife and tiny scissors.  I cut the dark grey piece and scored it every 1/4" for some texture.  Not the best pic, but my usual editing tool is not working today. 


Today is ANZAC Day here in NZ.  It's a public holiday when we take time to think about all those service men and women who fought in wars.  It's a bit of a cooler day, as Autumn is truly here now, so a good day to spend some time in the craft room.   Got this one done, plus a birthday card for Finn (it's not till June 23rd but I wanted to get ahead!)  

Sunday, 25 February 2024

Valentines with Hero Arts

 Hi there.   Today I'm sharing my card for Die Cut Divas.  


Our challenge this month is Non-Traditional Valentines


I started my stamping with a lot of Hero Arts stamps and dies.  I pulled out an older cling stamp called Dancing with Flowers (Circa 2011) and stamped it in Versafine Onyx Black and clear embossed it.  The sentiment is a clear set (Circa 2009) called Treasure the Moment.   I lightly blended some blue and yellow inks over the panel.  My card base was dry embossed with Swiss Dot folder.  

Do come and join us at Die Cut Divas 

Today I got a visit from our littlest Princess.... Florence and her Daddy came around.   It was lovely to spend some time with her.  She is growing so quickly.  Almost 8 months now..


Sunday, 11 February 2024

Flowers and Heart

 The Flower Challenge has restarted for the New Year and being February (the month of Love) the challenge is "Add a Heart" 

I still trying to use patterned paper so I pull out some for my background. 


The paper is from a Uniti pack called Sunshine Floral.   Love the soft look of this paper.   The rest of my card is made up by bits from my "to use" pile.   The heart (a Spellbinder's die) and the floral bouquet (Pink Fresh Studio - Artistic Dahlia stamped, stenciled and die cut) have been sitting in the pile for some time.  I took Prisma's pencils to add some extra shading to the bouquet and to add around the heart.  The sentiment is from a very old Hero Arts set called Yes.   I used some Memento Gray Flannel ink.  Three little pink gems finished the card perfectly.   

I had a great weekend creating.  Yesterday I finally got around to creating the pages for the two new grandchildren to put into frames and made my design card for the 28th of the month.   Today I did a card for the Craft Roulette that I will share tomorrow and this one.  


Monday, 4 December 2023

Poinsettia Christmas

 I case'd one of my own cards with this card... in fact I made two of them 

I used the same design - just changed up the colour of my arch, poinsettia  and leaves, and used a different sentiment.   Just used the same embossing folders.   The arches are from a Hero Arts set, and the sentiment is from Scrapbook.com.  

Here's the original


Now to address and send all my local cards to friends and family.   


Monday, 5 June 2023

Use up those backgrounds....

 I have a lot of backgrounds sitting around... lots of blended, painted, smooshed etc.   It's been another cold and wet day, so after lunch I headed into the craft room and pulled out some of the of my backgrounds and decided what ones I could make into a card.  


I took a panel with greens and orange Distress paints on it.  I had been playing with the paints a few weeks ago.  I took a Stampin' Up wooden stamp from the Background Builder set and some Grey Denim ink from Altenew and added some subtle writing on the background.   I die cut the oval and it's layer with dies from Gina K Master Layouts 1.   I had picked up a Uniti stamp set from the Warehouse here in NZ - they were very cheap and cheerful but stamped lovely.  I used Hero Arts Navy ink to match the navy card used for the layer on the oval.  Next I took a piece of card that had orange paint on it and using the flowers from Sizzix Geo Floral Frames die set, cut two bigger and one smaller flowers.  Layered together and added the centre from the navy card.   Found a scrap of card with some green paint and together with two other shades of green, and die cut the four different leaves.   Added the flowers with 3D tape and then added the leaves directly to the card.   Layered the panel to navy card and then to a white base.  As this is not a colour combo I used much, I was thrilled at how it turned out.  

Entering this one into Darnell's NBUS challenge - first outing for the sentiment. 


Friday, 10 March 2023

Masculine Birthday card

 I had to make a male birthday card for my son-in-law whose birthday isn't for another  10 days but as it needs to make it's way to Perth, I did it early.    I struggle with masculine cards but thank goodness for Pinterest.   My card is a combo of a couple of different ideas I saw there.  

I used some grey card and embossed it for a textured background.  Cut some flags and a circle for the Hero Arts sentiment.  It's a great one for a focal sentiment.    I die cut a few little stars to add as embellishments.

I've been making a few cards but as they are for swaps and upcoming design work, my blog has been a bit quiet.   Hoping this weekend to get a couple of cards done for challenges.   

Take care and happy crafting 

Tuesday, 28 February 2023

End of the month with Hero Arts and Die Cut Divas.

 It's the last day of February - where has the time gone!  Anyhoo - last day of the month is my turn to share at Die Cut Divas.   Our sponsor this month is the amazing Hero Arts.

An our Theme: Add some gold - heat embossing, foiling, gold pen, gold thread, gold gems/sequins/enamel dots... something GOLD.

I have a lot of older Hero Arts stamps and dies so decided it was time to invest in some new products.   I picked up the Succulent Bouquet Combo (stamp and die set) and paired it with an older cling stamp - Stripe Pattern (retired) 

I stamped the Succulent Bouquet and used some Altenew watercolors to colour it up.  I then die cut it out.  For my background, I masked off an area on a card panel, and used the Striped stamp to stamp and emboss in gold.  I also stamped and embossed the Hello sentiment in the gold.  I used Gina K Master Layouts 1 to cut the panel and it's layer then added the die cut. 

You have till 9pm Pacific Time to join us at Die Cut Divas with your projects incorporating some GOLD.

Saturday, 11 February 2023

Take a sheet of scrapbook paper - and chop it up Part 2

 Hi there.  Back to share my part 2 of  use that hard to use scrapbook paper.... You can see part 1 here.

Three more cards using the paper I chose. 

Card 4

I added some texture by stamping the Hero Arts Old French Writing with black ink and clear embossing.  I used a rose from a Uniti Ephemera pack with a reversed foiled sentiment - from Memory Box.   It was the left over foil, foiled onto white card.  

Card 5

This one was another monochromatic look.   I stamped and embossed the sentiment from Hero Arts - With Sympathy.  I then masked it off and used some of the flowers from the set - stamping a bit extra of the stems below the masking.  

Card 6

For my final panel, which as very textured and patterned, I went for a large die cut sentiment.   I cut the Penny Black sentiment from black and silver card and layered them together.  Part of the die set was a die that cuts a few little hearts - which I did twice from red card.  

So that's 6 cards from one 12 x 12 hard to use sheet of scrapbook paper.  I am happy with the results I got.  

Here in Auckland we are battening down the hatches.... Cyclone Gabrielle is headed our way and the forecast for the next few days is high winds and heavy rain.  With Auckland still a bit waterlogged from the rain 10 days ago, we are on high alert.  Supermarkets were super busy today with people stocking up on bottled water, and food in case we lose power.  Hopefully it won't be as bad as predicted.  


Wednesday, 17 August 2022

Feeling Blue....

 No I'm not feeling "blue" but had fun making some blue cards today.    It was a wet and windy day so decided to finish work a little early so I could spend some time in my craft room.  I knew we were going out for a curry dinner, so didn't have to prep a dinner so spent time playing.   

I thought I'd do a card for Less is More - butterfly - but didn't get my card done in time.... I knew I wanted to try a technique I saw on Gina K's 5-minute You Tube video a couple of weeks ago.  


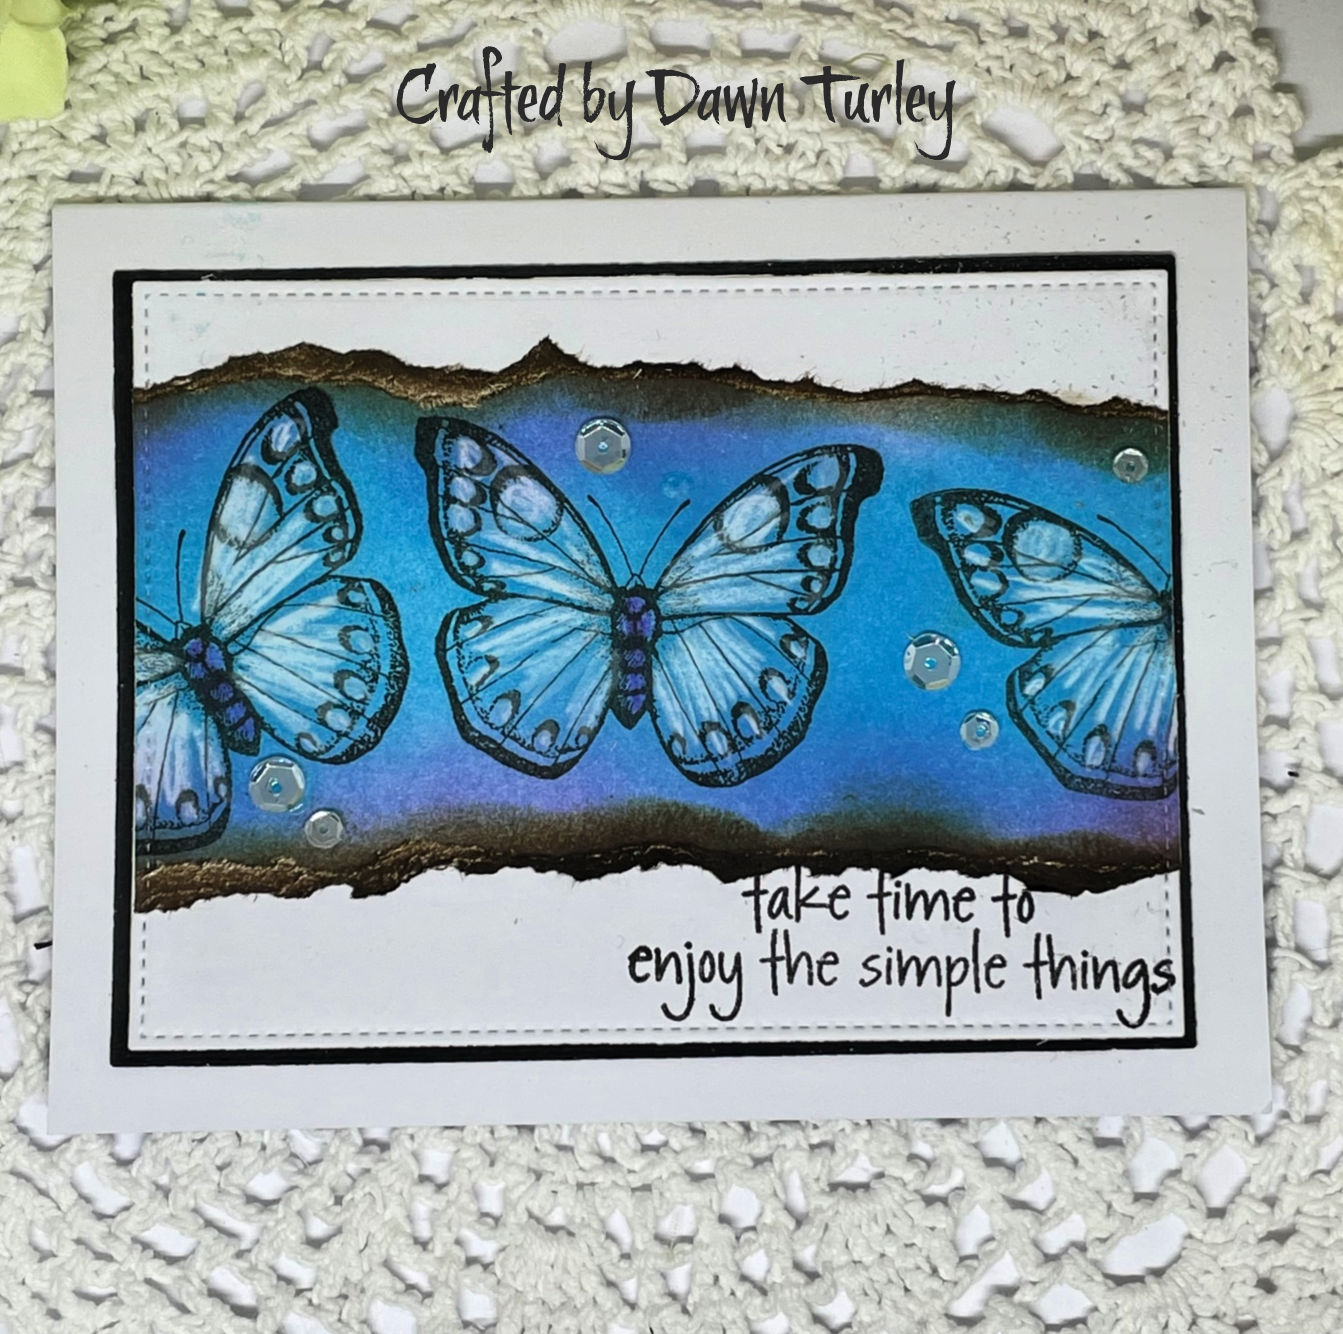
This card used older Hero Arts stamps.  The butterflies from Antique Engravings (2010) the sentiment from Share Laughter (2008)   I stamped the butterflies onto some white card and then coloured with some white Prismacolor pencils.  I then took some blue and purple Altenew inks and blended over them.  I tore the panel and inked the edges with some Walnut Stain Distress inks before adding to the white die cut panel.  I added the sentiment and some clear sequins.    I looked at it and realised it was not quite as CAS as I had wanted - but love it anyway!   Believe it or not... I messed up this card 


I ended up getting some blue ink onto the card.... but due to my trusty sand eraser... I managed to get it off.  

So the latest challenge at "Less is More" is One Layer Card - Favourite Flower.   This I can do! 

I took a piece of mixed media paper to make my card.  I have taken a stamp from Altenew's Craft Your Life Hello Beautiful and white embossed it onto the card front.  I then took some Altenew Turquoise ink and blended over and around the embossed flower.   I then used Turquoise and Tide Blue inks to watercolour the flower.  The leaves were painted with Evening Grey and Lava Rock inks.  A few splatters of the grey inks were added.  The sentiment from the same stamp set was inked in black ink and embossed with clear powder. 


Sunday, 22 May 2022

OCC Spring Card Camp 2022 - Day 3 & 4

Note: Photo heavy post 
Hi there.   After feeling really blah on Friday - and not doing anything other than watching my class videos, I had a better day on Saturday and got a lot of backgrounds made with the techniques.  And today, was feeling even better so got 4 cards made...

Day 3 - 2 for 1 inked backgrounds.   Our tutors were Kristina Werner and Jenny Colacicco.  Kristina showed us techniques using a Gel Plate or even stamps and Jenny did a stencil technique using watercolour paper with ink and water.   I didn't get get around to doing any of Jenny's techniques so my first three cards are using Kristina's technique with the Gel Press. 
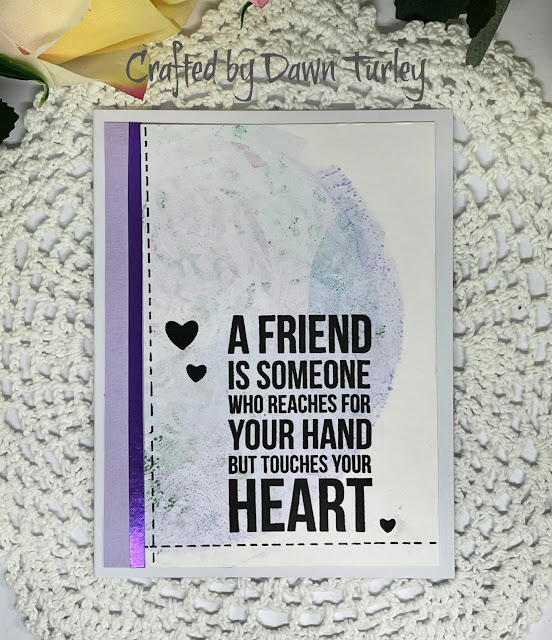

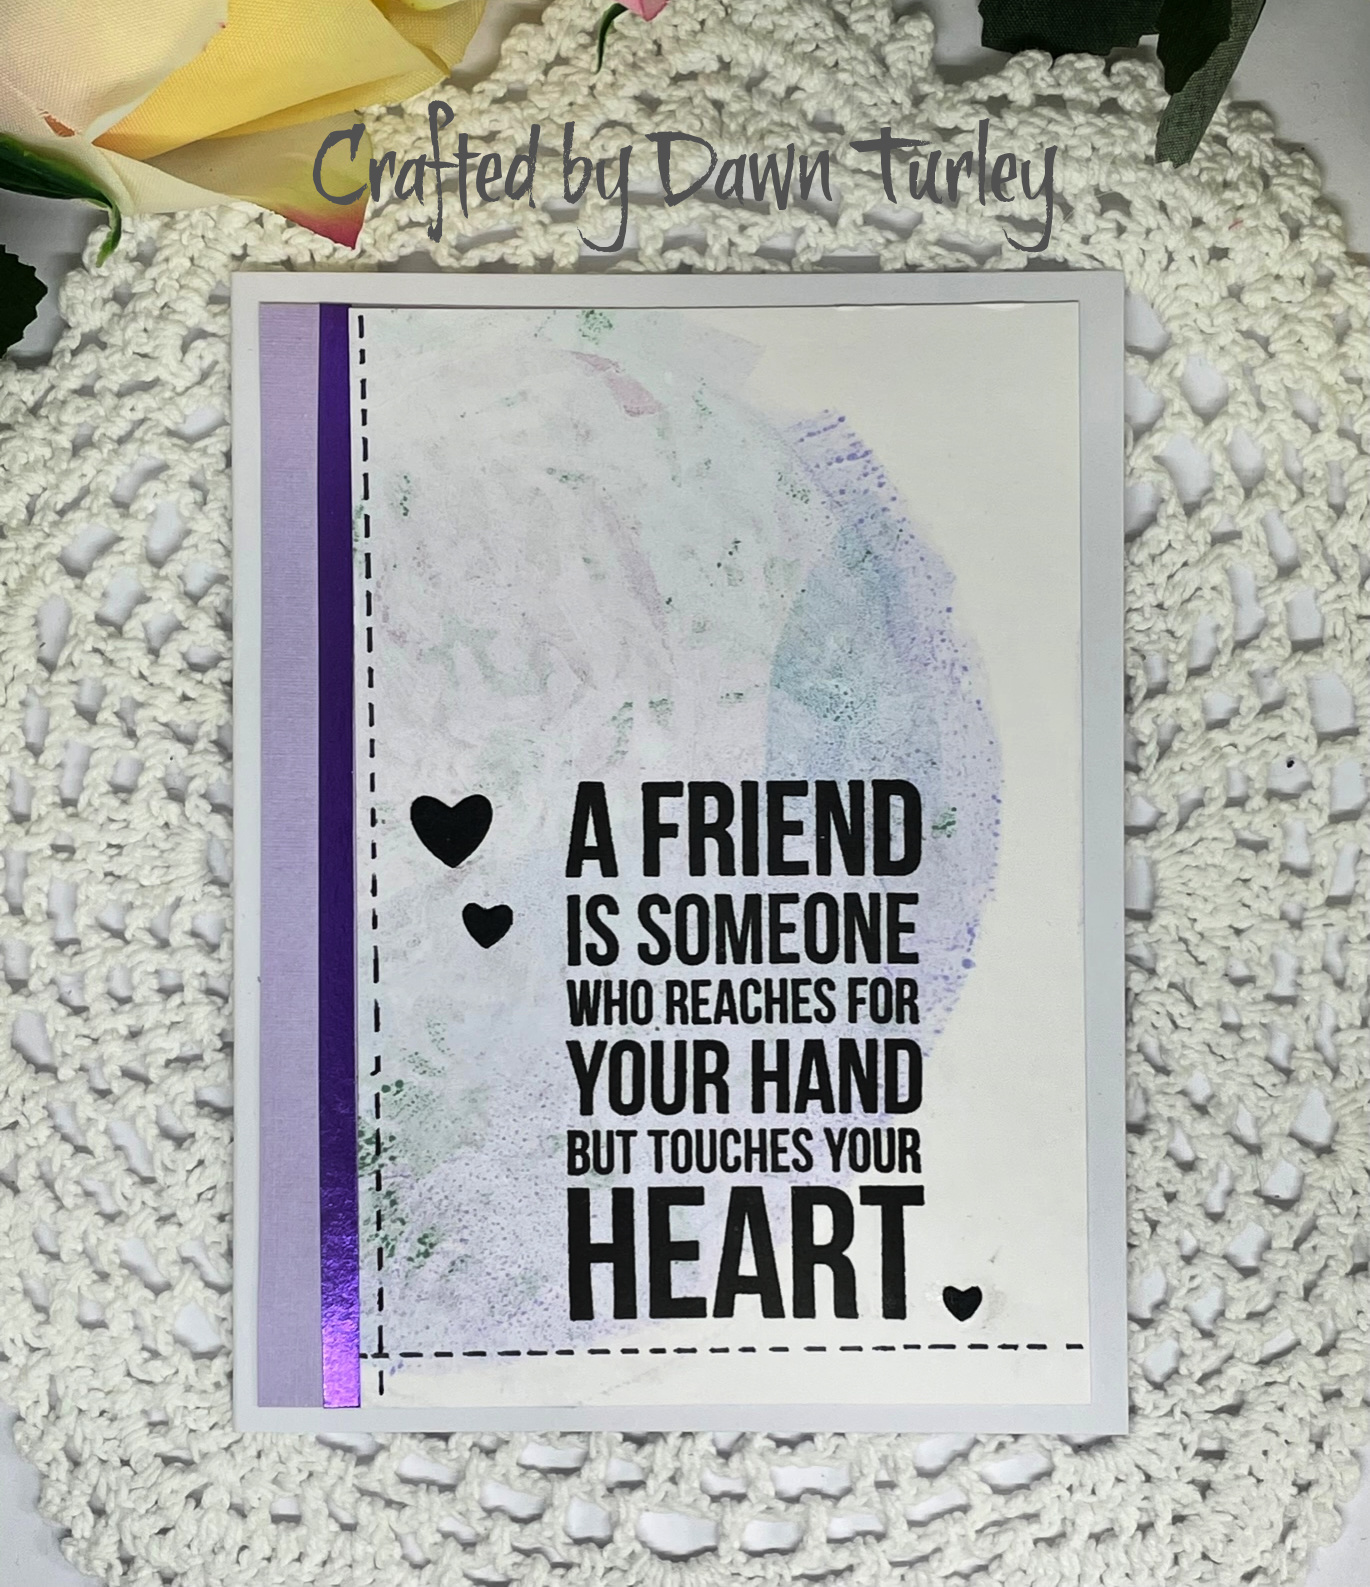
Kristina used a 6" round gel plate - I used a rectangle plate but liked the look of a circle so cut out a circle from card to make a mask.  I only have a few Distress Oxide inks - mainly in soft colours so had a go.  First go used some Wilted Violet DO and Broken China.  I used a Memory Box stencil (Raymelle) and added a layer with a touch of Worn Lipstick.  I got a bit of ink where I didn't want it... so trimmed the panel down and added a lilac card backing and some purple metallic washi.  Kristina did a bit of faux stitching on her cards so I tried it too.  The sentiment is from Kaisercraft and I die cut some little hearts from different die sets..

I tried again with some more of the Worn Lipstick and Wilted Violet.  


I did added some of the blue ink as well.  For this one, I trimmed the panel down and added a frame I had in my "stuff to be used" bowls.  I added two layers of thin stripes of card for dimension. I did the same for the sentiment... it's the centre of Altenew's Circled Greetings - hello.  Just cut out the sentiment bit.  Added a sub-sentiment from Hero Arts Stamp and Cut Hello set.   Finished with a few pearls.

My third cards is the Twofer bit of the above ones...  As I was using the brayer to add the ink to the gel plate, I brayer-ed the extra ink onto a card to get some lovely interesting patterns. This is what I made with that panel 


I trimmed the panel down and using Altenew's Antique Silver powder, embossed the Woodware set - Floral Wonder by Jane Gill.  I added a sentiment from the LDRS set.  The panel was matted onto Lilac card and then onto a dark grey card base. I added some pink sequins to finish.  This one was hard to photograph.

Day 4 -  Embossed resist with a Twist.   Heather Hoffman and Mindy Egan were the tutors and had two awesome techniques.  Heather used embossing and then used a layering stencil to to the resist.  I still have to try this one.  Got a new Altenew layering stencil this week so it's on my to make list!  Mindy's twist used embossed background and a Gel Plate and Shimmer powders.   So I pulled out an older Hero Arts background stamp and some Cosmic Shimmer Pixie Powders.  
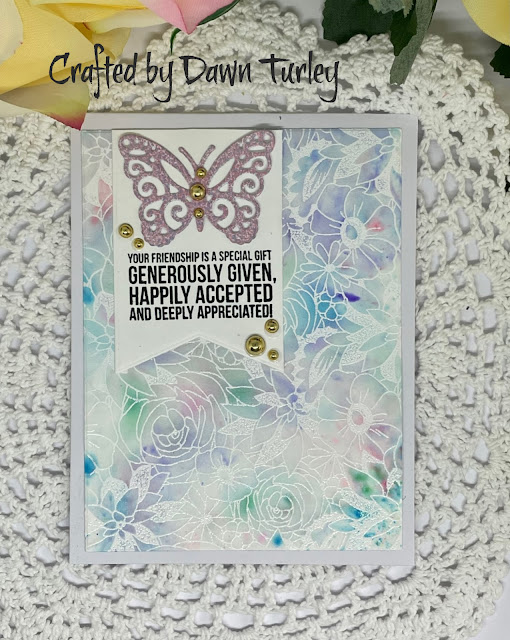

The background stamp is Flower Medley (circa 2012)   I stamped in Hero Arts Unicorn ink and embossed with white powder.  I then used the Gel Plate with Aqua Lagoon, Purple Violet, Candy Pink and Peacock Green powders.  I spritzed the powers and the card and pressed it onto the plate.   The colours diluted a bit more than I thought they would, but love the soft look I obtained.  I was inspired by a Jennifer McGuire video for the card design.  I used Gina K ML 4 flag - modified to increase the length.  The sentiment is from Kaisercraft - Best Friend set.   The butterfly is 2 layers I had in my little bowls. 

Thanks for getting this far.  I'm back to working tomorrow - but will still work from home as I'm still coughing.   I have to stay isolating till I'm symptom free for 24 hrs.  All in all, I got off quite lightly... so pays to be fully vaccinated and boosted.    

Monday, 28 February 2022

White Pencil Highlighting - with Die Cut Divas and Hero Arts.

 Hi.  It's the last day of the month, so I'm sharing my card for the monthly challenge at Die Cut Divas 

 Our February challenge is "ANGLE IT" and this month our sponsor is the fabulous company Hero Arts who will be giving our winner a $25 gift card to their online store.


Today I have two cards to share.

First is the one you can find on the Die Cut Divas Blog (here) 


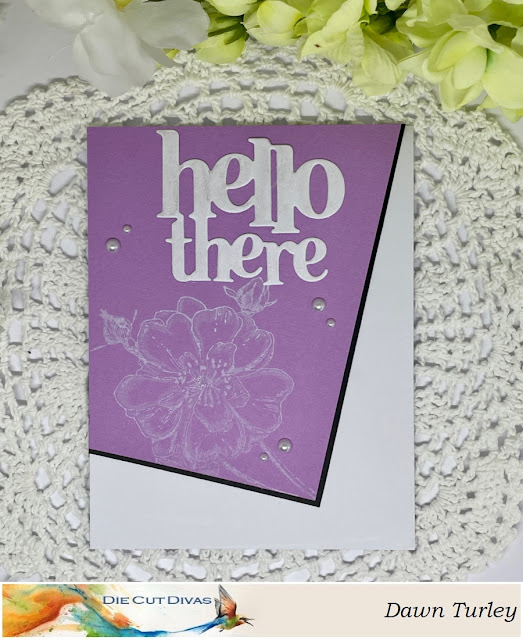
I used a technique that I first saw over on Jennifer McGuire's blog in February 2016!  It's called White pencil highlighting.  I took some purple card and cut it on an angle before stamping Antique Rose Stem stamp (wooden rubber stamp circa 2016) in Hero Art Unicorn white ink and then took a white Prismacolor pencil and added shading around the edges to highlight the petals.  I added a white die cut from Hero Arts Hello There Stamp and cut.  I added some Wink of Stella on the die cut.  I matted the purple panel onto black card.  A few pearls finished this one.  
and my bonus card.... this one came about after I had done the one above.   I had been catching up on watching some You-Tube videos.  I saw one by Natasha Foote... making her own book paper.  So I decided to have a go.  I case'd Natasha's card. 


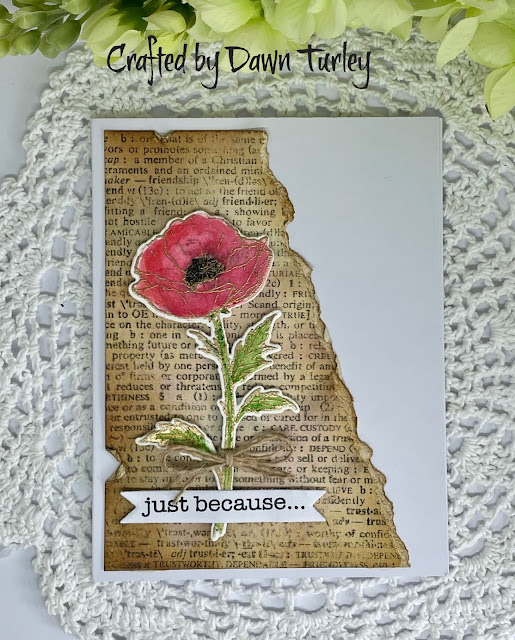
I added Distress inks - Vintage Photo, Tea Dye, Old Paper and Weathered Wood onto a silicone mat and sprayed water onto it and smooshed some watercolour paper into it.  I dried the panel and added another layer.  I used another of my older Hero Arts red rubber background stamps - Friends Definition circa 2010.   I then tore it on an angle.  I rolled the edge and inked it with the Vintage Photo.  I also distressed a couple of spots.  I added an embossed poppy from Hero Arts - Hero Florals Poppy and matching Frame cut with some 3D tape.  I stamped the sentiment from another older set - Everyday Sayings circa 2010.  I die cut it using a Gina K die.  I added a burlap thread bow. 

Our challenge finishes at 9pm 28 February Pacific Time (1 March 6pm NZ time) 


Friday, 25 February 2022

Angle it with Hero Arts.

Hi there.   It's time for me to share my card for this month's Die Cut Divas challenge. Our February challenge is "ANGLE IT" and this month our sponsor is the fabulous company Hero Arts who will be giving our winner a $25 gift card to their online store.


I have quite a few Hero Arts stamps but most of them are older ones.  When I first started stamping Hero Arts were my favourites.  And I love pulling them out now and again to play. 


I used an older Hero Arts Rubber background stamp (circa 2012) called True Friends.  I used some Altenew Rocky Shore ink to stamp it onto some white card.  I used a yellow gold card to die cut the Hero Arts - Hello There Stamp and Cut sentiment.  The bottom sub-sentiment is from the same set and stamped directly to the kraft base.  To define the angle I used as  very slim stripe of gold card.  

We would love to have you play along with us - showing off your Angle It projects.

Monday, 25 October 2021

"We Three Kings of Orient Are..."

 Hi there.  It's my day to share at Die Cut Divas.  We have an Anything Goes Challenge this month with a amazing new sponsor - Scrapflower Estudio

This small, woman owned, business is known for a wide variety of multicultural, and gnome-loving, digital images. Her adorable images are designed for colorists of all kinds. The owner, Patricia, began her entry into the digital stamps world via her love for coloring. Her illustrations are drawn for worldwide, beginner to expert colorists, and everything in between.

The team have the priviledge of working with some of the beautiful images from Scrapflower Estudio.  I chose to use Three Wise Men digital image.


I decided a mini slimline would be a great way to show them off.  I sized them quite small along my card and then used some Altenew Woodless Watercolour pencils to colour the Wise Men.  I added some sparkle pen and glossy accents to their crowns.   I used a sentiment from a Hero Arts set  together with one from a freebie set.  I used two dies from Gina K's Master Layouts 7.  I'm loving this little 3.25" x 6.25" card size.  

Do come and join us with your projects.  

Wednesday, 3 March 2021

Purple florals - and using Stamping Foam.

 I've been working from home for the last 4 days as we are back in lockdown 3 for 7 days.  I have set up my tablet and old TV monitor on my craft table - which I have to say is very distracting!!!!  I use my break times to do some crafting... 10 mins in the morning and afternoons and 20 mins or so at lunch time.  So over the past few days I have been trying out a new tool!  I brought some Simon Hurley stamping foam from my local online store (Krafters Cart) and after watching Jennifer McGuire and Simon's videos I made a few backgrounds... using stamps and embossing folders.  I made a few backgrounds and today I finished my first card.


My background was made using a Hero Arts background stamp.  I followed the instructions on heating the foam and pushed it into stamp.  I used some Altenew ink to rub over the foam and stamped it onto some white card.  I trimmed around the edge and added it to my purple embossed base card.  I stamped Altenew Gift for You onto some scrap card and used my Jasart pencils to colour it in.  I fussy cut it and added the little sentiment stripe that I had in my "magic mug" a la Laurel Beard.  A few pearls finished of the card.   I must admit to loving this one... Purple is my favourite colour.  

Now I just have to make sure that I don't get too distracted with all my crafty goodness around for the rest of the week.   I will be strong!

Tuesday, 2 March 2021

Hero Arts Facebook Fans 90 minute Scramble.

 Today Cindy started a new 90 minute Scramble over at the Hero Arts Fans Scramble Facebook page.   I've been working at my craft desk - so as soon as I signed off for the day, I picked up my supplies and made a card. 

Cindy's challenge is to make a mini slimline card.  Mini slimlines are 3.5" x 6 inches.  A good size to try.   Here's my card - made in about 45 mins and then took about 25 mins to photograph and add to the album on FB. 


It wasn't till I took the photo that I realised my sentiment was a bit crooked!.  I made my base from Kraft card stock.  I die cut the Poppy then used the negative space to line up the stamps.   I used Copic markers to colour the poppies.  I then added them to the blue centre panel.  I made my own shiny glittery card by painting the red card with Wink of Stella clear sparkle pen and then covered it with clear packing tape, before die cutting the sentiment.  I then stamped the sub-sentiment from the Hello There set.  Added a few holographic gems to finish.  

Come and join the Scramble Group over on Facebook and play along in the Scramble.  It's running for 7 days.   

Sunday, 1 November 2020

Gnomes, Gnomes and Gnomes....

 Hi there.... I just had to play today with some of my new goodies from my trip to the FYI Craft show yesterday.    Two of my purchases were Gnome stamps made by Montarga Stamps - a New Zealand company   They are just adorable.  Gnomes are so trendy again this Christmas so was really pleased to pick these two up. 

I have already made 4 cards.  Two are for upcoming samples - the sneak peeks from yesterday's post.  So here are the two I made today


For this one, I used a pre-scored card by Rosie's Studio.  I used the Gina K layouts 2 for the die cut stitched panel.  I added a 1/8" matting with dark green card and used the little flag tag from Layouts 2 and stamped and embossed a silver sentiment.  I had stamped a few of this gnome and used my Scan'n'cut to cut them out.  For this one, I coloured him in red and green and then added dimensional tape to pop him up.  


For this second card, I chose some turquoise colours to colour him up, with pink for my accent colour.  I used some patterned papers to make my layers and some pale blue for the mats.  I added the panel to a dark blue base.  I used a Hero Arts sentiment and the dots are from a Catherine Pooler set. 

I am having so much fun with this stamp.  There will be more of them in the future I am sure.