Showing posts with label Stamp-It. Show all posts

Friday, 31 October 2014

Vellum Poinsettia

I saw a beautiful card on Facebook from Deasy (see here) and decided I wanted to try something like it....

Red Poinsettia

I stamped my Kiwi Stamps  Poinsettia in Versamark on vellum and embossed with some Red Tinsel powder and heat set.  I then fussy cut and added to a striped card from Close to my Heart.  The sentiment is from Stamp-it!

I've entered this into the Stripes challenge at City Crafter Challenge

I also did a CASE of Deasy card.

Vellum Poinsettia

My splatters are gesso watered down.  Sentiment is from Winnie & Walter and was white embossed. 

Happy Halloween to everyone.  I only had a couple of lots of Trick and Treaters tonight.... so lots of chocolate and black jelly beans for me!


Sunday, 22 June 2014

Inspired by Virginia.

Getting back from holiday I struggled for a day or two to get back into stamping and creating, despite new stamps sitting on my desk.  So off to the internet to see what my friends are up to.  Virginia has been really busy with one botanical collage stamp from Penny Black and it really got me inspired.  One of my new stamps is a set from Stamp-It, an Australian company, and is a collage set.


I did two cards using the stamps in the set.


This first one is the bigger of the two stamps.  I coloured with Copics and then masked them and used my air spritzing tool and a Copic and a Tombow marker to colour the background.  Sentiment is from Close to My Heart.  I added some Wink of Stella.  It splattered when I shook it and I ended up with splatters, so added some more all over the card. 

 
My second card used two of the other collages.  I used a Poppy Stamps die to cut the 3x4 journal card and stamped the image.  I used some Inktense pencils and a Tombow colourless blender to colour.  The sentiment is also a Stamp-It stamp.  For the background I used the smaller collage with some sepia Archival ink and added some distress around the edge.  I layered a couple of washi tapes across.  To finish I added black pearls. 

This was just the kick start I needed.  So much so that I managed two cards today for my July posts on Die Cut Divas.  Getting myself a little ahead.  And I even went out to look at some storage ideas for the craft room.  Got some ideas for tidying up one corner with some cube storage.  Just got to wait till some repairs on the corner of the floor are done.  A while back our water cylinder leaked and the floor under it and into the corner of my room has gone soft.   The repairer is coming in this week and I've moved out some of my supplies to give them room to fix the floor.  Once it's all back I'll get the new storage in place. 

Thanks for stopping by today.  


Saturday, 21 April 2012

Tuesday Trigger.... beautiful butterflies

I don't usually enter Moxie Fab World's challenge.. ( daunted by so many more talented crafters there!) but this weeks trigger was a beautiful watercoloured butterfly dress.  And it did inspire me!

Tuesday Tigger.


I pulled out an older Stamp-It butterfly stamp and inked it up with Brilliance Twilight pigment ink ~ this is a beautiful shimmery ink in pink/purple/blue.  I trimmed it with a Spellbinders die and then distressed while the die was still in place.   I stamped the biggest butterfly again and fussy cut it and added for dimension.  Added some pink pearls and matted it onto some wine coloured card that had been embossed with a butterfly folder ( not that you got to see this in the end) The BG paper is from Hot of the Press.   I added a doily behind the butterfly panel and added a little purple double bow.  As it seem quite busy, I decided to go with the sentiment inside ...

Inside of card


stamped the butterflies again inside with with the Mother's Day sentiment - also from Stamp-It.  One of the ones I got when I went to their store in Perth.  It's an older one that was on sale down from $17.95 to $6.00.   With Mother's Day here in NZ on 13 May, it will be handy.  I'm making some cards to sell at work.

I've started to tidy up ( a continually exercise in my craft space!) and came across a pile of stamped and punched butterflies in a orangey colour so can see another card in my mind... now to get finished tidying so I can get it made.

Hope you have a great weekend

Dawn 

Sunday, 1 January 2012

2011 in Review....

Happy 2012 to all.  Many of my blogger friends are showing off their favourite cards from 2011... I've decided to take one from each month to share>>

JANUARY 
Using Spellbinders Tag dies to make the frame around the circle 

 FEBRUARY
 I hand made my watercoloured paper adding various stamps around the piece. The girls are a digital image, printed and coloured with pencils

 MARCH
Using distress inks smooched onto an acrylic block for the background and double stamping in two colours to create shadow

APRIL
Hand rolled roses and hand made stick pin for this one.
MAY
Had a go at a shaped card.  Really pleased how this one turned out. 

JUNE
This one was inspired by Jacqueline.  Using some more hand made watercoloured paper, using Hero Arts Frame and Hydrangea stamps.

JULY
This one was for a CASE study challenge ( which made it to the Top 3).  One of my all time favourites for the year.

AUGUST
This elegant beauty is a digital image combined with PP, Embossing folder and a Hero Arts sentiment. 

SEPTEMBER
A fun Penny Black stamp set, some distress sponging and some pretty PP combined with a soft ribbon finished this one off. 

OCTOBER
Another digi image ( from Heather Ellis ~Pure Innocence~) lots of fun papers and some fun with a Tim Holtz rosette die. 

NOVEMBER
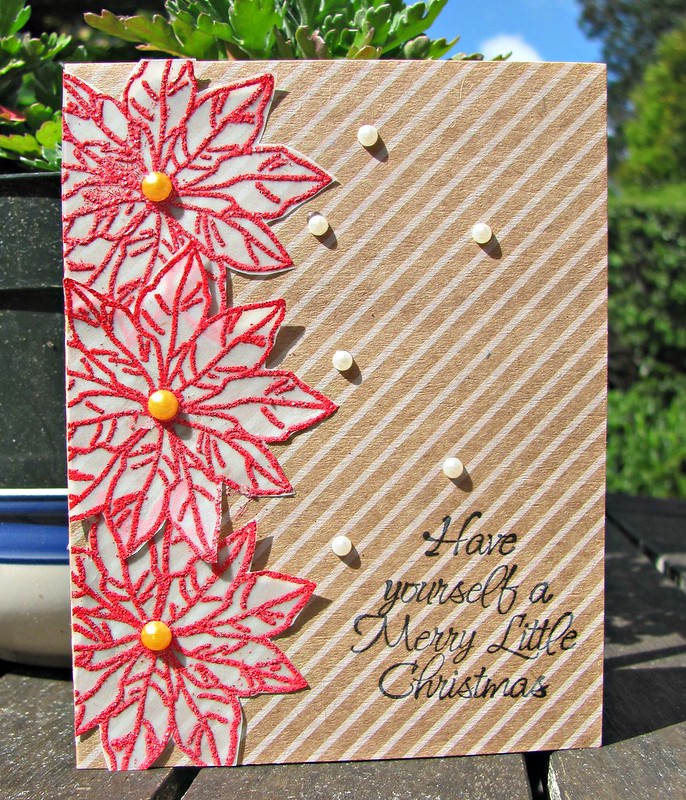
Loved the simplicity of this card as well as the brown and gold yellow colours

DECEMBER
And finally the card I made for my parent's 55th wedding anniversary.  A digi image from Mo's Digital Pencil.  Loved how my felt roses turned out.

This year I also had my cards showcased in Hero Arts Social Thursday, City Crafter's challenge Blog, CASE Study, and twice over at Wee Memories.

Thanks for bearing with me through the year of cards.... It's been fun and I have learnt heaps and been inspired by many... THANK YOU all.

Cheers
Dawn

Sunday, 27 March 2011

March Card Chain Challenge Reveal...

I was a tad late getting my card off in this months Card Chain Challenge organised by the lovely Deborah.... and that's who my recipient was this month....  Deborah tells me the card has arrived so I can now share...
CCC March 2011

Inspiration from this came from a Stamp TV episode (here)  Gina K has lots of fabulous videos of lots of different techniques.  This one involved embossing on patterned paper and then using inks to bring out the embossing.  I used a butterfly embossing folder and some patterned paper I printed out on the computer.  I used a butterfly stamp from Stamp-It which I stamped on the die cut piece with the die still on it... then sponged the Aged Mahogany ink over it.   I used the distress ink to colour the butterfly.

And this little beauty arrived in my letter box from Mariette
CCC Challenge March 2011

Mariette did an amazing job on this one.... It is a stunner.

If you haven't joined Deborah card chain challenge.... you should... it is such fun. Visit her blog to link up shortly...

Our trip down to Hamilton today was good.... but not without a little incident.... We had a late night.... so told our son he could drive us down.   We have a Nissan Maxima so he was thrilled to be driving a good car.  The road down to Hamilton is mostly 2 laned highway.  I'm dozing in the backseat when I felt the car slowing and his girlfriend saying" Told you to slow down"  - yeap he was caught speeding and pulled over.... doing 127km in a 100Km area.   So a fine and loss of 35 demerit points.... not the greatest start to the day.  However the rest of the day was lovely.  We met at Peter's brother's house and the family all said a few words about their sister and then we viewed the video of the funeral service.  Very moving... then we all headed off to a local bar/restaurant  for drinks and a meal.  Lots of friends came, including two of Helen's friends from Levin.   It was lovely to catch up with the family and the young ones enjoyed each others company.    And a lovely way to say goodbye to Helen

Thanks for visiting.  Have a great week....

Dawn

Monday, 7 March 2011

Phew... busy busy...

I can't believe it's been nearly 5 days since I posted... life has been busy...  a bit of card making, lots of socialising and fun.  Friday I had a card to make for a friend.... for a christening.  I wanted to do something special so spend some time thinking about the stamps I had and what I could do.  I had bought a set of stamps by Rosie's Studio last week that were some dictionary definitions... so I chose 3 that I thought fitted a baptism... Joy, Believe and Love.... here's what I came up with
I was pleased with the results and so was my friend.  Something a bit different.   Stamps used:  Butterflies by Stamp-It.  Words by Rosie's Studio and Congratulations by Hero Arts.

Saturday evening we went to some friends about an hour south-east of our place for a dinner party.  We had a great night, staying over night as it was too far to come home after a few wines.   I made a card to say thanks to Prue and Roger for their hospitality.

I started by masking round the card base with painters tape and stamped the Envelope background with Old Paper distress ink.  Then edged the mask with a fineliner pen.  I stamped the Chair onto some pp I found in my stash, that looks like leather and cut it out.  Stamped the thank you and then inside used the computer to type... for your hospitality.  Just a bit of a fun card....

Sunday... we went to a Roxy Music Concert.... held on the green at a local vineyard...Villa Maria.  The weather was not very nice over the weekend, but had improved by the late afternoon.   It was definitely cooler than we have had for the last few weeks, but it was fine by the time the concert started.  Not the greatest of concerts but not too bad.  But now I am feeling a bit tired.... sitting here watching TV and catching up with blogging.

Thanks for stopping by.  Have a great week

Tuesday, 12 October 2010

Christmas trees

The final cards I made on Saturday were both the same... just slightly different colours.  I made them towards the end of the evening.... and it was getting the sentiments on that told me it was time to go.....  I was using a stamp'am'gig to make sure it was straight and twice in a row I stamped it upside down on the plate... Luckily I did that rather than straight on my card or I would have been a bit peeved!!!!  So here they are

IMG_2046


IMG_2047


I started by stamping the Pine Bough in Forest Green distress ink on one and Rhubarb Stalk Momento ink on the other and then using the distress ink as a paint, coloured in the pine needles and well as adding some pearlescent paint for shine.  The sentiment is from a set by Stamp-It.  Nice clean and simple cards.  Great idea for mass production.

I have also got a couple of photos of Connor's birthday cake - made by my talented daughter...

How cute is this..... Apparently Connor was over the moon with his cake.

Thanks for visiting - hope you week goes well

Saturday, 26 June 2010

Cards for the Boys....

are always so difficult.... no frills and frippery, not flowers or butterflies...
So when I saw some lovely male orientated cards in an Australian Simply Cards magazine, I knew I had to get some of the Graphic 45 papers they had used and make some cards....
So far 4 cards done.... sneaked off this afternoon to stamping at Helen's place.  Knew I couldn't do all day but got a couple of hours in....
This one is for my Dad ( don't look Dad).  I had seen this one by Lucy - which inspired me to computer generate the sentiment.  I used PP from the pad and cut and matted the car from one of the pages.  Used Old French writing for the background.
Again used papers from the pad or this.  The stamp is by Stamp-It.  Lots of distressing to give it a vintage look, added some brads and layered everything.
 this whole pad of papers is great for male cards... the car on this one is at the bottom of the page because I stamped the Fleur de lis first and noticed it was crooked.  So covered it up with the car and put the sentiment at the top.  I borrowed the sentiment stamp from Sandie - it's by Stampin' Up!
And finally
another quick and simple one again using the car and PP from the pad.  Added little black gems to the corners of the car and added the sentiment and all done.  I'm going to do more the same to stock up on male cards- I often get requests for male orientated cards so having a few on hand will be good.

Thanks for visiting... hope your weekend is going well.  I'm off to watch the 2nd half of the All Blacks versus Wales... ( rugby)  AB's winning so far!!!
Cheers from me...