Showing posts with label Stress Free Cardmaking Summit. Show all posts

Wednesday, 5 November 2025

More mixed media inspired by Stress Free Cardmaking Summit

 Hi.  I have enjoyed trying some more mixed media on my cards inspired by both Erin Reed and Juliana Michaels.   Today I used Erin's butterflies and her design elements... but on a bit of a mixed media background. 

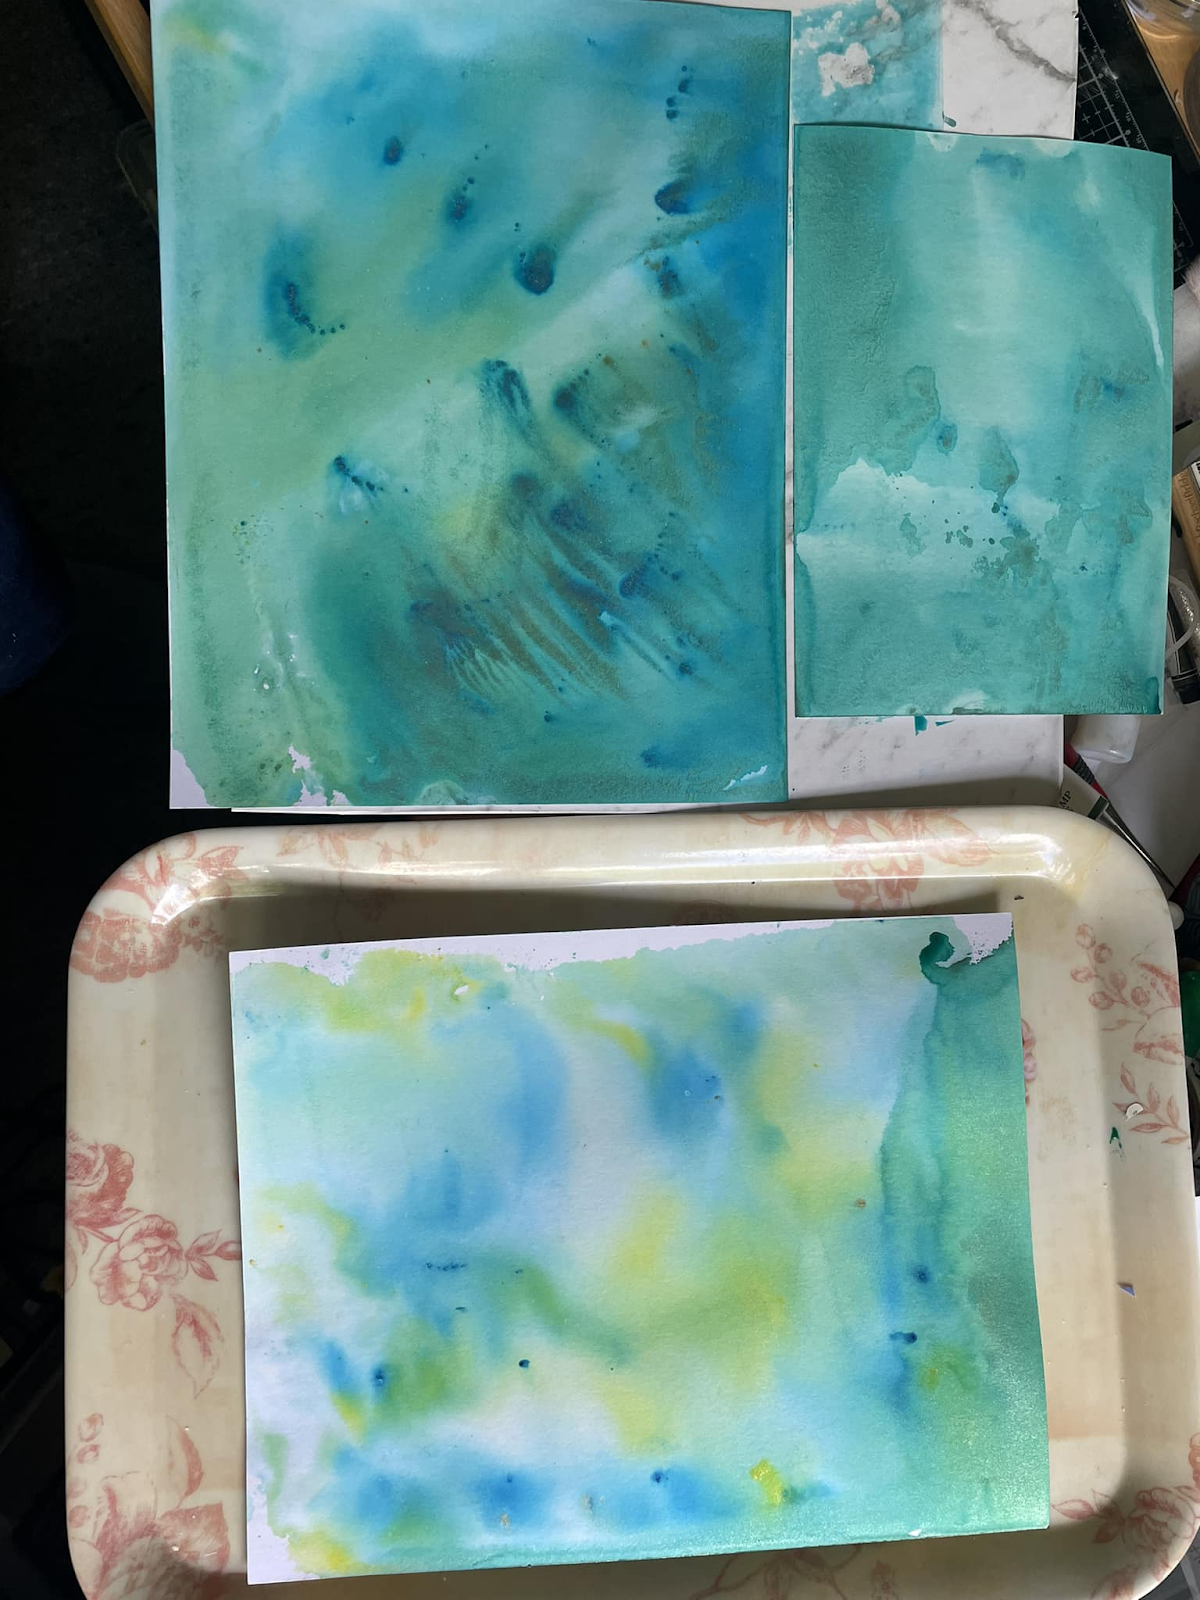
On Sunday Grace and I did some backgrounds using watercolour paints and some chunky Himalayan salt.  Some worked really well, some not quite so good.   Grace took home 4 backgrounds and I did 3.  My first background was light colours and I added some fine table salt with some of the chunky salt.  The fine salt didn't really work but did stick to the card which gave it a bit more texture.   It was this one I used for my background.

To enhance the background I used some Lindy's Starburst sprays - Clam Bake Beige and Whale Watch Blue. Used TCW Multi stencil, Circle stencil and Mini Geometric Art Lyrs with a variety of inks including black. Added some white shimmer spray splatters.   Stamped part of a Couture Creations sentiment with Altenew Cloudy Night ink.  Added the strips of black and purple together on the card and added the fussy cut butterfly.   Finished with some of my homemade enamel dots.  

Keep a look out for another mixed media card coming up on Saturday.  


Sunday, 26 October 2025

More Stress Free Cardmaking Summit projects.

 I had some fun on Friday and Saturday playing with inspiration from the summit.  I really love getting the VIP classes.. so I can take my time to watch the classes and play along.

First card I did was inspired by Erin Reed's mixed media class. 

Erin provided a sheet with butterflies and sentiments to print out.  The butterflies are stunning and I chose this one.  I used some paints for my background - Dina Wakely, Reeves and Tim Holtz Distress Paint and a variety of stencils.    Did some pen scribbling on the background as well and added some splatters of the black paint.  Fussy cut the butterfly and trimmed the sentiment.  Just loved the results and will definitely be trying the background again. 

Next up are some cards I made inspired by Therese Calvid's embossing technique.   It's one I've tried before but it's an awesome one.   


 This was my first try but, I chose a patterned paper that was just a bit pale.   I embossed with a Christmas 3D folder and used Hero Arts Unicorn ink to blend over the top.   Added some sparkle pen on the flowers.   I wasn't sure about it, but made it into a card.   Sentiment was stamped in Catherine Pooler Icing on the Cake ink with a Kaisercraft sentiment.  

Card two turned out much better -

This time my patterned paper that was darker and the white ink really made the embossing pop.  I added a preprinted banner I had in my stash and added some off white homemade enamel dots.

And while I was playing finished off a green card I had embossed with the free folder I got when I was away.  It's a normal embossing folder and I wondered what it would look like if I inked it with the white.  Turns out it looks great. 

I decided to make it into a Christmas card.  I had some printed sentiments from last years summit and I die cut one and matted with some of the dark green card. I used a Sizzix die set to cut the leaves and red flowers.

Today didn't get any time to play but hopefully tomorrow - as it's a public holiday here in New Zealand.   A few more sessions to check out and try. 


Saturday, 18 October 2025

Stress Free Cardmaking Summit - Oct 25

 Got a few hours this afternoon to watch some more sessions of the SFCS - I watched Justine Hovey's Live presentation - on replay as it was too early in the day for me - and played along with her.   And then watch Juliana Michaels session - using precise smooshing.   All just using 5 items!

Justine did some masking and ink blending to make a lovely clean looking one layer card - I followed her placement of the masking stripes as I liked the design. 


I chose to use a green/blue background - blending with Altenew inks - Mountain Mist, Volcano Lake and Lagoon.   I used Mint tape to mask off areas to stay white.   Then stamped two flowers from an older CASual Friday stamp set called Pretty Posies.  I then stamped and fussy cut from masking paper before blending.  Used Emerald ink with a 2009 Hero Arts background stamp (Antique Background) to add some extra texture.  Once I removed the masking, I added some little sentiments from Altenew's Sentiment Strips 2.  And finished with some iridescent drops from Pinkfresh Studio.

My second card is more of a mixed media card - inspired by Juliana's session.  Included using a couple of homemade ink smooshers.   I already had a flat one, but made the bubble wrap one.  


Very different from my first card today.   I used light blue and purple inks to make my smooshed background.   Use the light blue with the flat smoosher and the bubble wrap one with the purple ink.   I then used a stencil from Ranger to added the purple.  Splatters of black, white and blackberry acrylic paints (Dina Wakely paints).  My focal butterfly is from Memory Box and I used an Ultramarine ink to smoosh the bottom layer.  I used Catherine Pooler Grass Green and Eucalyptus inks to smoosh onto white card and then die cut two of the leaves from Pinkfresh Studio Curvy Leaves die set.  Added the leaves behind the butterfly and added a teeny tiny sentiment - stamped with black and a Mama Elephant stamp set.  Added some holographic dots to finish.

Had a great afternoon crafting.  Can't wait to finish watching the summit presentations. 

Friday, 17 October 2025

Friday Fun

Today was my first Friday of not working - started 4 days a week from this week.   So after a bit of a sleep in, I breakfasted and got onto the house work - dusting, vacuuming, floor washing, clothes washing and hanging out - so by lunch time a nice clean house.   Sat outside in the sunshine for a lovely salmon salad for lunch and then - into the craft room for some play time.  

I finished off a card that I had initially started with the idea it would be for hubby's birthday yesterday, but ran out of time to get it done and gave him one I already had in my box of cards.  


   The patterned papers is from a Couture Creations paper pack called Sea Breeze.   I used Gina K Master Layout 1 to cut the paper and matting layer.  Stamped a sentiment from Gina k Birthday Sparkle set and cut it with the matching die.  Quick in the end. 

I've got the VIP bundle for the latest Stress Free Card Summit - 5 items or less - and have watched a few of the tutorials.   Today I Case'd Ardyth's card - using Post It notes to make a stencil.   Ardyth provided a template to use to cut out the shapes - I used it but my printer made it a bit bigger so my card looks quite different from hers. 

I cut out my stencils from Post It and then used two different greens, reds and blues of Catherine Pooler inks.   I die cut 2 Post It note with the side of a rectangle scalloped die - it had holes so loved how the two toned ornaments turned out.   I added sparkle pen to the bottom half of ornament.  Looks really sparkly in real life.   Used a gold pen to make the toppers.  The sentiment is from an older Hero Arts set called Color Layering Wreath.  Matted the panel onto some glittery gold card stock before adding to my top folding white card base. 

Spend an hour or so watching some more of the tutorials and other crafty videos.   Lots of ideas in my head for projects.   Should have a bit more time over the weekend, now all the house work is done!

Tuesday, 27 May 2025

Stress Free Cardmaking Summit - Inspired by Erin Reed

 Still working my way through the presentation from the summit and over the weekend I found a little time to play.  This time inspiration came from the beautiful Joyful card fold that Erin Reed made.  She even included some love digital papers to download.   However, I did not use them this time around.  While I was re-organising my craft room, I came across a box of patterned paper that had been in a corner that wasn't too accessible - now right in view.  One of the paper pads was from Rosie's Studio and called "East meets West"  and that was what I used.


This is it standing up.  I just love the combo of red, black and white.  The paper pad was a NZA5 size and there were 4 pages of each design.   

Here is it opened.   I mostly used just the one design, placing it in different orientations.  The central panel was the amazing bird design and the right hand side is where I'll put my personal message. The outside front panel has my sentiment.  Ran with the red and black theme by die cutting the Altenew die from red and it's shadow layer in black.  Added a little Altenew sub-sentiment to finish.  

This is a really awesome fun fold and was so pleased how it turned out.  

Wednesday, 21 May 2025

Stress Free Cardmaking Summit - inspired by Justine

 Slowly making my way through the Stress Free Cardmaking Summit presentations... and over the weekend I watched Justine Hovey's presentation and her three bonus presentations.   She did great fun folds... including a Pop and Twist card and a Side Step card.  Both of these inspired me to try these fun folds.


First pic showing the card closed and the second pic opened up showing the 4 panels. For my card base I used some kraft coloured cardstock and for my patterned paper I used a Couture Creations pad (circa 2014) called Hearts Ease. One of the pages had 6 panels which I chose 4 to use. I put a white panel on the inside and added a strip of PP.   Used some vellum for the belly band and add some scraps of the patterned paper and a couple of fussy cut elements as well.   Sentiment is from Altenew Classic Greetings stamp and die set.    Justine was very good at describing how to make the pop and twist element making it easy to follow. 


I chose some very bright pink for my base to highlight the Pinkfresh Studio washi and die cuts (Artistic Dahlias)  I added the washi to some 300gms white card and die cut all of the elements at once.  Justine's instructions were easy to follow.  I stamped the sentiment from the matching stamp set and die cut it to add to the front of the card,   Here are a couple more pics from different angles. 


Just love the bright colours on this one.   Big thanks to Justine for such fun projects.... and still one more to try out.  


Friday, 16 May 2025

Stress Free Cardmaking Summit - Inspired by Ardyth

I decided it's worth the extra cost to get the VIP option for the May Stress Free Cardmaking Summit... and I've already watch a number of the sessions.  

I got inspired by Ardyth Percy-Robb - whose 5 items for her fun fold cards, included stencils.   I did an A2 Z-fold card.  Ardyth gave lots of options for sizes and way to do a Z-fold card. 

Here's what I came up with...


I found this unnamed stencil.  Think it might be one I got from a NZ based crafter.... I used different colours of ink to add my colour and then used some small stamps from an older Catherine Pooler/CASual Friday stamp set to add the black flower elements.  I added some home made silver dots for the centres. Sentiment is a die cut from Scrapbook.com "Let's Celebrate"  

Hoping to get some more play time this weekend as Hubby and son are off to do some go-carting on Sunday... so I get a sleep in and some playtime!  


Sunday, 29 September 2024

Christmas inspired by Stress Free Cardmaking Summit

 It's been a busy weekend.  Had a lovely lunch with my friend, Yvonne, and all her family to celebrate her 70th on Saturday.  Got home around 4pm and hit the computer to watch some of the presentations from the Stress Free Cardmaking Summit.   OMG - what amazing presenters and their projects.... Quick, easy and stress free!  I started with Ardyth Percy-Robb and her stenciling ideas.   

This one was inspired by Ardyth's idea of masking off part of a stencil to use it differently.   I took a Tim Holtz stencil (Festive) and masked off one of the Holly Leaves.  I used Distress Oxide inks to add the colour and added some red Nuvo Drops.  To keep it CAS I just added a sentiment.  It's a Woodblock stamp from Paper Inspirations (circa 2005) called Favorite Things Calligraphy - stamped in Altenew Charcoal Suit grey ink.  To give the look of matting, I did a faux matting by masking off the edges and using a Copic marker. 

My next card utilised the ink left on the stencil - I sprayed with water and used it to "print" a panel.  I then took inspiration from Julia - used an embossing folder. 

Once I dried the background (you can just make out the stenciled pattern) I ran it through my machine with a Couture Creations folder (Joyful Wishes).   It's only a 2D folder so rather than inking up the folder, I swiped some Mowed Lawn Distress Oxide across it.  Was really happy with the results.  To finish I took a Couture Creations Ringing Bells stamp that I had cut with my Scan'n'Cut.  I used some Tri-blends to colour with a touch of silver pen.  I also added some Spectrum Noir Sparkle pen to it as well.   Mounted on a silver glitter circle. 

And my final card was inspired by Joy's alcohol ink backgrounds.   Must say I can't even remember when I last used my alcohol inks!  I used the matt side of some photo paper like Joy used, and used a half a large sheet to get two backgrounds.  

When with the green theme again... used three different green inks, lots of blending solution and added some gold foil. I trimmed it and added to a card base.  I used a Concord & 9th sentiment from Big on Christmas stamp and die set.   Black stamping and clear embossing on vellum before doing the die cut.  The snowflakes are from a magazine freebie set cut with white paper and added some Nuvo iridescent flat sequins. 

And I still have a panel of green ink to use 

Big thanks if you made it this far.  I appreciate your visit.   


Friday, 6 October 2023

Stress Free Cardmaking Summit -Part 2

 Hi there... I'm back to share three more cards I've made this week inspired by more of the presentations I've watched from the Stress Free Cardmaking Summit...  so a warning that this post is long!

First up I was inspired by Mary Polanco - I actually made two for this one... but simply did not like the first one.... The blues were too green and I found I don't have a medium sized snowflake stamp!  I tried to make on with some fun foam and a die... but my fun foam was too thin and the die too intricate - so that panel ended up in the bin... so back to the drawing board - or should I say the painting board!

For this one, I took some Fabrico Mixed Media paper and masked around the edge.  My first attempt used Catherine Pooler inks to paint, this time I used some Distress Oxides in blues... one little corner seeped under the mask - but that was ok.   I took the snowflake die (a freebie from a magazine) and some silvery shimmery paper and die cut three snowflakes.  I used Altenew's Charcoal Suit grey ink to stamp the Waffle Flower sentiment.   Added some Stampendous Dot Sparkles in silver.  They really are iridescent.  This time my heart was singing.  It was just how I wanted it to look!

Card two was inspired by the presentation by Jess Crafts - her sessions was all about take 12x12 papers and cut them up to make 6 cards.   Well I don't have many Christmas 12x12 papers but do have some 6x6 ones.  So I did just one card - but have enough stripes for at least one more card.  The papers she used had some pages of toppers - I found a topper in my stash... not sure where it came from but I put it to use. 

A nice and quick card to put together as I had cut up my 6x6 at the time I watched the presentation and put it together this afternoon.  Added some Wink of Stella shimmer pen to his hat and finished with some Altenew red enamel dots.  This design will be used a few more times I'm sure - I think I'll make some topper with my stamps, stencils etc. 

And the final one for today - inspired Crafty Al.  Her presentation was all about using Ephemera to make a quick card - using a lovely design.  I found a pack of Christmas ephemera by Kaisercraft - got it when I bought a kit from Uniquely Creative in Australia 2 years ago.  I hadn't even opened it!  And I have two more packs of Nature and Floral ephemera so will be trying out the design and the stepped up versions that Crafty Al provided as an add on to her presentation.   Today's card was the basic design,


The main design element was the soft ink blending behind the ephemera and sentiment.  I used Altenew Firefly green ink for my glow behind the cute Nutcracker which I added with dimensional tape.  Al used small printed sentiments, I decided to stamp a sentiment directly to the card panel.   I used a gold shimmer pen to add some splatter.  

Thanks for stopping by and I appreciate if you made it all the way through.   It's World Card Making Day tomorrow - my time so for me - it's like WCMD weekend as I love trying out some of the challenge in the US - which will be my Sunday!


Sunday, 1 October 2023

Stress Free Cardmaking Summit - Part 1

I decided to take part in the Stress Free Cardmaking Summit - I bought the Ultimate package as I knew I'd never get to watch all the presentations over the three days - this way I can go back again and again. 

On Saturday (my time) I watched two presentations - the first by Sharon Curtis.  - She showed how to make a Christmas wreath card.   


 I didn't have any of the same products so shopped my stash.   To make my wreath I used two circle dies (one Spellbinders one and one Impress one) to make the wreath frame.  I took dies from a number of companies and mixed and match to come up with the poinsettia flowers and leaves.  Sharon used a sentiment die, but I went with a stamped sentiment.   This one is from Waffle Flower Designs.  Added some of the little pink dots from a Sizzix die set as the flower centres and for embellishments.   Added the white pen stitching and some ink spatter.   It was a fun card to make and I can see myself using this idea in the future. 

The second presentation I watch was from Ardyth.  It was about easy "gel prints" with out a gel plate.  Using some shimmer powders on a smooth surface to dip you card into.   I used some Pixie powders and Nuvo shimmer powders.  

 These where the first ones done... 

Ardyth used a stencil to "stamp" with some paint made with the shimmer powders.  I tried mixing a couple of powders to get a darker blue - but it went way too dark and I really thought I'd messed it up.   But I preserved and from one sheet got 4 panels and from two of them I made these three cards. 


Note to self:  Don't use a fine die for this technique!   The backgrounds turned out a bit more grungy than I wanted but in the end was quite pleased with the outcome.  And there are still 8 panels to use!

Today I've watched a few more presentations and have lots of ideas to try out.   The summit will keep me going for quite some time trying out the wonderful techniques and ideas.  

Thanks for stopping by.   Hope you had a crafty weekend.