Showing posts with label Waffle Flower. Show all posts

Saturday, 30 August 2025

Play date - crafting with a friend.

 I've had the most awesome day... My friend, Suna, came to visit today.   This year has been very busy for both of us, and we haven't meet up since Oct last year!!!!  So this Saturday was the day - we both were free and Suna drove the 25kms from her place to mine.   She arrived around 11.00am and left around 3.30ish.   Lots of chatting, crafting and had a lovely lunch - we were able to sit outside on the deck before the weather pack up and the rain started.  


The last picture is of Suna's drawing.  She had blended some blue ink onto her card and then hand drew the gorgeous flower.    Isn't she so talented.  

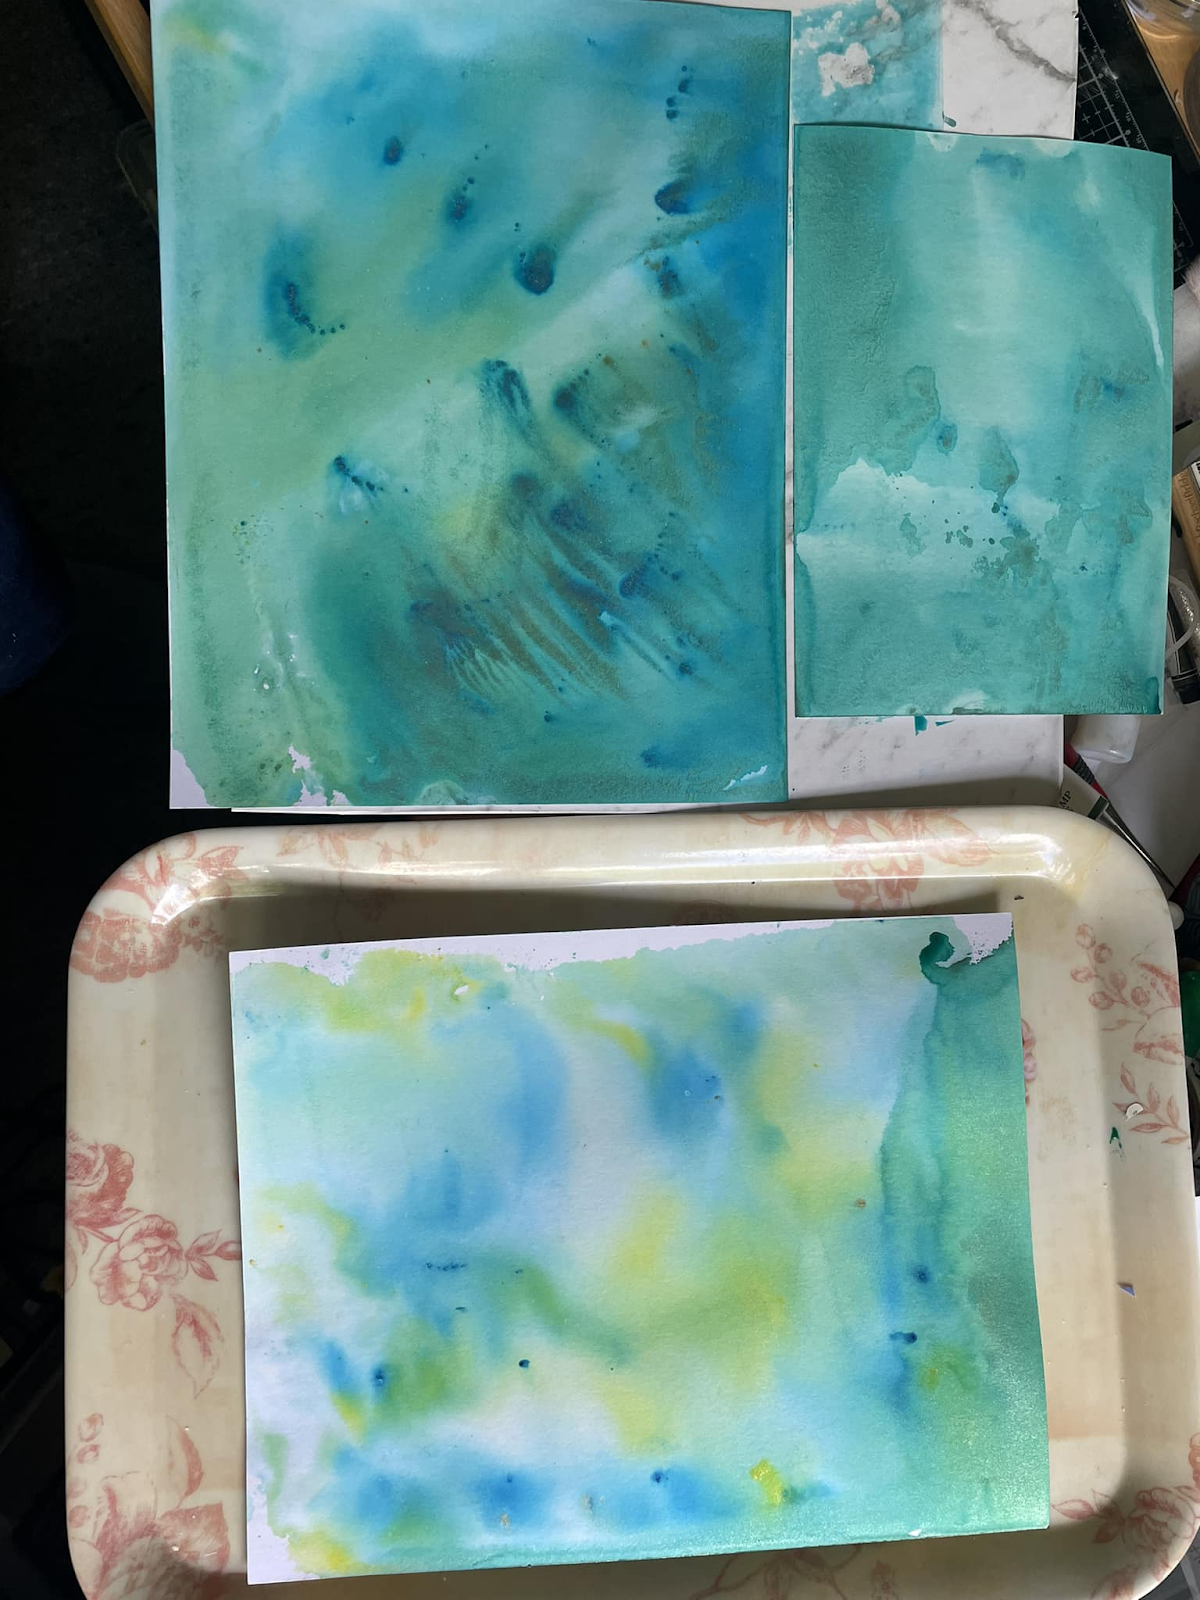
Suna got three backgrounds done -


Her hand-drawn flower, a new stencil I had gifted her and an older stencil of hers.  Just love what she did with the middle one... such interesting colours. 

I managed two cards.


This one used the Papertrey Ink stencil - In the Meadow - this time with more purple inks.  I cut the panel with a Pinkfresh Die- Folk Edge Rectangle.   Added a big two-tone purple die sentiment with a vellum shadow layer.   Added some iridescent dots for embellishment. 

My second card used a Waffle Flower die and stencil set I've had for about a month now, but hadn't opened.  


I made a little 4.25" square card for this one.   I die cut all the parts of the die and then used the stencil to add the colour.  I die cut all the extra flowers and berries and layered them over the first die cut.  Spritzed it liberally with some Frost Shimmer Spray. I took some Tim Holtz Distress Spritz Fossilised Amber and splattered it over the base before adding the die cut.   Sentiment is from Waffle Flower - Star Snowflake stamp set. 

As this was the first outing for this die and stencil set, I'm adding to the NBUS challenge for August. 


Really enjoyed crafting with someone who understands what card making is all about!  


Friday, 29 August 2025

Feel better soon and a Christmas card

 Been a very busy week at work and as we had been away last weekend... not much crafting done this week.   Today I'm sharing a scrappy Christmas card and a Feel better soon card I made. 

First up the feel better card....

Another card of encouragement for my SIL who has just had her second round of chemo.

I recently purchased a gorgeous layering stencil from Papertrey Ink- In The Meadow - which I paired with a Waffle Flower Postage collage die and masking stencil.  I used Altenew purples/pinks  and greens inks with some soft blue to make background.  I used a sentiment from my stash - from Altenew Build a Flower  Grand Carnation stamp and die set.  

And my Scrappy Christmas card 

The patterned paper stripe was left over from a previous card.  Matted it onto a white panel and added to my card base.  The bells (Couture Creations) were already stamped and in a baggie with other Christmas bits and pieces.  I just added some colour with my Tri-blends from Spectrum Noir.   The circle die was in the bits pile, already embossed with Altenew's Organic Linen 3D folder. The little banner was already cut from a freebie from Natasha Foote.  I'd printed a few and cut with my Scan'n'Cut.  All I did for this one, was to use my dotty die to cut some dark red glitter card to make the embellishments.   

Looking forward to tomorrow as my crafty friend, Suna, is coming for a play date!   We haven't got together for a long time.... and this year I'm away for the craft fair we usually go to.   We finally found a Saturday we were both free and she is coming over.   I've been saving up ideas to do while she is here!

Hope you all get some crafty time this weekend.  

Sunday, 20 October 2024

More new stuff fun....

 Over the weekend, I've managed to get a couple more cards made with my new stuff from last weekend.  

First this card using one of the panel's I made last Sunday.  

This used the Waffle Flower Duo Layering Poinsettia stencil.  Using some Berrylicous ink from Altenew together with some Lunar Paste - Silver Lining.   I cut the panel into two pieces and stamped the sentiment from Darkroom Door - stitched Christmas.  I added the panels with some 3D foam.  I wanted to add some Poinsettia and went through my stamps and decided on this bouquet on Altenew Holiday Flower.  I used the Berrylicous ink to blend on some card and stamped the flower.  I fussy cut the red flowers.  I used some of the Lunar Paste blended onto a scrap of card and once it dried, fussy cut the whole bouquet and layered the red flowers on top.  Added a dote of gold Kindyglitz for the flower centres.   Really happy how the card turned out.  

Card two is also a Christmas one - this time using a Woodware stamp. 

The stamp set is called Printable Bauble Circles - designed by Jane Gill.  It has the circles, toppers and snowflakes.   I started by making my panel background.  I spritzed a little Distress Spritz in Peacock Feathers and Fossilised Amber.  Blended some Peacock Feathers DI around the edge.  I stamped the snowflakes in Distress Ink Chipped Sapphire.  The three baubles were made by spritzing Peacock Feather Spritz for the big blue one. Stamped the big circle and added the sentiment from Gina K's Holiday Tapestry set.  Splattered with some gold Lunar paste watered down.  The medium one used some Distress ink - Peeled Paint and spritzed with Sparkle spray and stamped the snowflakes in the Peeled Paint.  And the little on was Forest Moss Distress Ink with the sparkle spray and added the snowflakes in the DI.    Added a little Peacock Feathers ink around each of the baubles and added splatters on them all. The biggest bauble was added with some 3D tape and the other two were glued directly on the panel.  Added the topper and ruled a line for the string.  There is heaps of sparkle in real life.  

Adding this to the challenge at Darnell's NBUS 

I still a couple of more stamps, dies and embossing folders to use. Next weekend is a long weekend for us so an extra days crafting! 


Friday, 31 May 2024

Shades of Green

It's the end of the month so time for our final post for Die Cut Divas.  Our theme this month has been monochromatic.  And our lovely sponsor is 


 My card today is in shades of Green

I used a piece of green patterned paper, not sure where it came from, to cut with two of the Waffle Flower Deckled Rectangle dies to make the three windows.  The background piece is some green watercolour paper that I made ages ago!  I finished by adding some black die cut with dies from Altenew's Branches and Berries set.   The sentiment is from Altenew's Birthday Builder set. 

Wednesday, 15 November 2023

Craft Roulette #189

Recently my friend Suna started following Craft Roulette and I've seen my friend Arlene entering... so over the weekend I watched Episode #189 and today I made a quick card.   I am too late to submit it to the challenge, but still sharing it as I really loved what I made. 

Cathy Zeilske was the guest and it was her card that inspired me.  The wheel spun the following 

Project - Guest's choice - Cathy chose A2 for the base

Colour - Forest colours

Element - starting with "H" 

Random - Postage stamp or mark.

Here's what I came up with, inspired by Cathy's use of the Waffle Flower's Postage Collage Die


 I have used an A2 card base -top folding, the colours of my 49th & Market rub-ons are greens and browns of the forest, the little hearts and the hugs postmark and used the Postage Collage die and the postmarks are the random element.   

I added the rub-on first to white card and the die cut it.   Love this arty rub-ons.  I stamped the sending hugs, postal lines and the little hearts from the Waffle Flower Postage Collage stamp set.   I added the die cut panel with dimensional tape. Love the look of white on white. 

Entering this into the Happy Little Stampers - Anything Goes with Die cuts challenge


Friday, 6 October 2023

Stress Free Cardmaking Summit -Part 2

 Hi there... I'm back to share three more cards I've made this week inspired by more of the presentations I've watched from the Stress Free Cardmaking Summit...  so a warning that this post is long!

First up I was inspired by Mary Polanco - I actually made two for this one... but simply did not like the first one.... The blues were too green and I found I don't have a medium sized snowflake stamp!  I tried to make on with some fun foam and a die... but my fun foam was too thin and the die too intricate - so that panel ended up in the bin... so back to the drawing board - or should I say the painting board!

For this one, I took some Fabrico Mixed Media paper and masked around the edge.  My first attempt used Catherine Pooler inks to paint, this time I used some Distress Oxides in blues... one little corner seeped under the mask - but that was ok.   I took the snowflake die (a freebie from a magazine) and some silvery shimmery paper and die cut three snowflakes.  I used Altenew's Charcoal Suit grey ink to stamp the Waffle Flower sentiment.   Added some Stampendous Dot Sparkles in silver.  They really are iridescent.  This time my heart was singing.  It was just how I wanted it to look!

Card two was inspired by the presentation by Jess Crafts - her sessions was all about take 12x12 papers and cut them up to make 6 cards.   Well I don't have many Christmas 12x12 papers but do have some 6x6 ones.  So I did just one card - but have enough stripes for at least one more card.  The papers she used had some pages of toppers - I found a topper in my stash... not sure where it came from but I put it to use. 

A nice and quick card to put together as I had cut up my 6x6 at the time I watched the presentation and put it together this afternoon.  Added some Wink of Stella shimmer pen to his hat and finished with some Altenew red enamel dots.  This design will be used a few more times I'm sure - I think I'll make some topper with my stamps, stencils etc. 

And the final one for today - inspired Crafty Al.  Her presentation was all about using Ephemera to make a quick card - using a lovely design.  I found a pack of Christmas ephemera by Kaisercraft - got it when I bought a kit from Uniquely Creative in Australia 2 years ago.  I hadn't even opened it!  And I have two more packs of Nature and Floral ephemera so will be trying out the design and the stepped up versions that Crafty Al provided as an add on to her presentation.   Today's card was the basic design,


The main design element was the soft ink blending behind the ephemera and sentiment.  I used Altenew Firefly green ink for my glow behind the cute Nutcracker which I added with dimensional tape.  Al used small printed sentiments, I decided to stamp a sentiment directly to the card panel.   I used a gold shimmer pen to add some splatter.  

Thanks for stopping by and I appreciate if you made it all the way through.   It's World Card Making Day tomorrow - my time so for me - it's like WCMD weekend as I love trying out some of the challenge in the US - which will be my Sunday!


Sunday, 1 October 2023

Stress Free Cardmaking Summit - Part 1

I decided to take part in the Stress Free Cardmaking Summit - I bought the Ultimate package as I knew I'd never get to watch all the presentations over the three days - this way I can go back again and again. 

On Saturday (my time) I watched two presentations - the first by Sharon Curtis.  - She showed how to make a Christmas wreath card.   


 I didn't have any of the same products so shopped my stash.   To make my wreath I used two circle dies (one Spellbinders one and one Impress one) to make the wreath frame.  I took dies from a number of companies and mixed and match to come up with the poinsettia flowers and leaves.  Sharon used a sentiment die, but I went with a stamped sentiment.   This one is from Waffle Flower Designs.  Added some of the little pink dots from a Sizzix die set as the flower centres and for embellishments.   Added the white pen stitching and some ink spatter.   It was a fun card to make and I can see myself using this idea in the future. 

The second presentation I watch was from Ardyth.  It was about easy "gel prints" with out a gel plate.  Using some shimmer powders on a smooth surface to dip you card into.   I used some Pixie powders and Nuvo shimmer powders.  

 These where the first ones done... 

Ardyth used a stencil to "stamp" with some paint made with the shimmer powders.  I tried mixing a couple of powders to get a darker blue - but it went way too dark and I really thought I'd messed it up.   But I preserved and from one sheet got 4 panels and from two of them I made these three cards. 


Note to self:  Don't use a fine die for this technique!   The backgrounds turned out a bit more grungy than I wanted but in the end was quite pleased with the outcome.  And there are still 8 panels to use!

Today I've watched a few more presentations and have lots of ideas to try out.   The summit will keep me going for quite some time trying out the wonderful techniques and ideas.  

Thanks for stopping by.   Hope you had a crafty weekend.  


Wednesday, 20 September 2023

Playing with a Gelli plate...

 A couple of weekends ago I pulled out my Gelli plate and had a play.   I had been watching some You Tube videos  - This one from Ardyth and this one from Natasha - both using inks on the gelli plate.  I did about 10 pieces and today I have two cards to share that I've made so far both using Natasha's water drops technique.   

First card: 


I used some Catherine Pooler Aquatini and Tiki Torch inks.  Still getting used to how much water to drop onto the plate. I added some white ink spray splats and some dark gray splats.  I used Gina K Master Layouts 2 & 3 to make my layers and the circles.  The background layer used Ardyth's blending trick using some Catherine Pooler Lime Rickey.   The sentiment is from Gina K's It's all you mini stamp set. 

Second card:

Another blended background using water drops.  This time I used two different blues from Catherine Pooler on my Gelli plate- one lighter and one darker.  I was also inspired by Natasha's video here   She added lots of little stamps in gold embossing  and cut into postage stamps.  I cut the panel into two and then took a lot of little stamps from a freebie stamp set and used some Rose Gold powder.  I then cut the Waffle Flower Postage Stamp die four times - twice in white card and then out of each of the dark and light blue paper.   I then fussy cut the centres out of the blue papers and glued to the white die cut which I had cut apart.  I then added the four stamps (two light and two dark) onto the panel with 3D tape.  The sentiment is from Altenew - Birthday Builder stamp set. 

I've still got lots of papers to use.  One background has been worked on... but still waiting to decide how to use it. 

Thanks for stopping by.