Showing posts with label Inspired by Natasha. Show all posts

Thursday, 24 July 2025

Sending lots of Love.

 My sister-in-law is going through a horrid time health-wise at the moment.   Not good news for her... so I made her a card to let her know we are thinking of her and sending her prayers. 

This card was inspired by a You Tube video from Natasha Foote - I masked off the panel and used some Distress Oxide inks with a torn edge scrap to make the blending.  Once the ink dried, I added some glue (Tombow Mono Multi) - Natasha used a Zig glue pen, but of course, I couldn't find mine till after the I finsihed the card.  I let the glue go tacky and then add some silver foil.  You just rub the foil over the glue - works a charm!  I stamped the Hero Arts Poppy stamp on the card and then onto some white scrap.  I clear embossed both stampings.  Used the Distress Oxide colours to add colour to the second stamping and fussy cut the poppy flower and the leaves and added them over the other stamped image.  Added some black dots and some foiled dots on the flower.   I unfortunately dropped my ink pad and got a splotch on my panel so had to cut it down a bit.   But it turned out ok.   Added as stamped sentiment. 

Monday, 2 June 2025

Easy Zentangles

The challenge at my local swap group for May was Easy Zentangles - as seen on this video from Natasha Foote - a New Zealand crafter.  My card basically CASE'd Natasha's card.   I did used different colours but the basic design was very similar. 

I drew my squares and then added the lines and made the "stones"  - at least that's what the looked like to me!  I used Spectrum Noir Tri-blends to colour in and backed onto some purple card and then onto my white card base.  My sentiment is from Altenew. I made stripe of the Zentangle for the envelope.   

This card had quite the journey to get to it's recipient -  Maxine - who lives about 3 hours south of me.  I posted it off early as I knew is was away for a couple of weeks on holiday... so it should have been there for her when she got back.... but no, it made it's way down to Tokoroa but came back as I had so carefully posted it - without putting a stamp on it!!!!!  So duly stamped it made it's way back to Tokoroa - and she finally got it! 

This is a great card idea if you need something a bit different,

Tuesday, 12 November 2024

Inspired by Natasha's Stack and Whack technique.

 I was watching Natasha Foote's YouTube video (number 1099 - ) where she did a technique called Stack and Whack... taking three sheets of paper and tearing it in the same spot.  And then mixed the pieces up and make three cards.  

Here's the three cards I made:


I used some paper from a Rosie's Studio paper pack called Making Merry.  It's a few years old now and loved how I was able to use some of the papers.  I edged each piece with some Distress Oxide Vintage Photo.  I used some Vicki Bouton ephemera that got some ink blending on as well.   The last one I stamped the sentiment from a Rosie's Studio stamp set in Memento Toffee Crunch.   

Love the vintage look with these papers.  


Tuesday, 2 July 2024

Inspired by Natasha...two cards

I've been crafting a bit for the last few days.. The long weekend was busy and I even managed some cards after work yesterday.  I made two cards inspired by YouTube videos I watch by Natasha Foote...her channel is HERE

First one was inspired by this video.  It's about coloured silhouettes 


I loved Natasha's use of purple so I did the same...of course I LOVE purple!  I did some ink blending like Natasha did on her card using some Villainous Potion Oxide ink , but when I decided to use Spellbinders Labels 1 to cut my panel, I lost a bit of the blending so I added some soft blending around the edges using Wilted Violet Oxide and added some splatter as well.  The panel went onto a white Decorative Labels 1 die cut.   I stamped a birthday sentiment from Altenew's Birthday Builder set  using the same Oxide ink.  Natasha has a neat trick for making a false layer - using some tape to mask off a little strip of the card and blending on ink.   Love how it always gives a great look. 

And the second card is inspired by this video.  It's called White Ink Embossing Tips and Tricks.


I've done some similar type of embossing - this one I took some teal card and an Altenew 3D folder (Silk Art) and white ink...inking up the raised side of the embossing folder.  I ran it through my Platinum 6 machine - and reinked and did it another pass through the machine.    This adds the ink to the debossed side of the card.   Once the ink had dried I added some Altenew Aqualicious Fresh Dye inks to the raised areas.   Added a foiled sentiment - used Go Press and Foil Aqua foil with a Pinkfresh Studio Perfect Sentiments hot foil plate and die set.   A few teal gems finished the card. 

Now I'm over to see Natasha's video for today.  She posts about three times a week. 

Sunday, 17 March 2024

Craft Roulette #206

 I managed to see the Craft Roulette show live yesterday ... 


Great parameters this week!  So much so I made two cards!   

Here's the one I made yesterday and submitted to the challenge

I started by making my background.   I was inspired by a video from Natasha Foote  - making a background with just one ink.... mine was a very old Hero Arts ink called Cup o' Joe.  I've had it for around 10 years.., and it still going well.   I smooshed it onto my craft mat and spritzed with water and dipped my Fabriano 160gms paper.  Dried and dipped again.  Then using a couple of lids to stamp circles and used a Catherine Pooler stamp set - Birds of a Feather to added some script and the Love postage stamp. Vintage colours ✓   I added a lace border using a Hero Arts wooden stamp called Lace Flower Cluster embossed with Ranger Vintage Pearl powder. - Lace on the Base ✓  It wasn't showing up so well... I added some extra ink blending to make it stand out.  Gave the background a bit of an ombre look.  I die cut a leaf cluster from the Fabriano paper with a Pinkfresh Curvy Leaves die.  I added a little bit of ink blending to the leaves.  That is my plant element.✓  My sentiment is from a Lawn Fawn stamp and die set - Magic Messages.   Again cut with the Fabriano paper and ink blended.  
Finally added a some little Hero Arts gems hearts to the centre flowers of my lace - Heart element ✓

And today - I made this one...


I've been seeing lots of cards using a birdcage and flowers... so that was my inspiration.  My patterned paper gave me a vintage vibe.  It was an A4 size so I cut it down into a 4" x 5.25" panel.  ✓  Used the same lace stamp and embossed it with the Vintage Pearl powder, ✓I have a very old Tim Holtz/Sizzix Bigz Die of a birdcage and bird.  I used some of the Fabriano paper ( it's a lovely light cream colour) to cut the die.  Added some gold gems along the bottom of the birdcage and a little bow from a bit of burlap.  My little grey heart from Altenew is added just under the bow ✓  And finally my plant element is the flowers and leaves.✓  The big green leaves are the Pinkfresh Curvy Leaves and the flowers are from the Spellbinders Be Bold Blooms.   I had them cut from some water colour paper and used Jasart Voyager Metallic paints to colour them.   I added a pre-printed sentiment from Creative Expressions - Everyday Wordies.

It was such a fun card to make.  I did some earlier in the day and the hubby and I meet up with our son and Grace at our local pub - The British Isles Inn just up the hill from us.  The boys had their glass of Guiness - to celebrate St Patrick's Day!  The pub was quite full of people dressed in green.  And there was a bank singing Irish songs.  Grace loved the music.   Florence didn't come with them as she is - unwell... ear infection and chest infection - poor wee mite.

Happy St Patrick Day 

Wednesday, 20 September 2023

Playing with a Gelli plate...

 A couple of weekends ago I pulled out my Gelli plate and had a play.   I had been watching some You Tube videos  - This one from Ardyth and this one from Natasha - both using inks on the gelli plate.  I did about 10 pieces and today I have two cards to share that I've made so far both using Natasha's water drops technique.   

First card: 


I used some Catherine Pooler Aquatini and Tiki Torch inks.  Still getting used to how much water to drop onto the plate. I added some white ink spray splats and some dark gray splats.  I used Gina K Master Layouts 2 & 3 to make my layers and the circles.  The background layer used Ardyth's blending trick using some Catherine Pooler Lime Rickey.   The sentiment is from Gina K's It's all you mini stamp set. 

Second card:

Another blended background using water drops.  This time I used two different blues from Catherine Pooler on my Gelli plate- one lighter and one darker.  I was also inspired by Natasha's video here   She added lots of little stamps in gold embossing  and cut into postage stamps.  I cut the panel into two and then took a lot of little stamps from a freebie stamp set and used some Rose Gold powder.  I then cut the Waffle Flower Postage Stamp die four times - twice in white card and then out of each of the dark and light blue paper.   I then fussy cut the centres out of the blue papers and glued to the white die cut which I had cut apart.  I then added the four stamps (two light and two dark) onto the panel with 3D tape.  The sentiment is from Altenew - Birthday Builder stamp set. 

I've still got lots of papers to use.  One background has been worked on... but still waiting to decide how to use it. 

Thanks for stopping by. 

Monday, 29 May 2023

Grungy Flower cards

 The other day I saw a lovely video from Natasha Foote - using a solid stamps and making a mixed media background.  Natasha used soft colours on her background and it was her inspiration that got me started.  My first background turned out a bit grungy and darker as I used paints for my base layer.  

I started by using Distress paints  and added to my card base.  Then lots of layers...Background Builders.  There are three wooden stamps each about 1.5" wide by 6" long.  I used various Distress inks to added them.  Also used some bubble wrap to add some texture.  Splatted some white ink spray.  Once everything was dry I stamped a Darkroom Door stamp in black ink and clear embossed.   Finished with a pre-printed sentiment from Creative Expressions Wordies.  

I decided to try and make a lighter background, albeit still a bit grungy. 


For this one I used Distress inks - Old Paper, Worn Lipstick Broken China and Victorian Velvet to smoosh onto my media mat and did the background.  Again used the bubble wrap. And some Gathered Twigs DI through a couple of stencils from Stampgiraffe.com.  One is dots and the other splatters.    Used the Stampin' Up stamps as well.  This time another of the Darkroom Door stamps, this time inked with Altenew Mahogany Bark ink.    The sentiment is part of another of the stamps in the set.  Added some hessian thread to finish.  


Monday, 27 March 2023

Inspired by Natasha - using an embossing folder a bit differently.

Over the weekend I caught up on some video from Natasha.  Her You Tube channel can be found here.  Her video from Saturday was what inspired me.   It was about changing how you use your embossing folders.   

Here's my take on her card 

I used some dark kraft card and cut 1 inch squares.  I then added them to some lightweight card at an angle pattern.  I then added ran it through an embossing folder.  This one was Gina K Tapestry folder.  The different way to use a folder involved Altenew's Hello Beautiful craft your life kit - I embossed the folder with white card and fussy cut out the two flowers.  I then used Distress Oxides to colour the flowers before adding to the background panel.  The sentiment is from Altenew Build a Garden, Grand Carnation stamp and die.  I added some silver sequins to finish.  

I will be trying this technique again as I loved the idea of getting more out of the embossing folders.  

Monday, 6 February 2023

Change HOW you use your Supplies....

 On Saturday I was browsing through my You Tube subscriptions and saw Natasha Foote had her latest video up  - Change How you use your SUPPLIES...  It give an idea to use with some of those cover dies - to stretch the look. 

I decided straight away on what die would be awesome to use.  Interlocking cover die from Penny Black... and I was right!

I used a couple of Spellbinders dies (Petite Mini Circles and Petite Mini Scallops) to cut the hole in the coverplate and to make my masks for stamping and stenciling.  I masked off the circle and then used Altenew Coral Bliss and Rubellite inks to blend over the background.   Then I used the reverse mask to stamp the Woodware Floral Wonder stamp and the sentiment from Altenew - Sweetest Peas set.  I then added the cover die cut and the scalloped circle to the panel.  The stamping was coloured with my Spectrum Noir Tri-blends.  A few Pinkfresh Irridescent clear drops finished the card.   So happy with the results. 

Today is a public holiday here in New Zealand.   Celebrating Waitangi Day - it marks the anniversary of the initial signing – on 6 February 1840 – of the Treaty of Waitangi, which is regarded as the founding document of the nation.   It started of a wet sort of day, but now the sun is shining and it's very humid so I headed indoors to do some crafting.   More on that in another post - 

Happy crafting everyone.

Thursday, 26 January 2023

Optical Illusion background

 I was inspired by Natasha Foote's optical illusion background in her video the other day -  (see it Here) and decided I needed to try it out.   

My first sheet... I did my drawing a little small - ended up only doing part of a panel and die cut it out


I did change it a bit by colouring in some of the spaces rather then add more lines.  I die cut out a circle.  I used a Couture Creations scalloped die to layer behind my circle.   Added some sticker flowers around the edge.   I added a love die cut word.  It was an unbranded die I got for $2.99.  I cut it once from black card and one out of some foiled card.  I cut the heart part out and layered it over the black.   Added a little part of a pre-printed sentiment. 

For my second card I did my drawing larger and used a purple gel pen.  


I did some partial die cutting to make my panel a little narrower and matted with some black.  It looked a bit stark on the white card so added some texture with an Altenew 3D folder.  Added the panel and an ephemera butterfly. The sentiment is one from LDRS - It's one stamp with lots of sentiments that you then die cut.  

I'm entering this into the Wednesday challenge at Simon Says Stamp - anything goes...

Had lots of fun doing this technique. Nice to try something new.  

Wednesday, 14 September 2022

Happy Birthday card inspired by Natasha.

 Today I am sharing a card I made last night, inspired by a You Tube from Natasha Foote.   She used some rub ons on book paper.   I had got a new paper pack yesterday from my local 1-2-3 dollar store and it had some subtle wording on one page so I used that using the design Natasha did on her card.  (her video is HERE)


I used an older Spellbinders nestability square die set and cut three squares.  I matted them with some black card,  and then followed Natasha's design.  I added a black line around the edge and added some gold gems.   The sentiment is a new to me one from Memory Box.  It's a hot foil stamp and die.  Love it!

I'm entering this into Darnell's NBUS for September as it was the first outing for the sentiment. 


and The Flower Challenge - Add Sparkle.  My sentiment is gold foil.  


Monday, 1 August 2022

Use up those little white scraps with collage tissue.

I have been following a NZ crafter on You Tube.... Natasha Foote and a few weeks ago she posted a video using white scraps and collage tissue. (here)   I didn't think I had any collage tissue (found it later on) so decided I need to make my own.  I used white tissue paper and took a stamp set from Pink Paislee  that I've had for many years.  It has lots of different vintage looking stamps - typewriter, bees, music, postage stamps, etc.   I stamped the whole page all at once. 

And here's what I made. 


I took my little scraps and used some 1/4 inch masking paper around the edges.  I used some Nuvo powders to colour the background.  I trimmed bits of the tissue paper and used some Matte Medium to adhered to the scraps.  I added to a black base for contrast.  Added some sentiment stripes and that finished the card.  Definitely something a bit different.   I might try again with the Tim Holtz collage paper I found in my storage cupboard.  

Thanks for stopping by... I'm under the weather again... with a chesty cough that has cause a bout of asthma.  Spent the morning in bed and managed to get a cancellation appointment  at the doctors.  Got a new inhaler and a course of steroids. Hopefully it will improve quickly.    


Sunday, 1 May 2022

Paper Ribbon Technique - two ways

 Recently I saw a fabulous technique - a twisted paper ribbon technique - that the delightful Natasha Foote did.  You can watch her You Tube video HERE

It's a great way to use up scraps or like me - some of my hundreds of paper pads.

Here is the first panel I did.... I can tell you that the panel is NOT what Natasha showed.   I went like a bat out of hell... and when I finished it, realised I didn't follow the instructions correctly.  However I really like the look... more of a criss cross ribbon look.


I used papers from a pack I got from K-Mart that is Australian based paper.  I paired the paper with some green card.  I die cut and stamped a butterfly from Altenew's Dovetail Butterflies set.  The sentiment is from Altenew's Sentiment Strips 3.

And I remade the panel doing the ribbon twist correctly 


Kept this one CAS...by just adding a sentiment from Gina K stamped onto a white circle with a green layer.  

I like how I finished off the first one best... the black base really made the panel pop with the large butterfly on it.   

Thanks for stopping by today. 


Saturday, 9 April 2022

Floral Heart - using stencils and dies.

Second post today  - to see my designer card for Sweet Stampin' Challenge - go HERE.

 Hi there.  I'm here to share my entry for the latest challenge at The Flower Challenge. - Add a Heart

My card was inspired by two artist - Gina K and Natasha Foote.   Gina made a card using a heart made with scraps - I was inspired by her design and Natasha's inspiration was to use die cuts to add to a shape. Natasha's was  more of a floating die cuts - but I used a white card to add my die cuts to. 


I used three flowers I made using Altenew's Bitterroot flower stencil and die set.   It is a toughy to do, but once I got the idea of what parts of the stencil worked together, I used different combinations of the pink Altenew inks,  I drew around the heart die and worked out where to put the flowers and the leaves and glued them down.  I then ran the piece through my new Spellbinders Platinum 6 with the die.  It is from Gina K Master Layout 4.  Layered it onto the black heart.   The background was inspired from Gina's card.  I used my Scor-Pal to add the lines and then a grey Altenew ink to blend over.   I used a Honey Bee die cut sentiment.  To make it shiny I added some clear packing tape to black card and then cut the die.  Used white for the shadow layer.  The little sub-sentiment from the same Honey Bee set and was cut with Altenew's Featured Sentiments die set.   Love the little rounded corners.  

Had my Rapid Antigen Test this afternoon - Negative - so all good to go tomorrow afternoon.   I made a couple more cards yesterday and today which I've scheduled for Monday - so do come back for a look.

Take care.... see you all in two weeks!


Wednesday, 9 March 2022

Snowflakes are winter's butterflies...

 The latest challenge at Christmas Kickstart is Snowflakes are winter's butterflies... 


I decided to try out a technique I saw at over at Natasha Foote's You Tube - creating a delicate background frame DIY - here.  Natasha made her frame with leaves/branches.   I decided to do mine with snowflakes.   


I don't have many snowflake dies... here I used three dies - 2 from a set by Marianne and one a freebie from a magazine.  I used some dies from Lil' Inkers to make the outsides of my frame.   I need to get some A2 layering rectangle dies so I can get a finer frame but these turned out ok.  I layered the frame onto a blue base and then silver embossed the Kaisercraft sentiment,  I die cut the biggest snowflake from some silver card and added it to the frame.  A few silver baubles finished the card.    

I was pleasantly surprised how easy it was to do this frame.  l will be trying this DIY frame again. 

Thanks for stopping by.  I appreciate each and every visit.  


Tuesday, 1 February 2022

Woodgrain Background - Floral card

 Hi there.  It was a public holiday yesterday here in Auckland for Auckland Anniversary Day.  It was hot and breezy so I spend some time in my craft room as it was nice and cool in there.  

About a month ago I watched a video by Natasha Foote on making woodgrain backgrounds (here) and have been meaning to to give it a go.  I did an order from Scrapbook.com as this is where Natasha gets lots of her products from - and got a Woodware floral stamp to try out.   They are very reasonably priced.


 I made my background by swiping some Distress ink cubes down my card.  I used Rusty Hinge, Weathered Wood and Gathered Twigs, leaving some white showing as well.  I stamped the Woodware stamp (Floral Wonder) onto the wood panel and again onto white card.  I used Zig markers to colour the leaves directly on the panel and then fussy cut around the flowers after colouring with inks and Zigs.  I used my Spectrum Noir glitter pen to move the colour around so the flowers have a great shimmer to them. The bud was stuck directly to the panel and the other flowers added with some 3D tape.  Love this large floral stamp and boy are they reasonably price via Scrapbook.com.  Took a sentiment from an Altenew set and drew a frame around it before trimming it out.  It's been awhile since I did a background like this. 

Omicron is now out and about in the community but still reasonably low numbers...for now!  I'm taking advantage of the ability to work from home - 3 days in the office and 2 at home...depending on our roster for manning the Front of House - where people can come in and get their tax queries answered.  Some weeks I have to work 4 or 5 days in the office, others I can do the 3/2 ratio.  Today is an at home day... currently taking a break.   Take care out there people. 

Thursday, 27 January 2022

The Gentleman Crafter - Sketch #3 - inspired by Natasha

 Today my card was inspired by a video from Natasha Foote (here) about using what was on your desk and the sketch from The Gentleman Crafter #3.


My desk is always messy.. that's me!  I have a big container of scraps and a couple of smaller containers of bits and bobs.  


So here's what I came up with using things already on my desk.  


I took an ink blended background for my panel.  It was one I wasn't so fussed on and just put to one side.    I looked through some my smaller scraps and found a few pieces that I thought went together.   I found the pink flowers in one of my little containers.  I'm not sure who they are by as I made them quite awhile ago.  I grabbed some green thread and made a little bundle to add behind the flowers.  The sentiment was one by Pink Fresh Studios that I had silver foiled and die cut.  I finished it and then decided that I needed something more on the background.  I took an older wooden stamp from a NZ company and added random bits of stamping on it.  Much better looking.


Thanks for stopping by.  Keep safe out there 

Thursday, 16 December 2021

WCC #331 Marsha's Special 3 - Week Challenge - Anything Goes

 It's time for a 3 Week special at Watercooler Wednesday  - Marsha is our hostess with an Anything Goes challenge. 


Today I'm sharing a card I made using with Altenew's Craft Your Live Project Kit - Hello Beautiful.

This kit has stamps, colouring stencils, dies and a 3D embossing folder.  Today I used the stamp, colouring stencil and dies.   Originally I was going to make this a one layer card... but got blending smudges so ended up die cutting the flower.  I used a doodle frame technique I saw on a video recently.  It really gives it a whimsical look.   I added some glossy accents to the flower centres. 

Come and join in the fun at  Watercooler Wednesday Challenge and check out the project from the other designers.  Then take our challenge and link up your project to the challenge post.    We'd love to have you join us.  You have until Monday 3rd January 2022 at 5 pm Mountain Standard Time (Tuesday at 12.00 noon NZ time ) to link up your project.


Sunday, 3 October 2021

World Cardmaking Day - Take 2

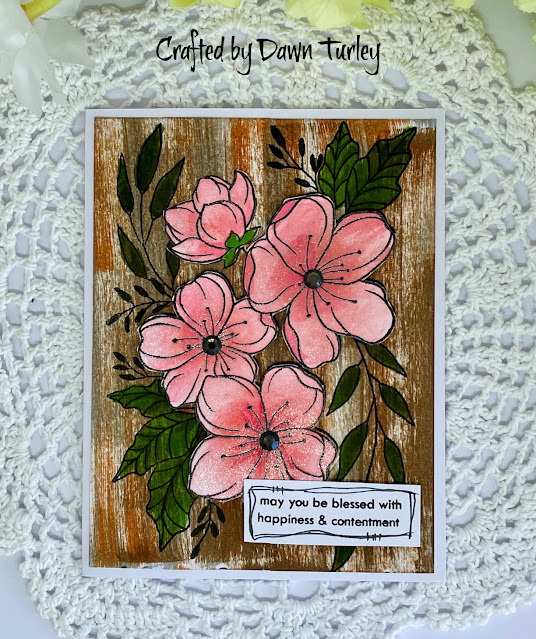
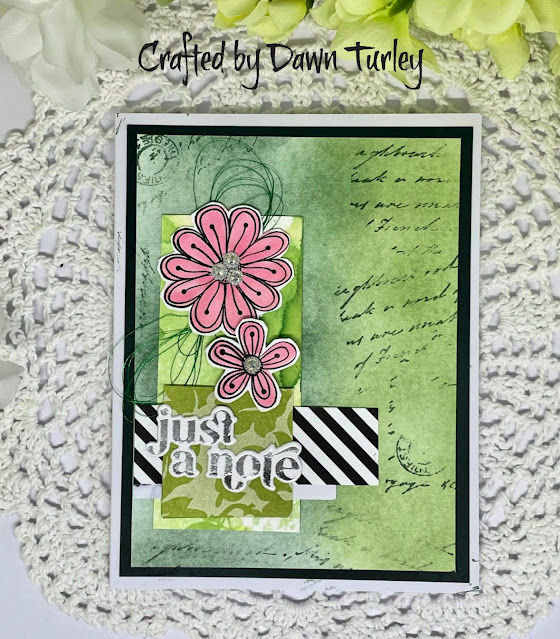
 Hi there.  I got to play again today.  It's so cool to just having a play - not for a design team challenge... but just for fun.   Once again today I made three cards but as one is for my Hubby's birthday on the 16th, I won't share till after the day.  

I also took some time to watch some videos for inspiration.  My first card is inspired by Laurel Beard - this video that shows lots of different ways to use your Embossing folders.   One of her techniques was double embossing followed by inking embossing.  

I took a pale aqua sheet of card and ran it through the Cuttlebug with an unknown brand flowers and leaves folder.  Next I ran it through again, this time with Altenew's 3D Decorative Flowers folder.  It made a beautiful panel.  But like Laurel, I stepped it up a bit by blending on some ink.  I used Catherine Pooler's Aquatini ink which made the raised 3D flowers shine a bit more.  I had blended over a little mat and I sprayed it with some water to wipe it off the mat and thought it was a shame to waste the ink so dipped the card into the watery ink.  Gave some extra texture to the card.  I stamped a sentiment from Clearly Besotted "Say Something" stamp set and die cut it with a flag label from a Gina K Master Layout set.   I added a few clear flat sequins.    

My second card was inspired by this video by Natasha Foote..where she give us ideas for using black card bases/panels.  I was inspired by a card she made using a white embossed plaid pattern. 

I white embossed a Concord and 9th Plaid stamp onto some black card.  I used some Master Layout dies by Gina K to cut the stamped panel and cut some black and white layers.  I stamped and clear embossed a rose from Altenew;s Botanical Garden set onto some watercolour paper.  I stamped and embossed twice.  I coloured both flowers with Zig Markers and fussy cut it.  I cut just parts of the flower and the leaf and used some 3D tape to pop them up. I added a little sentiment from Mama Elephant Occasions Labels stamped with Obsidan black ink and clear embossed before I trimmed it to have a white border.   I added a few black gems to finish.   

I'm happy to have had time to play this weekend.  Not being able to go out much has meant that the weekends have lots of time to craft.   And it might be that we will stay in Level 3 lockdown as the numbers are still lingering.  Plus there are two cases outside of Auckland, despite the borders around Auckland being closed.  Tomorrow we will find out.  I'm desperate to get to cuddle Gracie - it's been almost 7 weeks.  

Take care and have fun crafting. 

Saturday, 25 September 2021

Butterfly Floating Panel card.

 Happy Saturday... To quote Jennifer McGuire... "Today is a good day"

The sun was shining and we are in level 3 so a bit more freedom.  Hubby and I went crusin' this afternoon.  Recently he bought himself a 1977 MG soft top convertible . A super cute little red cruiser and we took a drive with the hood down... and had a beer and coffee - takeaway and contactless pickup before heading over the Harbour Bridge and back...

Prior to leaving I had been watching a video tutorial from a New Zealand stamper - Her name is Natasha and she lives in my home town of Dunedin.  Her channel on You Tube is HERE  Today her video was called Floating Panel cards.  So after we got back I headed to the craft room and came up with this card


I decided to use this fantastic Altenew Dovetail Butterfly.  I stamped it towards the bottome of my card panel.  I did a bit of googling to find out what colours this butterfly is.  I then took my Woodless Watercolour Pencils to add the colour.  I then did the cutting and fussy cutting around the butterfly and chose to make my panel turquoise to match the blues in the butterfly.  I used a TWC stencil and Altenew Turquoise ink to add some interest to the panel.  I used a sentiment from the stamp set - love that it has favourite spelt the way we use it here in NZ - I finished with a few little silver gems.