Showing posts with label Altenew stencils. Show all posts

Saturday, 30 May 2026

A Crafty Play Date

Yesterday I had the loveliest crafty play date with my talented friend Suna, who drove about 20 minutes to spend the day creating with me. We had around four and a half hours together, complete with homemade soup for lunch and plenty of crafty chatter. Suna spent her time ink blending, assembling Simon Says Stamp roses, and colouring a Gina K image with her Polychromos pencils—something she does beautifully. While she worked on her projects, I managed to make two and a half cards during our time together and finished the last one after she left.

Here’s a look at the three cards I created during our crafty afternoon.

For my first card, I pulled out a tulip die set I bought a while ago and followed the assembly method demonstrated by Christine Stokes on her YouTube channel here. Although the tulips are designed as a single layer, Christine cleverly cuts them twice and trims them to create a dimensional two-layer effect. I ink blended purples for the tulip petals and fresh greens for the stems and leaves, then added texture by spritzing everything with water droplets. To build the background, I die cut a panel using Gina K Master Layouts 2 and added patterned paper cut with the same die for a coordinated grounding layer. I finished it with an Altenew pitcher die cut and embossed from brown textured card and a foiled Spellbinders sentiment from my stash.


My second card was inspired by a video from Natasha Foote, where she used the Altenew Dancing Cosmos stencil on its own. The stencil coordinates with an embossing folder, and I’ve previously used it to colour the embossed design, so I enjoyed trying a different approach this time. After a slightly rocky start, I finally got the stenciling just right, and I was really happy with how it turned out. I trimmed the finished panel with a die, matted it with dark pink cardstock, and then created a decorative frame by fussy cutting the centre from a Kaisercraft scalloped rectangle. The final touch was a stamped and die cut sentiment from the Pinkfresh Studio Artistic Dahlia set.

My third card was inspired by a video from Natalie Bowers, where she used an embossing folder to “stamp” onto cardstock. I inked up the Couture Creations “Jane” embossing folder with Distress Oxide in Picked Raspberry, added touches of Wilted Violet here and there, spritzed it with water, and then pressed it onto cardstock. While the panel was still damp, I sprinkled on tiny bits of gold embossing powder and heat set them for a little extra sparkle. Natalie cut her panel into smaller pieces to make several cards, but I loved my background too much to chop it up, so I kept it whole. I trimmed and matted it with gold cardstock, then added a flower from the older Simon Says Stamp Fresh Daisies die with a vellum layer behind it. The sentiment came from a Spellbinders set that was included with a magazine a few years ago.

It was such a fun and refreshing day of crafting, conversation, and inspiration. With a long weekend here in New Zealand for King Charles’ Birthday, it feels even more special to have four days off work—and I couldn’t think of a better way to start it than with a crafty catch-up and three new cards to show for it.

Thursday, 8 January 2026

Hello 2026 with Altenew Challenge Live.

Yesterday was a really warm one... and in the morning I hid in my craft room to keep cool.. I was watching Jen from Altenew on her live challenge on Facebook.   She does a weekly challenge live and usually I have to watch on replay but as I'm still on my summer holidays, I got to watch live and I crafted while watching.   The challenge was to use "Hello" on your project. 

I immediately remembered a Circle Greetings - Hello die and pulled it out together with a stencil and a sentiment stamp set. 

I made a 4.25" square card. Cut a panel at 4 x 4 and die cut the circle greetings die from the middle.  I decided to use the Altenew Sweet Spring stencil and used only two tones of green - Volcano Lake and Emerald Crisp Dry inks. Added some bronze-gold watercolour splatter.  I die cut the "hello" part twice more, once in white and once in textured gold card.  The white one when underneath and the gold on top.  Added some extra card strips on the back to give some height.  Gold embossed the sentiment from Sentiment Strips 2.  Finished with some matching gold dots. 

I didn't quite get it finished during the live - mainly because I changed my mind about the stenciling behind.  First panel didn't float my boat so started again.  

Did end up down at the beach later in the day - lay under the shade of a Pohutakawa tree and enjoyed the warmth of the day.  

Friday, 13 June 2025

Mosaic Tiled card.

 I have been a bit unwell over the past week....a bad head cold that has ended up on my chest. I had last Friday and Monday off work, went back on Tuesday and only lasted till lunch time... and been coughing since.  Today I had the day off... my day before the birthday day off!  I had a hair appointment set for midday and then a visit to the optometrist in the afternoon, so decided easier to just take the day off!  My hair appointment got moved 3/4 hr earlier ( suited me better ) so did some shopping and had lunch at the Mall.  Got a new winter vest, a lovely pink sweater and picked up some old magazine freebies that my local stationery store was selling for between $2.99 to $6.99.  Also got my granddaughter's birthday present - ready for the 1st of July.   The trip to the optometrist was a bit expensive as I need to replace my frames and lenses - been 6 years with the same frames and prescription.   A couple of weeks till the new ones will be ready.  

Anyhoo.... Today I am sharing a card I made a while back to send to my friend Suna as part of our NZ swap group.  It was Suna's turn to set the challenge - and she chose "Mosaic card" - you can do this a number of different ways, I chose a tiled mosaic design.   Suna has let me know the card arrived....

I started with a stenciled panel I had made a few weeks ago.  It's an Altenew stencil - Floral Garden.  It was one of Altenew's earliest stencils - I took it and sliced it into 1 1/2" by 1" rectangles and added to a brown card panel.  I added some twine around the panel and then stamped the sentiment from Altenew's Our Friendship Blooms stamp set and cut it with a circle stitched die and a matting circle from a Gina K Master Layouts set.  Added some of my handmade dot embellishments.  

Suna let me know she has sent her card to me over a week ago but it still hasn't arrived.  She also sent me a birthday card that was post 2 days ago, that arrived today.  She lives about a 25k's from me (about a 20 min drive) but sometimes the post takes weeks to get between us.  

It's been a successful week for me with card challenges - won Jen Rzasa's challenge with my no black card (here) and Star on the top of the Tree at Christmas Kickstart Challenge with this one. 

Hopefully I'll get some time to play over the weekend... Going out to dinner tomorrow night with our friends and catching up with the Junior Turley's on Sunday lunch.    Take care all. 

Sunday, 18 May 2025

Altenew weekly challenge - "Acute card"

 Jen Rzasa hosts a weekly Live challenge on the Altenew YouTube channel.  This week's challenge is "Acute" - use triangle/s on your projects.  It can be triangle cut card, triangular stamps, visual triangles of embellishments and so on....  

I made two cards for the challenge. First one was using a focal stamped image using the gorgeous gift stamp that Altenew sent me... and an embossing folder...

The Mod Square embossing looks like triangles with the 3D layers.  (Hope it is acceptable for the challenge!)  I stamped the Charming Bouquet and used my Scan'n'Cut to cut it.  I used Altenew Alcohol Markers from the Pocketful of Sunshine and Green Fields set to colour.  The sentiment is from Altenew Classic Greeting. 

My second card was totally inspired by Jen's video where she did some stenciling to make a background and then trimmed it to add to a card with some embossed triangular shaped embossing.  I actually made 7 panels... Two using Rose Bouquet Stencil... because I messed up part of the first panel and two made by the use of the Floral Garden Stencil - which covers a 4 1/4" x 11" panel and it got cut into the two panel.  This is an older Altenew stencil which you do the first time and then rotate it 180 degrees and ink again.   I didn't use them today so have two lovely panels for future use. 


I inked up the Rose Bouquet stencil - the pink was ink on my blending brush, so not sure of the actual colour.  Used Bamboo and Olive for the leaves.  First go I didn't mask so ended up with some green in the pink and it looked terrible.  I managed salvage some of it... so this second version I did mask off the eaves while doing the flowers and the flowers when doing the leaves.   I then cut the panel down to a 3 1/2 inch square and then trimmed it in half to make my two triangles.   I added them to a 4 1/4 white panel which gave me the space in the middle.  I added a strip of gold card down the long side of each triangle and added a sentiment from Altenew Sentiment Strips 3.  Added my homemade shiny dots in a visual triangle of 3 on each triangle.   Really happy how it ended up.   Doing a square card made it easier. 

I've had a really productive weekend with lots of fun playing with my supplies.  

Wednesday, 30 April 2025

Beautiful Day - Hello Beautiful and a bonus birthday card

 It's the final day for our challenge at Die Cut Divas.   

FLOWERS

Our sponsor this month is Altenew. They will be giving our winner a $50 gift certificate to their online store. Thank you Altenew for this very generous gift.


I am a real Altenew fan.... and have A LOT of their stamps, dies and stencils.   And today I've used one of my earliest purchases.  - Beautiful Day stamp and die set.   I've had this one for over 9 years!  


I stamped the focal flower and then lots of leaves and branches.  I used Shades of Purple ink set and Freen Fields inks to add the stamp layers on the flower and leaves.  I used some watercolour pens and Copic markers to add colour to the smaller branches and berries.  I then die cut all the pieces.   I made a frame with Gina K Master Layout 18.  I added some soft brown inking with whatever ink was on my blending brush.  I layered all my elements and added a sentiment from Hello Beautiful stamp set.   Added some home made enamel dots made by adding clear packing tape to some purple card and die cutting with my dotty background die.  

I also made a bonus card - because Altenew are a FAVOURITE company for make floral cards... so much choice. 


This card was inspired by Natasha Foote in her video #1171.  I used Altenew Sweet Spring Stencil.  It's an older stencil - just two layers.  I chose to used teal colours.  Fresh Dye inks in Aqualicious and Teal Cave.  Something a little different.  I cut the panel with a Pinkfresh Studio die - Folk Art Rectangle and then used Hero Arts Arches die to cut out the centre panel and also the next size up to cut a white arch.  I used the Teal Cave ink to add colour to the matting layer.  I stamped a sentiment from Altenew's Just a Number stamp set.  Added some of the Teal Cave to a scrap of white card and cut out with my dotty background.   Added to the card and added Glossy Accents to make my own enamel dots.  Loving doing this at the moment. 


Our challenge is open till 9.00pm Pacific US time  - Just remember to make use of your die cutting machine to die cut/emboss.   

Saturday, 6 July 2024

Saturday Afternoon crafting.

 It's been a cold and wet Saturday afternoon here in Auckland.  So I tucked myself into the craft room and had a play!  Yesterday afternoon I had spend some time cutting out some Spellbinders Be Bold Flowers from some Francheville Ombre Blue card.  It's 176gms so perfect for layering flowers.  I made up a pile of them, despite keeping losing dies... all good by the end of the evening- they were all there.  So, this afternoon while hubby was out watching some local rugby I made a card. 


I made my background by taking a piece of patterned paper and used Altenew Dotted Starburst Debossing die to add some subtle texture.   I found a blue circle in my scrap pile and used Altenew's Sentiment Strips - after a bit of stamp surgery so I could stack the sentiment.  I smudged it a bit, so took the big ball of my stylus and some Altenew Galactic Stream Fresh Dye ink and made some dots.  Added to the BG and then added the flowers.   

I'm adding this card to AAA Birthday Challenge - Fabulous Flowers.   


And to The Flower Challenge


I also found a 5-1/2" x 8-1/2" panel that I had hot foiled Altenew Vibrant Florals onto with some black foil.   I decided that it would look good in the July Inspiration Challenge colours. 


So pulled out some ink pads so I could use the matching stencils to add the colour.  In the end I used - Coral Bliss, Coral Berry, Orange Cream, Misty Moor and Sweet Leaf inks.   Once I done the colouring, I cut the panel to make two cards. 


I added an encouraging sentiment.  It's from the Altenew set - Monstera and Quotes.  A few Altenew enamel dots finished. 

and the second one 

The sentiment this time is from Altenew - Classic Greetings set.  Again, finished with some enamel dots.  Just love that I got two cards from the one hot foil image.  


Off to make dinner and then watch the All Blacks versus England in rugby.  

And I've got another post scheduled for later this evening. 

Saturday, 6 May 2023

Stenciled Flowers

 Hi there.  Today I'm sharing a card made last weekend.   I was playing with an Altenew stencil set, it's matching die  and Altenew inks.  

The stencil and die set is called Flower Bunch.  I started by die cutting and then used the stencil to add the inks.   The flowers were done in Pastel Sunrise, Canyon Clay and Burnt Red with Moon Rock and Lava Rock for the centre.  The buds were done with Fresh Lemon and Honey Drizzle.  For the leaves I used Silver Sage, Jade and Eucalyptus.  Before adding the die cut to my panel, I used a stencil from Faith Pocock Designs with some orange ink on my blending brush.   I mostly did the stenciling in the bottom left and top right.   A simple sentiment finsihed the card. 

As I'm writing up this post, I am watching the King of England's coronation.  So much pomp and ceremony.   And what a piece of history in the making.    Currently the coach procession on the way to Westminster Abbey is under way.  It's fabulous seeing places I have visited in the past.  

Hope you are having a great weekend and get some crafting done. 

Wednesday, 29 June 2022

One Hot Foil plate - 3 cards

 Hi there from a cold wintery night here in NZ.   I recently got a new hot foil plate from Altenew called Vibrant Florals and it's co ordinating stencil.  It's a beauty  - quite large too.... so I pulled out the Go Press and Foil machine on Monday and some WRMK's Rose Gold Foil and put it through it's paces...I managed to make three cards -

I placed the Hot foil plate in the middle of a half sheet of 8.5" x 11" card - foiled and then used the stencil to colour.  I then cut the panel in half to get two panels 4.25" x 5"  


This panel had the larger amount of the foiling which I trimmed down and matted onto some black card.  I then took some blue card and die cut the hello from Altenew's All About You word die set.  I then add a sentiment strip from Sentiment Strips 3.  Finished with a few rose gold sequins.


The second one used the smaller portion of the foiling.  The one was trimmed slightly and matted onto blue card.   The sentiement used was from Altenew's Just a Number stamp set.   I then added lots of Navy blue ink splatters.

And of course, I could not waste the foil left over.  I have the Pinkfresh solid foil plate and heated it up and added the foil to some card. 


I trimmed the panel down and matted onto some off white card before adding to a white base.  I used a Spellbinders foiled sentiment die cut with a Spellbinders oval die.  Have to say it's very difficult to photograph foiled cards especially on a winter's afternoon.  

Thanks for visiting today.  


Saturday, 28 May 2022

Happy Anniversary

Friday next week my son and daughter-in-law will celebrate their first wedding anniversary.  So I made a card for them.   My card was inspired by one of the Day 4 techniques at Online Card Class - Spring Card Camp 2022.  Heather Hoffman has a embossed resist technique with a twist... using stencils to colour the card.   Such a cool look.

Here's my take on this technique.


I started by clear heating embossing an older Hero Arts background stamp.  I then used my new Altenew layering stencil - Flower Bunch layering stencil.  I used the colours as per the stencil info.   I cut with a Gina K Master Layout 2 die.  Decided the background looked a bit stark - so masked around the edge of the die cut and added some soft blue ink.  Really made the embossed butterfly stand out.   Added a white embossed on black sentiment from Sentiment Stripes #1   Layered the panel onto some black card then onto the white base.   Another fabulous technique from the classes.  

I'm entering this into NBUS challenge for May as this was the first time using this stencil.  


I'm now a few days behind in my homework.   Having to work last week put a stop on my crafting time - bummer!   And Thurs afternoon and Friday - my cough got worse.  Ended up heading to the respiratory doctor at my local GP.  Ended up with steroids and an inhaler and have to go back on Monday for a further check up. Today I only managed about half and hour in the craft room... 


Saturday, 9 April 2022

Floral Heart - using stencils and dies.

Second post today  - to see my designer card for Sweet Stampin' Challenge - go HERE.

 Hi there.  I'm here to share my entry for the latest challenge at The Flower Challenge. - Add a Heart

My card was inspired by two artist - Gina K and Natasha Foote.   Gina made a card using a heart made with scraps - I was inspired by her design and Natasha's inspiration was to use die cuts to add to a shape. Natasha's was  more of a floating die cuts - but I used a white card to add my die cuts to. 


I used three flowers I made using Altenew's Bitterroot flower stencil and die set.   It is a toughy to do, but once I got the idea of what parts of the stencil worked together, I used different combinations of the pink Altenew inks,  I drew around the heart die and worked out where to put the flowers and the leaves and glued them down.  I then ran the piece through my new Spellbinders Platinum 6 with the die.  It is from Gina K Master Layout 4.  Layered it onto the black heart.   The background was inspired from Gina's card.  I used my Scor-Pal to add the lines and then a grey Altenew ink to blend over.   I used a Honey Bee die cut sentiment.  To make it shiny I added some clear packing tape to black card and then cut the die.  Used white for the shadow layer.  The little sub-sentiment from the same Honey Bee set and was cut with Altenew's Featured Sentiments die set.   Love the little rounded corners.  

Had my Rapid Antigen Test this afternoon - Negative - so all good to go tomorrow afternoon.   I made a couple more cards yesterday and today which I've scheduled for Monday - so do come back for a look.

Take care.... see you all in two weeks!


Monday, 22 November 2021

Encouragement card.

Hi... I have an encouragement card to share.  Last week I got an order from Krafter's Cart and amongst the goodies was an Altenew Stencil - Sweet Spring Stencil.  It's a pretty two layering stencil. 


I masked off parts of the stencil and used different Altenew inks with my small blender brushes.  I used a Pink Fresh Studios Mini Slimline Essential dies to cut my layers before adding to a pale green card base.  I added a sentiment from the Hello Beautiful stamp set.  

I made this for one of my work colleagues who is returning to her home town at the end of the year.  Her partner has got a job down there so she managed to get a transfer.  She transferred up to Auckland three years ago when he got a job up here.  She is a lovely young lady and I will miss working with her.  

Thanks for visiting today.  Hope you had a great weekend.  I had a visit from our Princess on Saturday.  It was such fun to play with her.  She is quite the character now... 

Saturday, 18 September 2021

Turquoise Flowers.


I haven't played along with The Flower Challenge in a while but this month's challenge called to me.  

I chose to use a Layering Stencil from Altenew to make a mini slimline card.


This is the Hill Blossom stencil and I used three inks from the Deep Seas set... Turquoise, Tide Blue and Starlight.  I added some black in to the tiny centres and added some tiny silver gems.   I cut the flowers out with a Gina K Master Layouts 7 die.  I used the larger of the two mini slimline dies and then added the turquoise layer before adding to a 3.25" x 6.25" base.  The sentiment is from another Altenew set - Classic Beauty.

Tuesday, 18 May 2021

Let's Squash It #8 Let's Make some Space and Bring on the Bling!

 I'm back with a card I've made to enter the Let's Squash It Challenge.


The challenge is to use an embossing folder that leaves some space and to add bling.   I recently got an Altenew order and purchased the Simple Frame 3D embossing folder so used that as my inspiration. 

I embossed onto some white card and trimmed around the embossing.  I then took some Altenew Encanted Gold pigment ink and a dauber and added colour to the embossing.  It is really sparkly looking (hard to photograph).  I had the Hill Blossom stenciled panel sitting on my desk.  Orginally wasn't sure about the colour scheme (plus there was a little smudge of the yellow ink) but trimmed it down to fit in the space left by the centre of the frame and added some flicks of gold ink splatters.  Add a sentiment from Sentiment Stripes 2. To added some bling I used Nuvo drops in Copper Penny to the flower centres and the corners of the frame.  I made the card a little smaller at 5" x 41/8".

This morning I had to be at the Radiology Group at 8.00am to have an MRI on my shoulder.   Half an hour in the machine, lying still.  I close my eyes so I dont' get the closed in feeling if I'm looking up at the tube I'm in.  Luckily they have ear plugs for the noise and also give you headphones and put on whatever radio station you like to listen to.   Was pleased when it was over even though I felt a little dizzy when I first came out.   Hopefully this will let the specialist know why I'm still feeling pain in my left shoulder. 

Thanks for stopping by. 

Thursday, 6 May 2021

WWC 315 - Marsha's Challenge: All Things Feminine

 Hi there.  Time for another Watercooler Wednesday Challenge.  Marsha is our hostess with an All Things Feminine challenge 


My daughter's birthday is 6th May (today my time) and this is the card I sent her. 


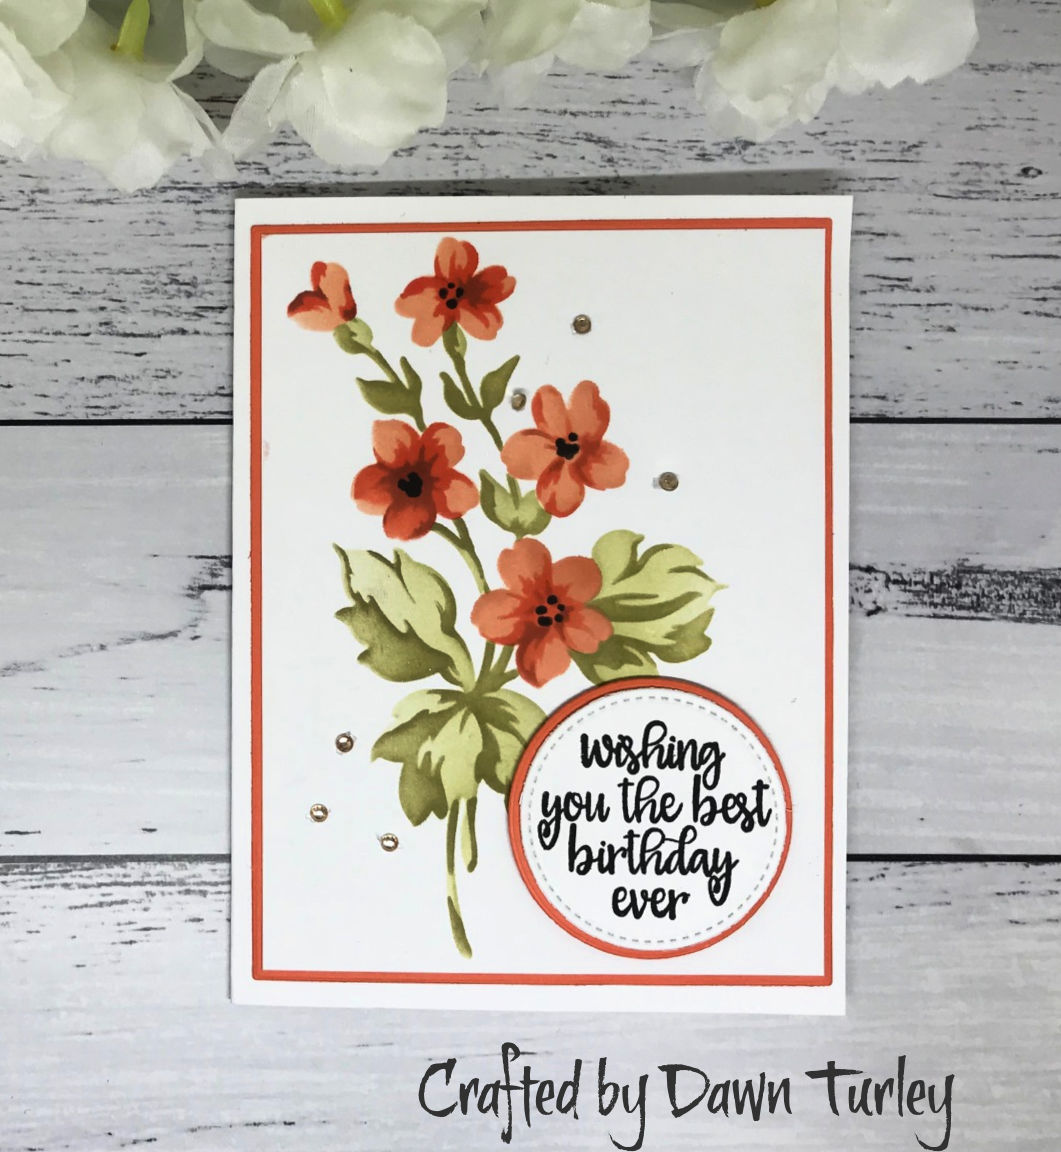
As the card had to make it's way to the far side of Australia, I made it a while back.  At that time I had just received some new Altenew ink sets and a Layering Stencil called Hill Blossoms.  It's a colouring stencil.  I fell in love with it when it came out.  My local online store, Krafters Cart had it shortly after the release so it went into my basket, together with a Gina K Wreath builder set.  I love the wonderful sentiments that fit beautifully into the circle dies from one of the Master Layout dies.  So inks from Martian Terrain and Nature's Wonders were used with the stencil.  I also purchased the tiny blending brushes from Altenew which made it so easy to blend the small parts of the stencil.   I'll be using this one with lots of different colour combos for sure.   The Martian Terrain inks were a bit more orangey than I expected but I love them.  I had some dark orange card in my stash that went perfectly as the layer for the card panel and the circle.  

Come and join in the fun at  Watercooler Wednesday Challenge and check out the projects from the other designers.  Then take our challenge and link up your project to the challenge post.    We'd love to have you join us.  You have until Monday 17th May 2021 at 5 pm Mountain Standard Time (Tuesday 18th, at 12.00 noon NZ time ) to link up your project.


Friday, 30 April 2021

Floral window at Die Cut Divas.

Hi there.  It's the last day of the month so it's time for my last card for Die Cut Divas for our April ochallenge.    Our sponspr this month is Poppystamps and our challenge theme is  WINDOW or APERTURE CARD

I bought this really cute die from Poppystamps and here's what I made


I made a green watercolour sheet and used it to die cut the Intricate die.  I used an embossing folder with some white card that I had cut with a Spellbinders square die. I used some 3D tape to add behind the frame.  I added the frame to a panel that I had on hand... that had been made with my Gelli Plate and an Altenew stencil.  To finish I added a die cut sentiment.  This is from Britannia Dies and I cut it from black card that had been covered with clear packing tape.  This gives it a really glossy look with out the mess of Glossy Accents. 

You have till 9.00pm (US Pacific Time) to join us here.  We'd love to see your creations.  


Sunday, 14 February 2021

Stencilled Wreath

 I recently joined an awesome Facebook Group called Share Handmade Kindness - started by the inspirational Jennifer McGuire.   It's a friendly, happy group.  And they have started a monthly Technique Throwback challenge.  This month it's Stenciling - and Jennifer's video  Here is the inspiration.  My card today is a very CAS stencilled card 

I used Altenew Wonderful Wreath Stencil and Green Fields and Shadow Creek inks to add the greenery.  I used some Magenta ink to add the berries.  And some red gems to add texture. The sentiment is from Catherine Pooler sets called Good Thing.  I added some green striped PP and gold washi to one side and then used Gina K Master Layouts 2 to cut out the panel.  

I'm writing this while waiting for the government update - South Auckland has 3 community cases.  Just hoping that Auckland doesn't go back into lockdown.  

Take care out there people 💓

EDIT- 3 day Level 3 lockdown announced for Auckland and Level 2 through out the rest of the country.  So working from home for the next little while.  

Thursday, 24 September 2020

WWC 290 Michelle's Challenge: All About Occasions

Welcome to another challenge at Watercooler Wednesday.  Michelle is our hostess with an All About Occasions challenge.


I have a great technique card to share today.  I recently took part in an Altenew class called Stunningly Styled Stencils.


One of the techniques we learnt was to take the ink blended stencil. spritz with water and "print" it onto card. I used an Altenew stencil - Feathered Leaves. My original background was on my Father's day card -here.  Makes a dreamy looking background.  The card was quick to pull together - I pulled out two already watercoloured flowers and a sentiment that was already stamped and in my "magic cup".  I just had to white emboss some leaves from Altenew's Natures Blossom set and watercolour them.  Love how all come together.


Come and join in the fun at  Watercooler Wednesday Challenge and check out the project from the other designers.  Then take our challenge and link up your project to the challenge post.    We'd love to have you join us.  You have until Monday at 5 pm Mountain Standard Time (Tuesday at 11.00 am NZ time ) to link up your project.

Thursday, 27 August 2020

WWC 286 - Marsha's Challenge - All About Occasions

Welcome to my blog today.  It's time for the weekly challenge at Watercooler Wednesday and this week Marsha is our hostess with an All About Occasions challenge.


Today I am sharing the card I've made for my Dad for Father's Day.  It's not till the 6th of September.

I used a new to me stencil from Altenew called Feathered Leaves.  I use some Distress Oxides - Mowed Lawn, Evergreen Bough, and Broken China - to blend through the stencil and then I used some of the same inks to blend over the whole piece.   I used a sentiment from Clearly Besotted's All Occasion Sentiments.  The feathers are from Catherine Pooler's Birds of a Feather stamped with Fiesta Blue, Eucalyptus and Grass Skirt CP inks.  I blended some of the DO over the whole lot before fussy cutting them out.

Come and join in the fun at  Watercooler Wednesday Challenge and check out the project from the other designers.  Then take our challenge and link up your project to the challenge post.    We'd love to have you join us.  You have until Monday at 5 pm Mountain Standard Time (Tuesday at 11.00 am NZ time ) to link up your project.

Saturday, 7 March 2020

Inpsired by Altenew Educators Blog hop...

I've been following along the blog hop by the Altenew Educators... Here..  So totally amazing inspiration and there is a Linky Party so you can share your "For the Love of Flowers".

I also, this week saw a fabulous technique by the incredible Laura Bassen (you can see her Youtube here)- using Distress Oxides, a stencil and some white pigment ink.   So together these two inspired me to create a card or two!

CARD 1;
For this one I used Distress Oxide inks in a variety of greens with a little touch of blue to add some blending on the background.  I then took the Altenew stencil - Rose Bouquet and used Colorbox Frosh White pigment ink and a blending tool to pounce the ink.  Added a little stamped sentiment from Best Sentiments ( the little gift from Altenew a while back)   I added some Lucy's Little Things Ice Cube jewels.

So I was wondering if this technique would work with Altenew Dye inks as I didn't have the colours I wanted to use in DO inks.  I was looking at the Altenew March challenge

 so onto
CARD 2:

And I'm happy to say the Altenew inks were a moderate success.  Next time I would try some slightly darker inks.... but still really happy with the results I got.   I used some Fresh Leaf, Ultra Violet and Persian Blue inks to blend before adding the white pigment.  I added some splatters with the white ink and Andromeda inks.  Sentiment is from the same set as the first card.

Both cards are being added to the Linky Party and the second one to the monthly challenge.    I LOVE my Altenew flowers so will be doing some more over the weekend I'm sure.

I'm also adding the second card to the Anything Goes challenge at The Flower Challenge


Thanks for stopping by.