Showing posts with label tags. Show all posts

Monday, 14 September 2015

StampNation Stamp of Approval - Friendship box

I recently decided that I needed wanted Catherine Pooler's Stamp of Approval kit - aptly named "Friendship"   It was a VERY EXPENSIVE box of goodies for me as the NZ-US exchange rate has plummeted of recent times and postage rates have risen in the US,  But I am so happy that I did get it!

As you can see it was chocker full of lovely stamps, dies and a stencil.   So here goes with what I've done so far!

This first one was CASE'd from one Isha did for the accompanying PDF.

Next up used the flower dies, and the stamped sentiments.

this one used the stencil for the background using two different colours of distress ink.  The Friend die came in the set and I paired it with a Winnie and Walter sentiment stamp

For this card I only used the Tag dies,  The background is distress ink over a The Crafter's Workshop snowflake mask/stencil.  Again used Winnie & Walter sentiments.

and finally
A Bokeh card with Teal and white inks on a sprayed background.  Sentiment and flowers from the SOA kit, leaves from Provocraft (very old Cuttlebug dies)

Thanks for bearing with me for this long post.  I've had fun with this kit and there are lots more ideas floating about in my mind.  Haven't even used a couple of the stamps and dies yet!

take care

Sunday, 27 April 2014

Tag - you're it!

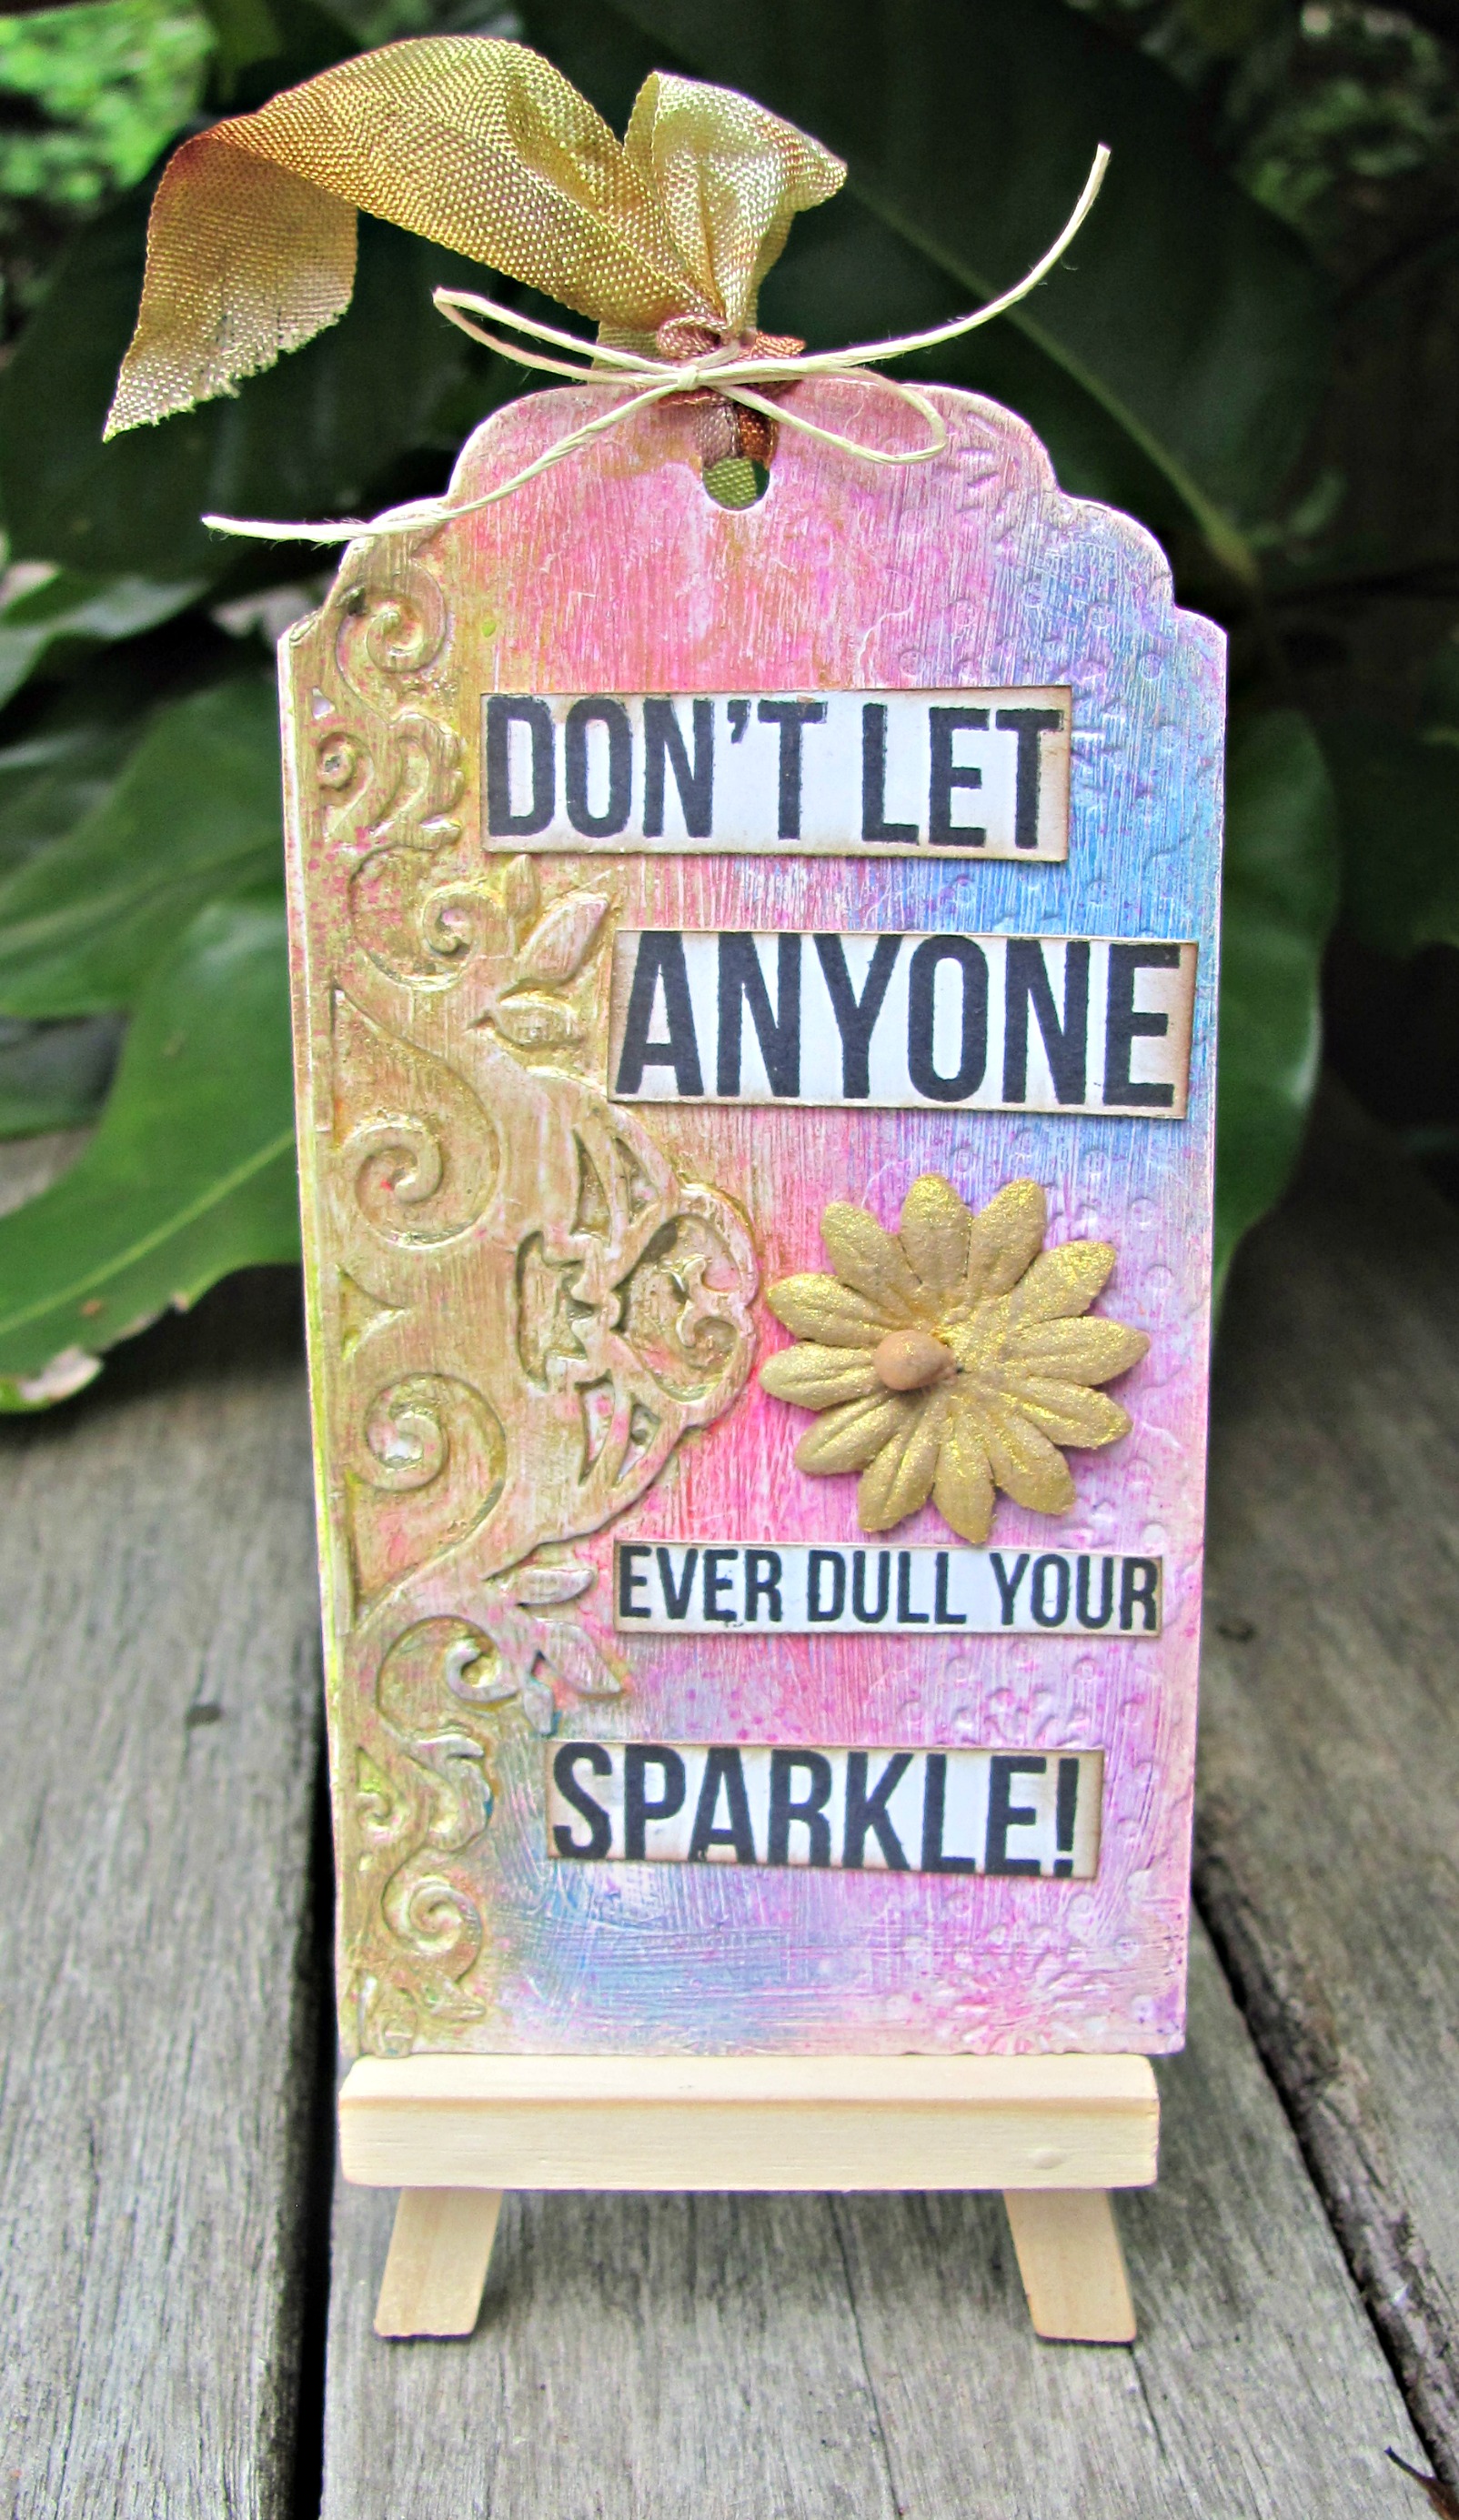
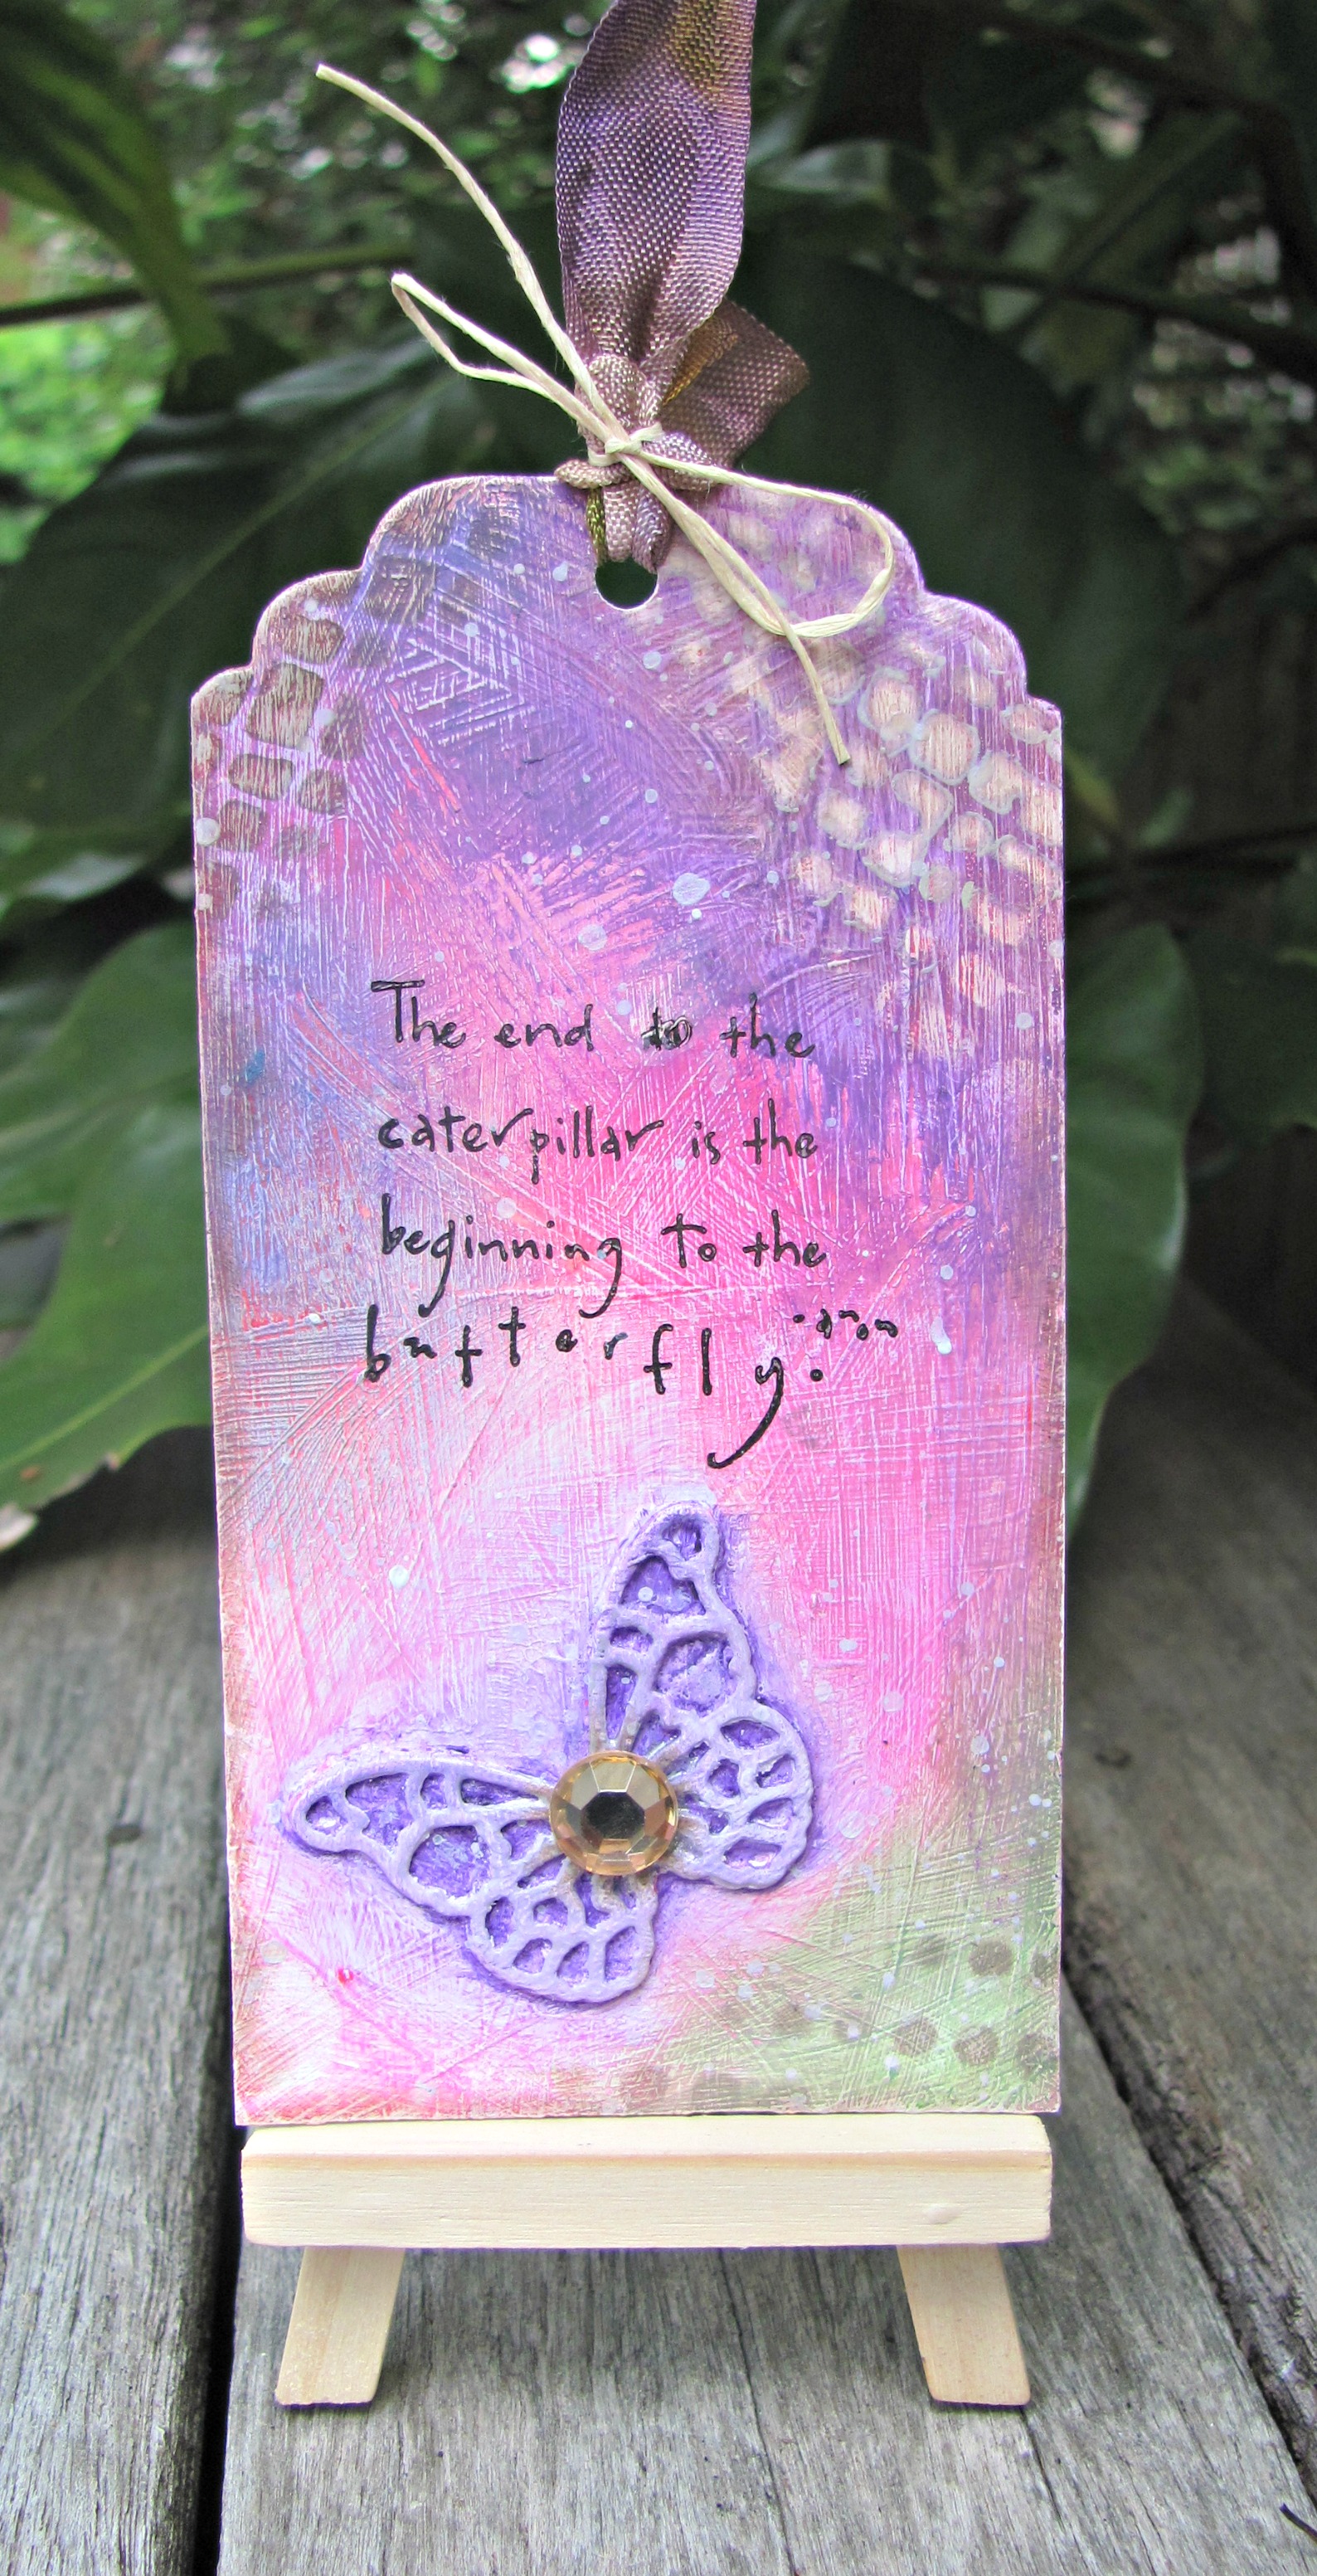
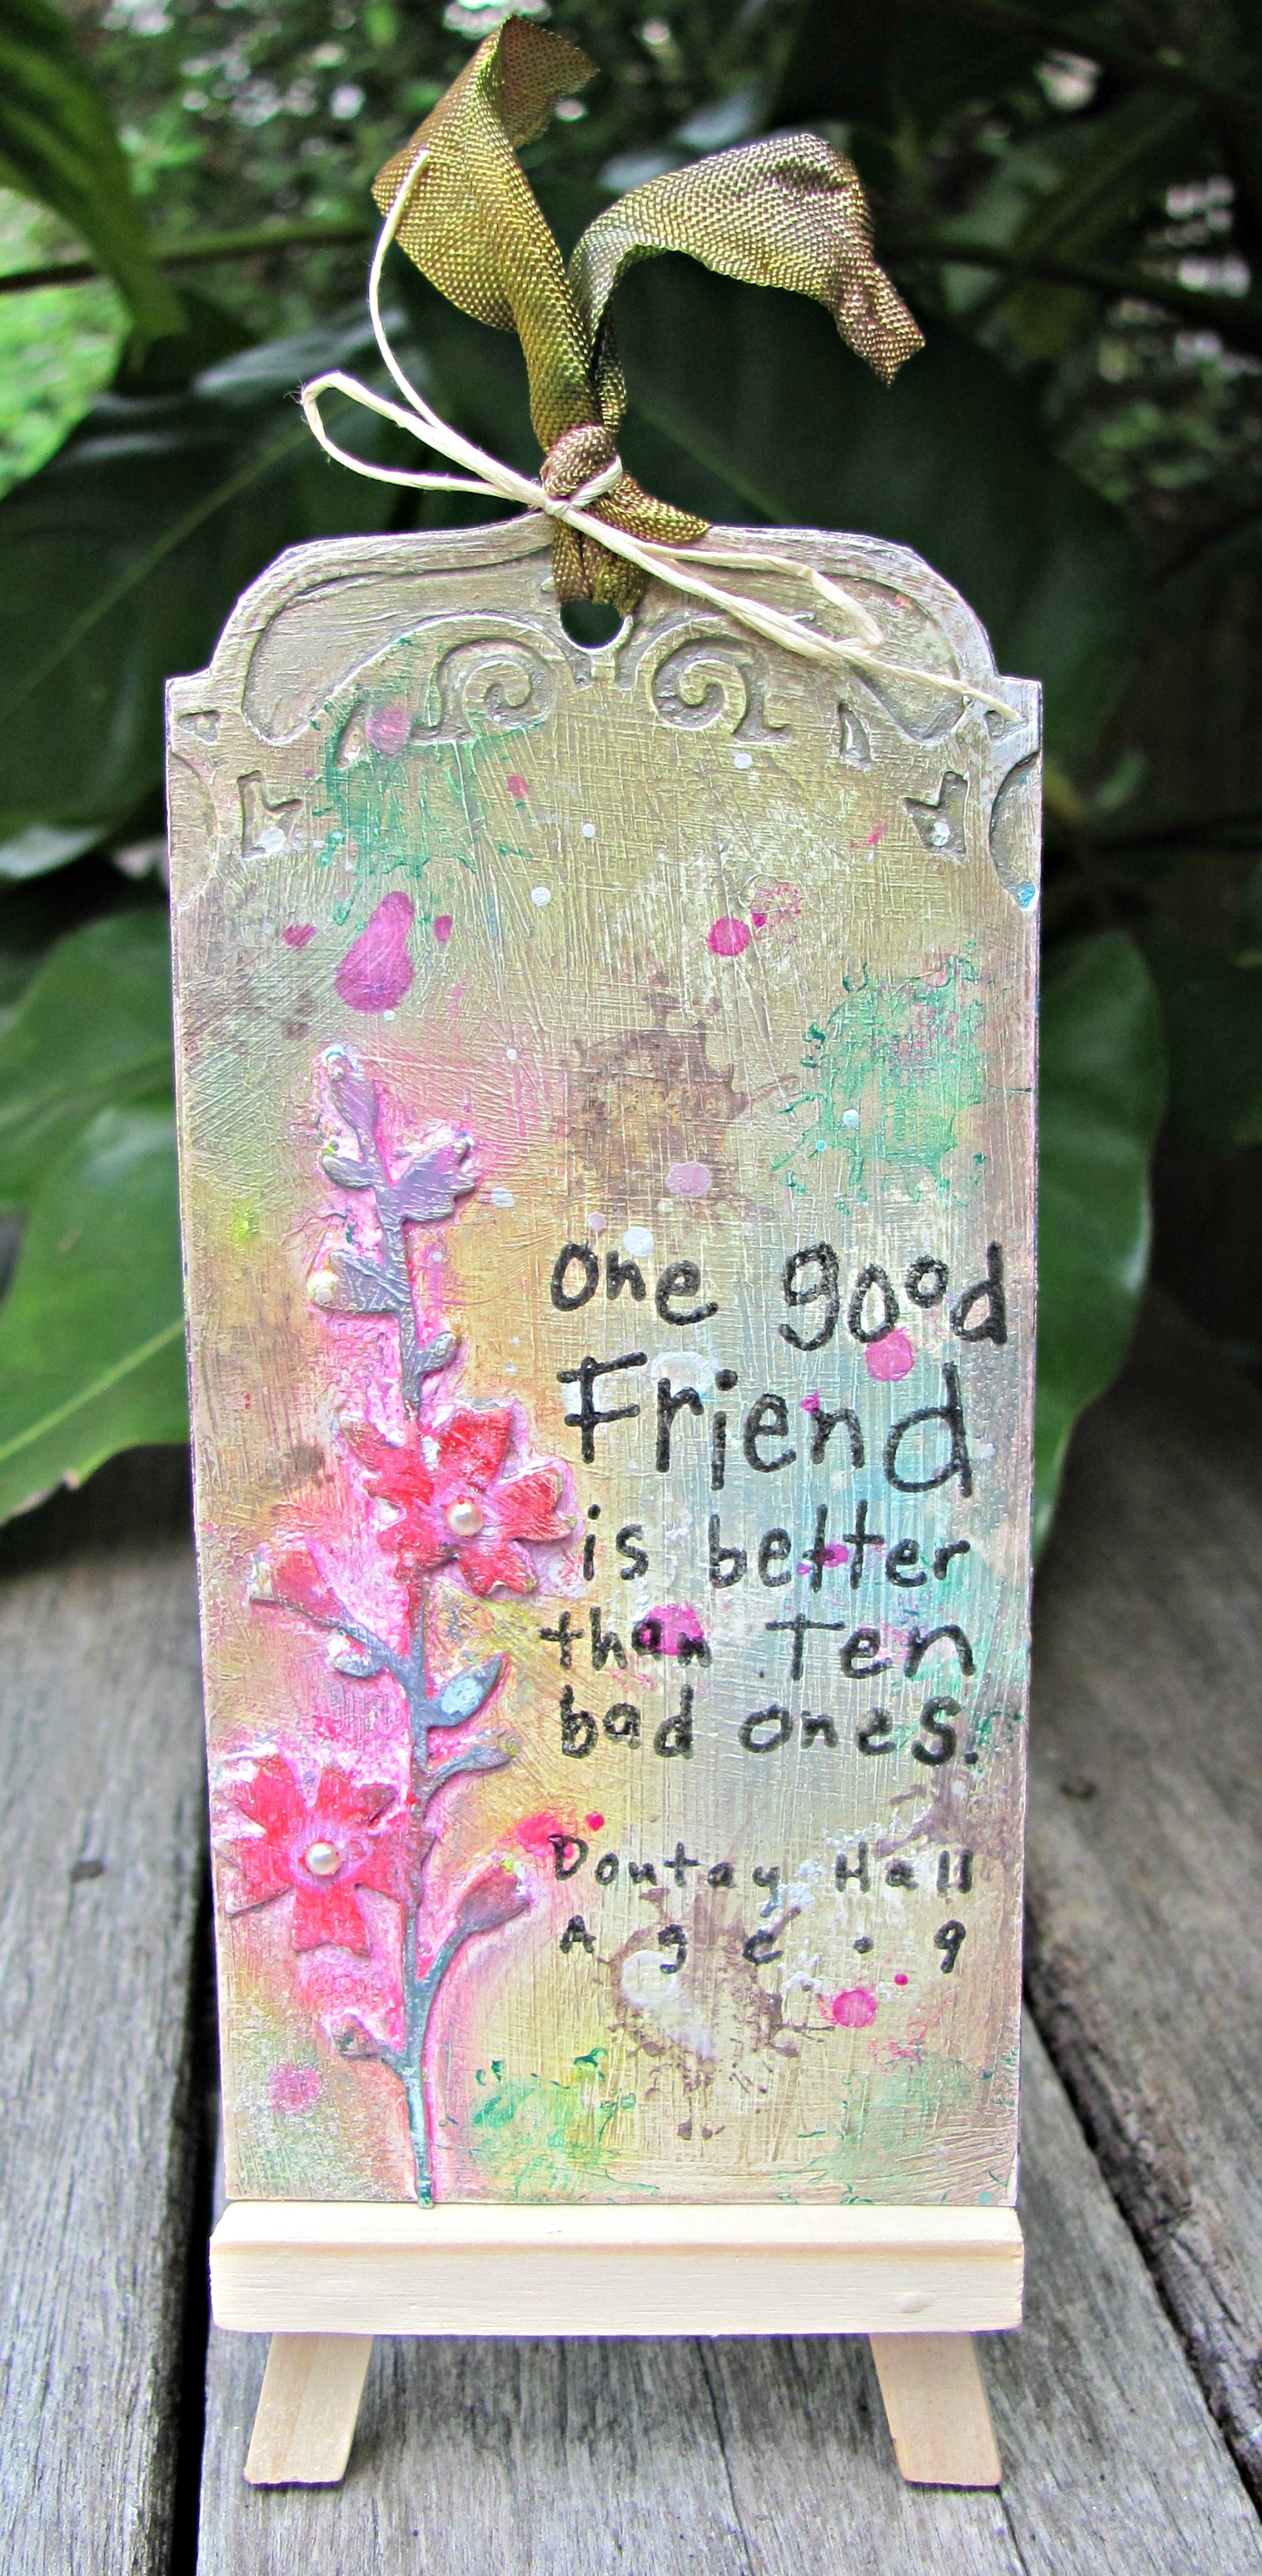
I am taking part in a tag swap with a theme of "Quotes"   There are six of us taking part in the swap so I had to provide 5 tags... I decided to do 5 different tags using the same techniques I used on my canvases.   Each tag is 5 1/2 inches tall and 2 3/4 inches wide.  I used Spellbinders dies to shape the top of the tags.

Don't Let Anyone Ever Dull Your Sparkle Tag

This one used a Spellbinders De-lite die and the sentiment is from Kaisercraft.

Live Beautifully Tag

This is the tag I made the other day, just shaped the top.

Butterfly Tag

For this one, I used some stencils, a Memory Box die, and a Penny Black stamp for my sentiment.

One Good Friend Tag

Another Memory Box die and this time the quote is from Inkadinkado.  

Within Your Heart Tag

For this final one, another Spellbinderd De-lite die with a Penny Black quote. 

Hope the recipients enjoy the tags when they arrive.  

EDITED:
I entered these into the "Paint It" challenge at City Crafter Challenge blog and am happy to say I got a "Spotlight Artist" award :-)


Dawn

Sunday, 17 April 2011

Rainy Saturday

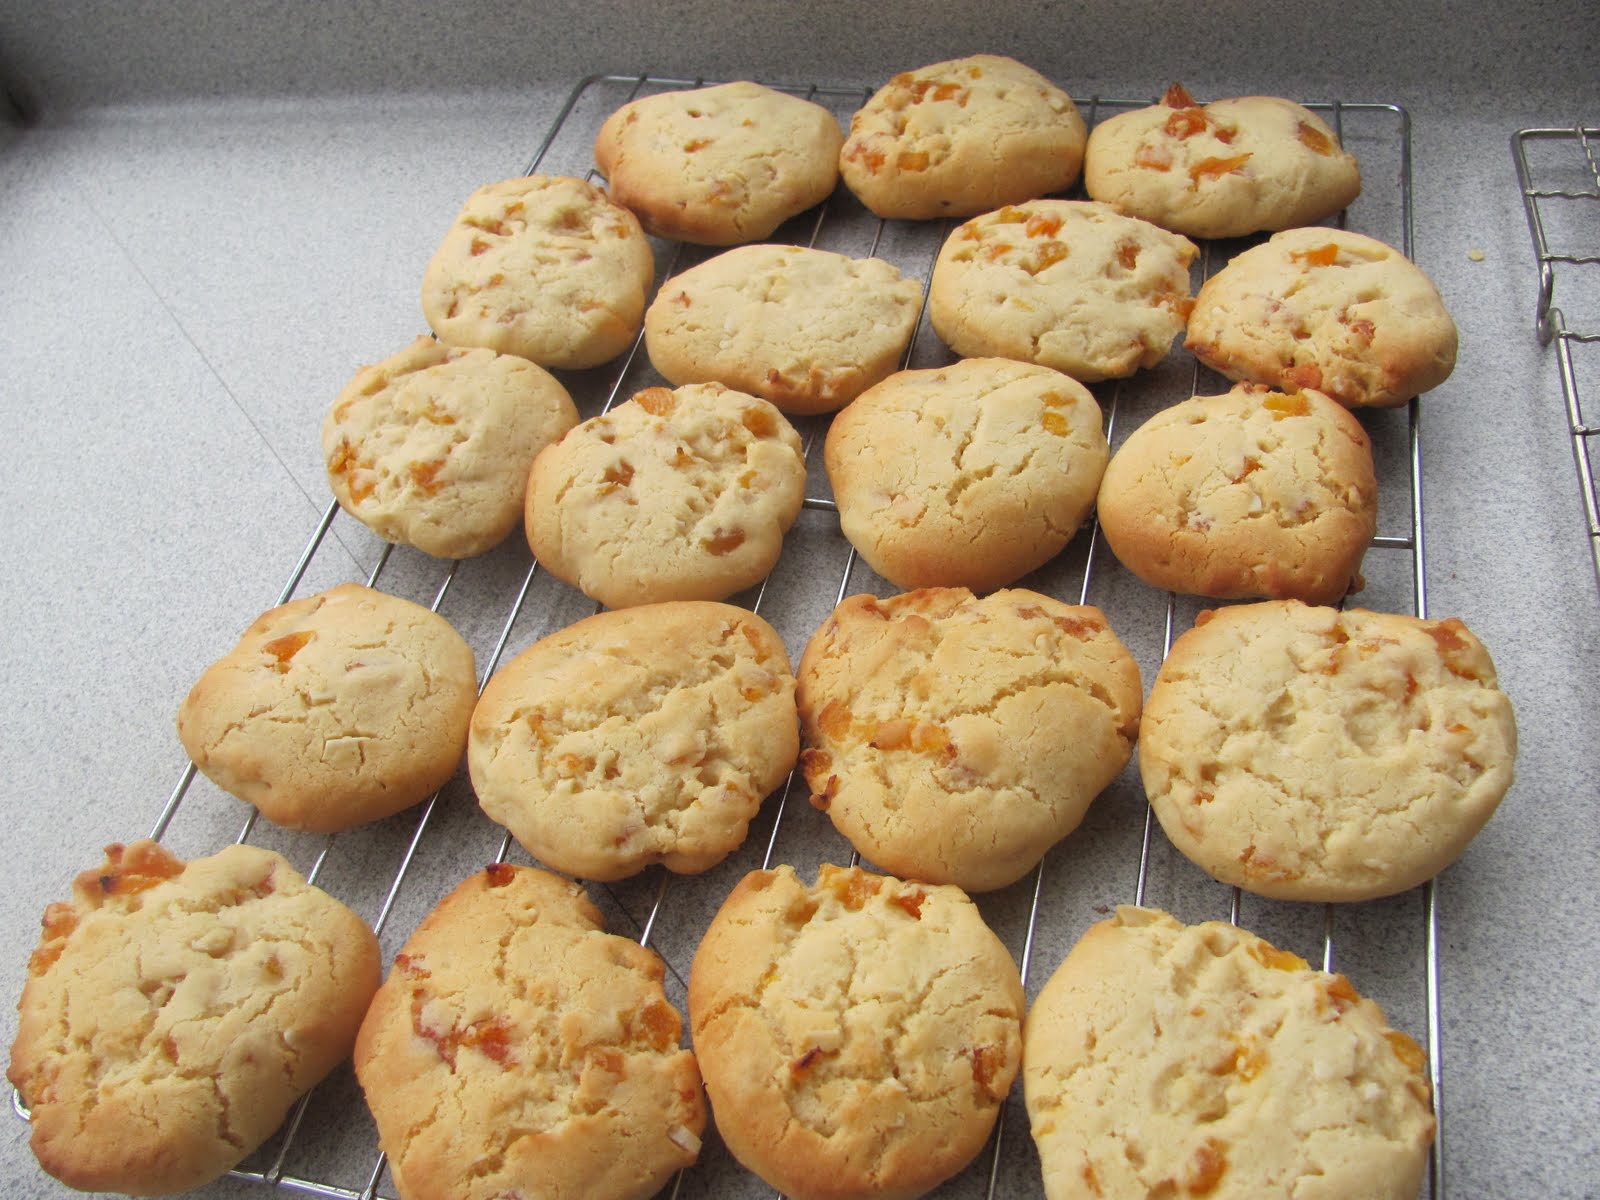
Yesterday was a Rainy Day here.... warm but very wet......so what better thing to do than bake biscuits ( cookies for my USA/Canada friends)  The latest Countdown  ( supermarket) magazine had a recipe for a basic dough that you split into 3 to make different varieties.  It is a big mixture using 250gms (1/4 lb) butter but made a number of biscuits.  The 3 varieties:
Choc chip cookies
Apricot Almond
Vanilla Hearts
I have frozen the Hearts and will take them with me for Easter.  I will be sandwiching them together with Passionfruit icing and dusting with Icing Sugar.  I have also frozen some of the others too.... but not all!!!!!!!!  Hubby insisted that some stay out for supper last night.

Got to make a couple of cards made too.... here is the first one.  Using some new Penny Black stamps I won over at Kathy's blog ( The Daily Marker)  I loved this Mimi stamp ~ dressed up in her bunny suit
Easter Mimi
I stamped her onto some Neenah Solar Paper and used Copics to colour her in. I added some liquid appliqué for her tail. I cut out with a Nestie oval and added some Spun sugar distress ink while the die was still in place. I had this lovely pink PP in my box so thought it went well enough to cover the background of the card. The label is a new one for me.. Grommet Tags from Spellbinder. Again sponged the ink while the die was in place and used a Sharpie fineliner to draw round the centre. Sentiment from Hero Arts. Added the bright pink flowers and it's ready to head off overseas.  Won't get there by Easter.... but the thought is there!!!!

Today is much nicer.... up to around 24 degrees this afternoon.  I've been out to get new cushions for my lounge suite and some lettuce plants for my little trough garden.  Now just to plant them out!!!!!

take care

Dawn

Thursday, 6 January 2011

Inspired by Hero Arts

I get a lot of inspiration from the Hero Arts blog, Flickr group and now their newest catalogue.  It is wonderful.  This month part of the Blog challenge is to be inspired by something you see in the catalogue.  On page 9 there is a beautiful card using the wreath from CL499 Special Note of Thanks set.  As I don't have this set, I improvised.


I used my wreath of leaves and added some tiny punched flowers in pink, dark pink and green. The lower portion is a piece of background card I made with Liquid pearls and distress ink ages ago.  The sentiment is also from Hero Arts - one I've had for a long time too... still a goodie though.


And I also want to say a big thank you for the lovely cards I received from my friends this past Christmas..... some from Flickr friends and some from my own stamp group friends.
Christmas Cards from my friends

top layer: Anne, Ivy, Arlene
2nd layer: Sue, Glenda, Sandie
3rd layer: Lei, Helen and my Mum and Dad.
and this wonderful tag from Jacqueline
Thank you all so much.

My mind is full of ideas after seeing all the beautiful work on the blogs, Flickr and all the other places I visit....so today ( being a bit cloudy) I will have some "play" time.  Love being on holiday when hubby is back at work... can play to my hearts content!!!  ~as long as his dinner is cooked!!!!!!!!  Take care

Wednesday, 4 August 2010

Tag Tuesday challenge

This week over at Kard Krazy - the challenge has been set by Sarah to use a Mannequin template for your tag.  The template has been provided by Sarah. 

This is what I came up with:

I resized the template to about 3 3/4 inches and printed it on the reverse of my cream card stock and cut it out.  I then stamped the Old French Writing ( Hero Arts) with black ink - missing bits here and there for an antique look... and embossed it with clear EP.  Next I sponged all over with Dusty Concord, Worn Lipstick and Faded Jeans Distress Inks.  I finally stamped a small Fleur de Lis ( Teresa Collins) in the Dusty Concord.  I added some netting and the Dusky Purple and red flowers, the lace and gems.  I'm just pleased you can't see the back of this tag... Trying to get the netting to stay on was a real mission I can tell you!!!   Lots of good old sellotape on the back.

Still at home today and will be for the rest of the week.  Had a chest xray today... all clear but I have a vicious virus that is just going to take time to come right... The doctor said to stay at home for the rest of the week.... As it is only 2 weeks today till we head off.... I will do as she says.... Come hell or high water, I WILL be on that plane!!!!

Thanks for stopping by.  I really appreciate you taking the time to visit

Saturday, 24 July 2010

Tag Tuesday challenge #60 Faces

I thought I'd give Louise's challenge a go this week.  The theme is Faces... Wasn't sure what I wanted to do.

I had this vintage image on my computer. Not sure where I found it... but used Photoshop Elements to crop just the face and printed it out of photo paper.  I then distress the edge with Fired Brick ink.  My cream tag was sponged with Worn Lipstick, Fired Brick and a touch of Dusty Concord.  The Hero Arts Antique Background was stamped in Fired Brick.  Added a bit of Lace under the photo and a flower over the centre of the butterfly.  Think I'm starting to get this vintage/shabby chic thing!!!

Tonight our we are going to a neighbourhood dinner as a farewell to our neighbours of 15 years...  Robyn and Barry have lived across the drive from us for that long!!!  We've been in this house almost 18 years... There are 8 of us having a lovely dinner together at Natalie and Murray's place.  I'm taking the dessert... Lemon Meringue Pie and Fruit Kebabs.  I've got pineapple, melon, mango, kiwifruit and marshmallows.  Wrong season other wise would have strawberries.... The pie is almost ready to come out the oven.  I used fresh lemons off the tree round at my son's flat.  We got a whole bag full last weekend when we were round there for lunch.

Just shooed the cat outside as I've left the pie on the bench to cool.... last weekend I left a piece of pork on the bench to defrost and forgot it when we went out.... came home to find a corner chewed off.... Had to cut it off !!!!!  Was rather annoyed with the cat ( and myself)

Hope everyone is having a lovely weekend.  Take care

Friday, 26 February 2010

February's card chain challenge

I have already shared the wonderful card and goodies I received as part of Deborah's CCC for February.  Now that Deborah ( my recipient) has got my card, I can share it with you.  If you have taken part in these challenges you know that you have 1) a sketch to follow or 2) a colour scheme or 3) a theme.  I decided to to the theme this month which was St Patrick's Day.
 
I don't have any shamrock stamps so used a small heart from HA's Share Laughter set to make them.  Same went for the Leprechaun... this one I found on a free clip art site.  I downloaded and resized and printed it out on white card.  I added the sentiment from HA's sparkle clear set Happy Greetings.  Used my Label 8 to cut out the white card.  For the matting, I traced around the outside of the label and cut by hand.  Add the ribbon and pearls ( coloured with a Copic).  As it also fitted the Hero Arts Challenge I entered into that as well.
Talking of shamrocks and leprechaun's this weeks challenge over at Tag Tuesday is to use a shamrock.  I have never entered this challenge before but here's what I came up with.  It used the same image and the background is the same shamrocks I used on the card.  I bit hard to see them but they are there.

I have a few other things I did this week - will post over the weekend.   Hope you all have a great weekend and thanks for stopping by for a visit.  I really appreciate all the delightful comments.

Monday, 7 December 2009

It's Chritmas Time in the city....

I just love this time of the year.... the radio stations have started playing Christmas songs and carols....What's your favourite?  I love Silver Bells, Silver Bells.... I don't even know who sings it but it just lovely.  Now it's December I start getting the decorations out ... getting the tree this weekend coming.... but last weekend I put up the Christmas Wreath on the front door.  This year I made a new wreath... ( the old one was looking a tad sad :-(...)  A few months ago I went with a friend to the Heirloom Christmas Shop and got a few bits and pieces to make myself a new one and here is the result....


I was very pleased with the result and it looks awesome against the white front door.  


I have also done a few more tags.... I now have enough for the presents.... but not sure I can stop!!!!  I really am enjoying making these.    

Well thanks for stopping by... Have a great week. 

Saturday, 5 December 2009

More tags....


I'm really starting to enjoy making tags - albeit that the ones I have been doing are rather simple... not much layering etc.  I have done these two over the last couple of days.

The one on the right was very simple... I used a Hero Arts Collage stamp that I simply inked up in 3 different Memento inks -  Rich Cocoa, Rhubarb Stalk and Potters Clay and stamped directly onto the tag.  I added some red gems to the snowflakes and then added a sparkle snowflake and gem to the bottom.  I put some Kindyglitz on the Santa and it was finished.
The one on the left was a bit of trial and error.... I started with some practise of my blending tool for the distress inks. I always have trouble trying to get it nice and even. I started with Worn Lipstick and then added some Dusty Concord on the edges. It went a bit dark in the lower corner. Next I inked up the flower only on the Sparkle Poinsettia stamp and used Rocket red Brilliance and clear embossed it. The bits of silver are actually alcohol ink mixative that I stamped onto the tag - I had been playing at covering a piece of acetate with Plum and silver alcohol inks and this was what was still on the felt pad.  It left bits of silver and the plum on the tag which looked rather cool. I used red and green ink on the sentiment from Stamp-it to finish off.   I had to add a bit of thin card stock to the back of the tag as I always seem to get them messy when I use distress inks and my teflon sheet.  I will be writing on the back of the tag for the person who is getting this added to their present.
No more crafting tonight though... Hubby's work Christmas function is on.  We are going out to dinner at one of the local bars.  Should be a fun night, so am off to iron the top I want to wear.... HATE ironing but needs must!!!
Thanks for stopping by.  Hope your weekend is a great one.

Thursday, 3 December 2009

Christmas Tag a la Oz.

This weeks challenge at Hero Arts is Holiday Tags. At quite a number of the blogs I like to visit, talented ladies make amazing tags... Jacqueline and Suzanne but to name a couple. I have been amazed by what they do, so thought I'd give tags a go. I went to the office supply store near where I work thinking I might be able to pick up some tags.... but sadly unless I wanted to buy a box of 1,000 for $60 I was out of luck... ( just trying to imagine how many years they would last was mind boggling!!) So stopped into the stamp store on the way home... yes I could get 8 tags for $1.50 - now that made more sense.....
For this tag I decided to try out Linda aka Oz's 4 stamp background technique. Visit her blog here to see the video she did... it's like being in the room with her doing it....I used my new pine bough stamp from HA's together with the sentiment from a Sparkle clear set from last Christmas. As I was trying for a bit of a vintage look ( don't think I quite got it) I dyed some white lace dark brown by putting Rich Cocoa Memento ink over it. I added a fawn flower with a dark green snowflake and a brown pearl to finish it. I am reasonably happy with the result.


Last week I bought the Spellbinders Tags die so over the weekend made a tag or two to put on my presents this year.  I ended up getting an order to do 10 of the little white and blue tags.  I used a snowflake stamp from the HA set Joyful Greetings I got last year.  For the red tags ( made 1/2 a dozen of these) I simply used the HA's digi kit - Snowman stamp resized and printed out.  I cut them out and placed on the tag.
Tonight I made another tag - This one is called my Kiwi Christmas as I used the Pohutukawa as my inspiration for it.  The Potutukawa tree is known as the New Zealand Christmas tree and has the most amazing red flowers that come out around this time of the year. The pine bough stamp reminded me of the flower. 

Well this has been a bit of a long post...thanks for taking the time to read it.

Sunday, 19 July 2009

Three Ferns


Three Ferns
Originally uploaded by turleyfamily(Dawn)
I got some time this afternoon to make a card using one of the shrinky plastic embellishments I made using alcohol ink on Friday. I made a red and yellow with pearl fixative background and used it to stamp the fern on. I wasn't fast enough to get the ink off before it dried, so left it as the brown ink on the background. I layer both the stamped piece and the tagged piece onto kraft and then onto the pink card stock. I used a gold calligraphy ink pen to edge all the pieces. The tag was popped to give some dimension to the card. I liked the way the tag is a more intensive colour than the background.

This afternoon Emma and Brad called round. I hadn't seen them for a couple of weeks so it was great to catch up. They both have been busy at work and continuing to work on their house. Emma came to "borrow" again from my stash. She was making a guest book for the wedding. She had covered an A4 sized note book cover in white and silver patterned paper and wanted something more for the front. I found a lovely black rub-on that said "Forever and Ever" - it was perfect. She had also been to Spotlight and got the bits to make Wine Glass Tags. She is going to put the guest names onto pale shell squares with a little metal oval embellishment engraved with Love, some white and black beads and use them as place settings for the tables.

Thanks for stopping by. Have a great week