Showing posts with label cuttlebug. Show all posts

Monday, 11 March 2024

Success from a failure.

On Saturday, I watched a great session from the Card Makers Success Summit by Tiffany Solorio -  Tiffany uses Distress Sprays in all sorts colourful sprays and layers.  I only have two Distress Sprays in Brushed Pewter and Tarnished Brass.  I tried my Lindy's Gang Mica sprays but they are all very muted colours.  I added a splotch of Adirondack Color Wash in Purple Twilight.  But my panel of mixed media paper was very pale and blah looking with a few blob of purple.  So what to do?

Die cut with Spellbinders Be Bold Blooms!

Here's the card I made with all the bits I die cut and glued together


I used some of the dark purple blobs to cut the bigger flowers and the other more softer colours for the leaves and buds. I used some pinky lilac card from Scrapbook.com  Purple card pack for my background panel.  I die cut it with one of the Altenew Mix and Match Frames and embossed it with a Cuttlebug folder.  I slightly sanded it for an even more textured look.  I then added my bouquet down one side, and added a circle die and layer die cut from Gina K Master Layout #3 and used a Gina K sentiment.   So a success from a failure!


Wednesday, 15 February 2023

Christmas Bauble.

 Over at Christmas Kickstart the February challenge is "Baubles"  Over the past couple of days I made a card to enter.   I'm working from home at the moment as our office in Takapuna can't open as the power is still out.  A small pocket of streets around the office lost power late afternoon on the 13th and as yet it has not been  restored.  So in my breaks I pop into the craft room and have a 10 min play.

So I started by taking a 12x12 sheet of Christmas paper and cut it into 6 panels.   It's lovely double sided paper.  I thought it might get me enthusiastic to getting my Christmas cards.  

Baubles...... I had to think what stamps/dies I have.  First I pulled out a stamp set and then remembered I had a very old Cuttlebug die and embossing folder set.  So I found it and away I went.


  Started by trimming some of the bottom of the green panel and flipped it over.  I layered the two panels to a red card base and added a little rose gold strip across the join.   I took a piece of white card and die cut the bauble and then put it through the embossing folder.   I took some Altenew Gold ink and rubbed it all over the die cut.  Added a little bit of gold ribbon and a few gold gems.    I can't wait to use more of the paper.  It really is lovely. 


And a big thank you to Christmas Kickstart for picking my January card as one of the Top Picks.  

I'm working from home again tomorrow so another little crafting time in my breaks.  The North Island of New Zealand got hammered by Cyclone Gabrielle.  Auckland and Northland still have some flooding and power outages.  The main highway north is blocked and lots of detours to get supplies up to the north.  And further south the Hawkes Bay was hit very hard.  Both north and south roads are blocked, huge floods, slips and sadly lost of lives - both in Auckland and Napier.   Aroha (Love) to all the people affected by the cyclone. 


Monday, 25 November 2019

Foxy Thanks at Die Cut Divas

Hi there.   Dawn here to share my Thanks card today at Die Cut Divas .

Our theme this month is "THANKSGIVING OR THANK YOU"


I used a Bugaboo image and coloured with some Copic and Altenew Alcohol markers.


I found the perfect thanks die - it's from a Cuttlebug alpha set called Olivia.   I used some bronze coloured shiny card and adhered it over the bottom of the image.

So come and join us HERE


Wednesday, 15 May 2019

Another Snarky Christmas Card

My bloggy friend Jo, runs a great challenge called "Christmas Kickstart"  The latest challenge is "S for Snarky"

I have a number of Bugaboo images that are Christmas snarky so I've entered a couple of Snarky cards.

First one

I used watercolour paints to colour up this image and to make the striped background. 

and my second one:


For this one, I printed the snow globe and coloured with Alcohol markers, some white paint pen, and some glitter glue.    I embossed some white card for my textured base and added the snow globe

I had some fun with these cards.

Baby Grace is now home and all cozy in her own bed. Mummy is not sleeping well and is feeling very tired, but I am so proud how my son has stepped up to help with baby and give her time to rest and gain her strength again

Thanks for stopping by today.

Tuesday, 13 June 2017

Have a Magical Birthday

Our challenge this month over at Die Cut Diva is Summer Fun...and Bugaboo is our sponsor.


My card today is a birthday card for a youngster ..... the colours are summery and lots of fun


 I used a Pretty Pink Posh border die to cut my panel.  I printed the unicorn out and after I coloured it with Copics and then fussy cut and used dimensional tape to pop it up.  I sponged around the edge with some blue ink.   The base is a pretty aqua-green

If you love using your Die Cut Machine then come and join us at Die Cut Divas with your Summer Fun cards/projects.


Sunday, 6 March 2016

A good morning's work

Hi there,  Hope your weekend is going well.  This Sunday morning at 8.00am was the start of a 24hr Hero Arts Flickr Group 90 mins challenge.  As I was awake early with hubby leaving to go man his work's tent at the end of the "Round The Bays' fun run/walk, I got up.  Barb set the challenge "Create a card with an angle"  She shared some great inspiration.   I started creating and just kept on going!

In all three cards were made in less than 4 hrs
First one took one hour to make, photograph and post


Some new Hero Arts stamps arrived yesterday including this one called Antique Rose stem.  I white embossed it and then used Zig watercolour markers to colour.  Cut on the angle and added to a Hero Arts pink card base after using some bright pink card to mat.  The sentiment is from another new set, DC 182 Butterfly Pair

Next one took 55mins


This is a combination of older and new Hero Arts stamps.  The background is an older cling stamp, the sentiment from last year and the partial cut butterfly from the new DC 182 Butterfly Pair.  I used a Spellbinders die to cut the shape and my MISTI to help shape the sentiment. 

and finally I spend 20 mins on this last one


This one was inspired by Linda W's card in the Scramble.  I used a MFT stencil and some Squeezed Lemonade and Wild Honey distress inks and then stamped and embossed Hero Arts F6068 sentiment.  As my ink in the centre was still a little wet, the powder stuck.  Ended up look quite good.

I get my Hero Arts goodies from A2Z Scrapbooking.... and if you go there and buy, you can used my discount code  DAWN15 to get 15% off when you spend $25 or more (prior to packaging and postage)


Wednesday, 7 October 2015

Christmas Tag Card

With Fall coming to the Northern Hemisphere and Spring in the Southern Hemisphere that means Christmas is just round the corner.  And now's the time to visit the store at A2Z Scrapbooking and get some new items to start on your cards.   All the Hero Arts Christmas stamps, dies and stencils are in stock.

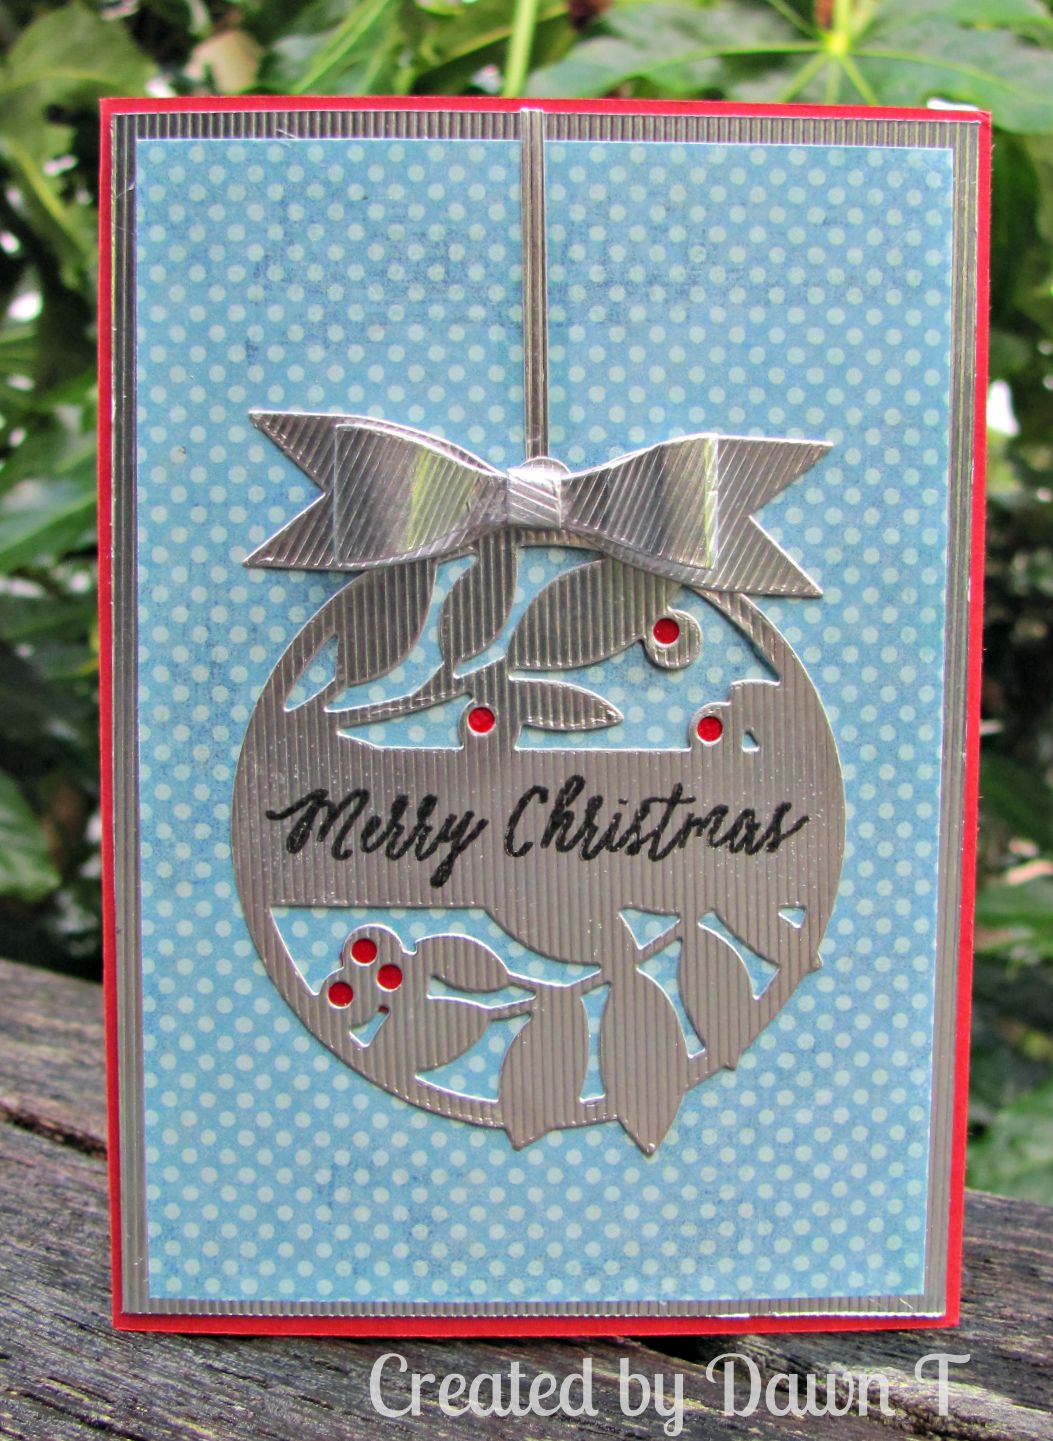
Today I have a card that uses Hero Arts Merry & Bright Tag Die and Stamp Set.

Tag card

I die cut the Tag from some American Crafts silver card stock.  The sentiment from the set was stamped with black ink and clear embossed.   Here I have used a bow die from Cheery Lyn but am pleased to let you know Hero Arts has an awesome bow die which we are stocking at A2Z.

Don't forget that our challenge this month is all about Fall.  Hope you can join us, there is a chance to win a $25 Gift Certificate to the a2z Scrapbooking Store.

Remember when you go shopping to use code Dawn15 at checkout to receive 15% off your purchase of $25 or more. And don’t forget that we are on TwitterInstagram and Facebook.  Follow us on these different social media outlets so you won’t miss out on any fun promotions!
Dawn

Monday, 14 September 2015

StampNation Stamp of Approval - Friendship box

I recently decided that I needed wanted Catherine Pooler's Stamp of Approval kit - aptly named "Friendship"   It was a VERY EXPENSIVE box of goodies for me as the NZ-US exchange rate has plummeted of recent times and postage rates have risen in the US,  But I am so happy that I did get it!

As you can see it was chocker full of lovely stamps, dies and a stencil.   So here goes with what I've done so far!

This first one was CASE'd from one Isha did for the accompanying PDF.

Next up used the flower dies, and the stamped sentiments.

this one used the stencil for the background using two different colours of distress ink.  The Friend die came in the set and I paired it with a Winnie and Walter sentiment stamp

For this card I only used the Tag dies,  The background is distress ink over a The Crafter's Workshop snowflake mask/stencil.  Again used Winnie & Walter sentiments.

and finally
A Bokeh card with Teal and white inks on a sprayed background.  Sentiment and flowers from the SOA kit, leaves from Provocraft (very old Cuttlebug dies)

Thanks for bearing with me for this long post.  I've had fun with this kit and there are lots more ideas floating about in my mind.  Haven't even used a couple of the stamps and dies yet!

take care

Sunday, 23 August 2015

Lacy Hearts for Valentines.

Yes I've made a Valentine's Day card to share today.  Our challenge this month at Die Cut Divas is "Holidays".  Our sponsor is Le Crystelle. - using some of their stunning prefolded and cut cards.

lecrystelle

I chose to use a heart shaped step card in pink to make my Valentine's card


 My card was a very pretty pink, that really doesn't show on the photo.  I used a Spellbinders Heart Die cut with red card.  The Love sentiment is a Winnie & Walter die with the co-ordinating stamp.
Although my idea is perfect for Valentine's Day, it would be great as an Anniversary card too.


Hop over to the Die Cut Divas blog and you can see Arlene's lovely heart card too!


Edited: Entering into the Holiday challenge at Addicted to Stamping (thanks Barb for the heads up!)

Saturday, 22 August 2015

Texture with Dry Embossing

Hi crafting friends...It's my day to share some inspiration over at A2Z Scrapbooking,  Our theme this month is Texture.   You can get awesome texture using embossing folders.  I have two cards to share with you today.
First up
Metallic textured card
This card uses a technique I saw over on Jennifer McGuire's blog.  It used distress inks and Perfect Pearls.  I used Fossilised Amber and Bronze Perfect Pearls to do the metallic panel after adding masking around the edge.  Once it dried, I used my trusty Cuttlebug to emboss with a We Are Memory Keepers 3D folder.  It really adds a heap of texture to the panel.  I finished off with a die and sentiment from the Hello Stamp and die set and a few black pearls.  Matted onto black and white card before adding to a black card.
My second card uses a stamp and die from last Christmas.
Christmas Holly
This time I used Hero Arts Ombre Ink (Greens) to make my metallic panel together with Perfect Pearls. Embossed with another WRMK 3D folders.  Stamped the Hero Arts Holly Leaves in black and clear embossed onto green card.  Added some additional colour with a Zig marker.   Then die cut it out.  Stamped the sentiment in Versafine Onyx black ink.  Coloured some gems with a Copic marker to get my red berries.   Trimmed the panel and matted with some gold foil card and onto a dark green base.
Remember if you are in need of any items from the a2z Scrapbooking store  you can use code Dawn15 at checkout to receive 15% off your purchase of $25 or more. (before tax and shipping)  And don’t forget that we are on TwitterInstagram and Facebook.  Follow us on these different social media outlets so you won’t miss out on any fun promotions!   Also, the a2z Store now has the 2015 Hero Arts  Christmas release in stock. So now there’s even more reason to go shopping!!!!!!
Dawn

Sunday, 16 August 2015

Baby Bunnies

One of my work colleagues is going to a be a Grandma soon, so I decided to make a card for her daughter.  The baby is going to a boy so some blues and greys.

I CASE'd a design from Lucy Abrams that I saw in a papercraft magazine.


I stamped the really cute Bunny from Hero Arts Baby Animals stamp and die set onto some MME pale grey spotted PP and die cut them out.  The die cut and matching sentiments are from Hero Arts Congrats stamp and die set. 

If you are after some Hero Arts goodies, including the new Christmas release, do hop over to A2Z Scrapbooking.  If you use my promo code DAWN15 you will get a 15% discount (prior to postage and packaging).

Thanks for stopping by.  The weekend is almost over for me.  Where did the time go?????

Wednesday, 1 July 2015

On your Bike for summer

There's a new challenge up at Die Cut Divas and it's all about Summer.
Our sponsor is DiesRUs.


 They have so many stunning dies from many companies.


For this card I started by making my background.  I used a Hero Arts mask to make my clouds.  I sponged on some green at the bottom and stamped the grass (from a WPlus9 stamp set)  I stamped the sentiment (Hero Arts) and the balloon (Hero Arts)  I die cut the Penny-farthing bike from Memory Box (Memory Box dies are available at DiesRUs).  The frame is a die from Elizabeth Crafts Designs (Thanks Arlene for sending this to me)   My background embossing folder is a new one from We Are Memory Keepers.  Its a 3D one is is stunning.  Particularly on the shimmery grey card stock. 

Thanks for stopping by.

Saturday, 20 June 2015

Critter Stack...


Here I am with another card for Die Cut Divas.  This month our theme is "June Bug"  I love Bugaboo images as they have lots of cuties.


I've used a Critter stack on my card.  I used some colour pencils and Gamsol to colour my image.  I used a Spellbinders circle die and an embossed background.  I used some Core-dinations card and sanded the embossing back. 
A line of PP down each side and a white embossed Hero Arts Sentiment finished off the card.

Well it's the day that I head off on my European adventure.  We leave at 11.55pm  night, heading first to Singapore for two days before heading onto Prague, Vienna, Budapest, Zagreb, Split and Dubrovnik before heading home.  I'll be away till late on the 13th July... but never fear, I will have a few scheduled posts for my DT work. And maybe a post or two from Europe if I get time and the internet!  If not... the there will be some posts afterwards. 

Adieu for now.

Sunday, 7 June 2015

Watercolouring Wonders

Have you joined the watercolour trend yet?  I love watercolouring and have a number of different mediums... Derwent Inktense pencils, Kohi-i-noor paints, tubes of watercolour paints, Twinkling H2O's, Gelatos, Pearlescent paints, Distress Markers, Tombow markers.... and have order some of the Zig Clean Colour pens.... Yes I think you could say I love watercolouring.... So does Paulina from Pretty Pink Posh and she's having a Blog Hop

watercolor.bloghop
I have a few birthdays this month that I need to make a card for, and with heading on holiday on the 20th, some have to be made early.  Just the excuse I needed to pull out the watercolours and play along


This one was inspired by a card I saw from Carrisa ( a DT on Pretty Pink Posh)
I used a Derwent Inktense pencil to scribble onto my watercolour paper then used a wet paint brush to blend it out.  I used a couple of colours of pink and then used the end of the pencil to flick some splatters.  I die cut the rose (Couture Creations) from gold card, the Walter & Winnie Happy from black card and white embossed the sentiment (note to self: make sure it's straight!) I added some glossy accents to the die cut.  I used some Pretty Pink Posh sequins.  Actually, I don't have any black sequins so took some clear ones and used a Copic marker to colour.  Worked really well!  

Thanks Paulina for such a fun hop.  And to all those talented artists out there who have done videos and tutorials that I have avidly viewed.  You are all so awesome!


Thursday, 21 May 2015

Add a bow....

Latest challenge is now up at Creative Craft Cottage  and our theme is to use a Bow on your creation.

Our sponsor is Ppinkydolls


I  used a lovely image 


I printed it out and used some pencils to lightly colour.  I used a Spellbinders oval die and the Floral oval die to cut the image.  I edged with a gold pen.  I added a Cheery Lynn bow die cut in bright pink for a pop of colour.  My base card was embossed with Swiss dots folder.

We would love to have you join us this fortnight. 

Wednesday, 29 April 2015

Use your favourite die/s

My New Zealand card group has a monthly technique challenge.  April's challenge was close to my heart... Use your favourite dies.  I LOVE my dies and have LOTS.  How to choose a favourite? 
Well I just went with my go to Floral Oval and some roses dies.... and here's what I made


Simply but I was really happy with the results and so was Suna when I hand delivered it in it's own little box envelope.  Suna works in the same office as me... I'm on the 8th floor and she works on the 7th floor. 

My dies were a Spellbinders Floral Oval and three sizes of Cherry Lynn roses dies.  Sentiment from a Clearly Besotted free set.

Enjoy your week.  I've got some fun things happening over the next few days... some exciting news come May 1st and of course the National Scrapbook Blog Hop on the 3rd 

Friday, 10 April 2015

Birds and Butterflies


I have a project over at Die Cut Divas today.  Birds and Butterflies...


I used a template I found in a magazine.  My base and part of my butterflies is Kaisercraft PP.  The vellum butterflies are the Hero Arts stamp and die set, embossed in white EP.   Used a Flourish die for my leaves.  I did have some issues with my bird... the template one was way too big for the birdcage so had to do some improvising.  I punched a Stamping Up bird, trace around it onto some plain paper, photo copy on enlarge and then used to cut out my card.  I used an embossing folder to emboss the wings.


Had fun trying something a little different.

Thanks for stopping by.

Monday, 23 March 2015

Finally done my homework!

I've been very slack with my homework for the Online Card Classes I'm taking...
http://onlinecardclasses.com/SYD/wp-content/uploads/2015/02/SYD_participant.png 

There has been lots of amazing different ways to use your dies... I've downloaded the class PDF's but haven't had much time to try out lots of the techniques.

I did manage to try out a couple of them.


For this one, I used some watercolour paper and stamped the sentiment then die cut the daisy die from Simon Says Stamp.  I coloured it with watercolour paints and then inlaid it back into the sentiment.  

My next card uses edge dies

This card was inspired by one from Debby Hughes and one from Karolyn. I used a Pretty Pink Posh stitched edge die and cut stripes of colours and then stacked them together on an angle.  The sentiment is a Winnie & Walter die together with W&W stamps.

I've got lots of ideas for using my dies - now just to find time to put them into practise. 

Monday, 24 November 2014

Deer Me....

Today another of my design team cards is up over at Die Cut Divas

Our sponsor is none other than Bugaboo Stamps.... just love their designs


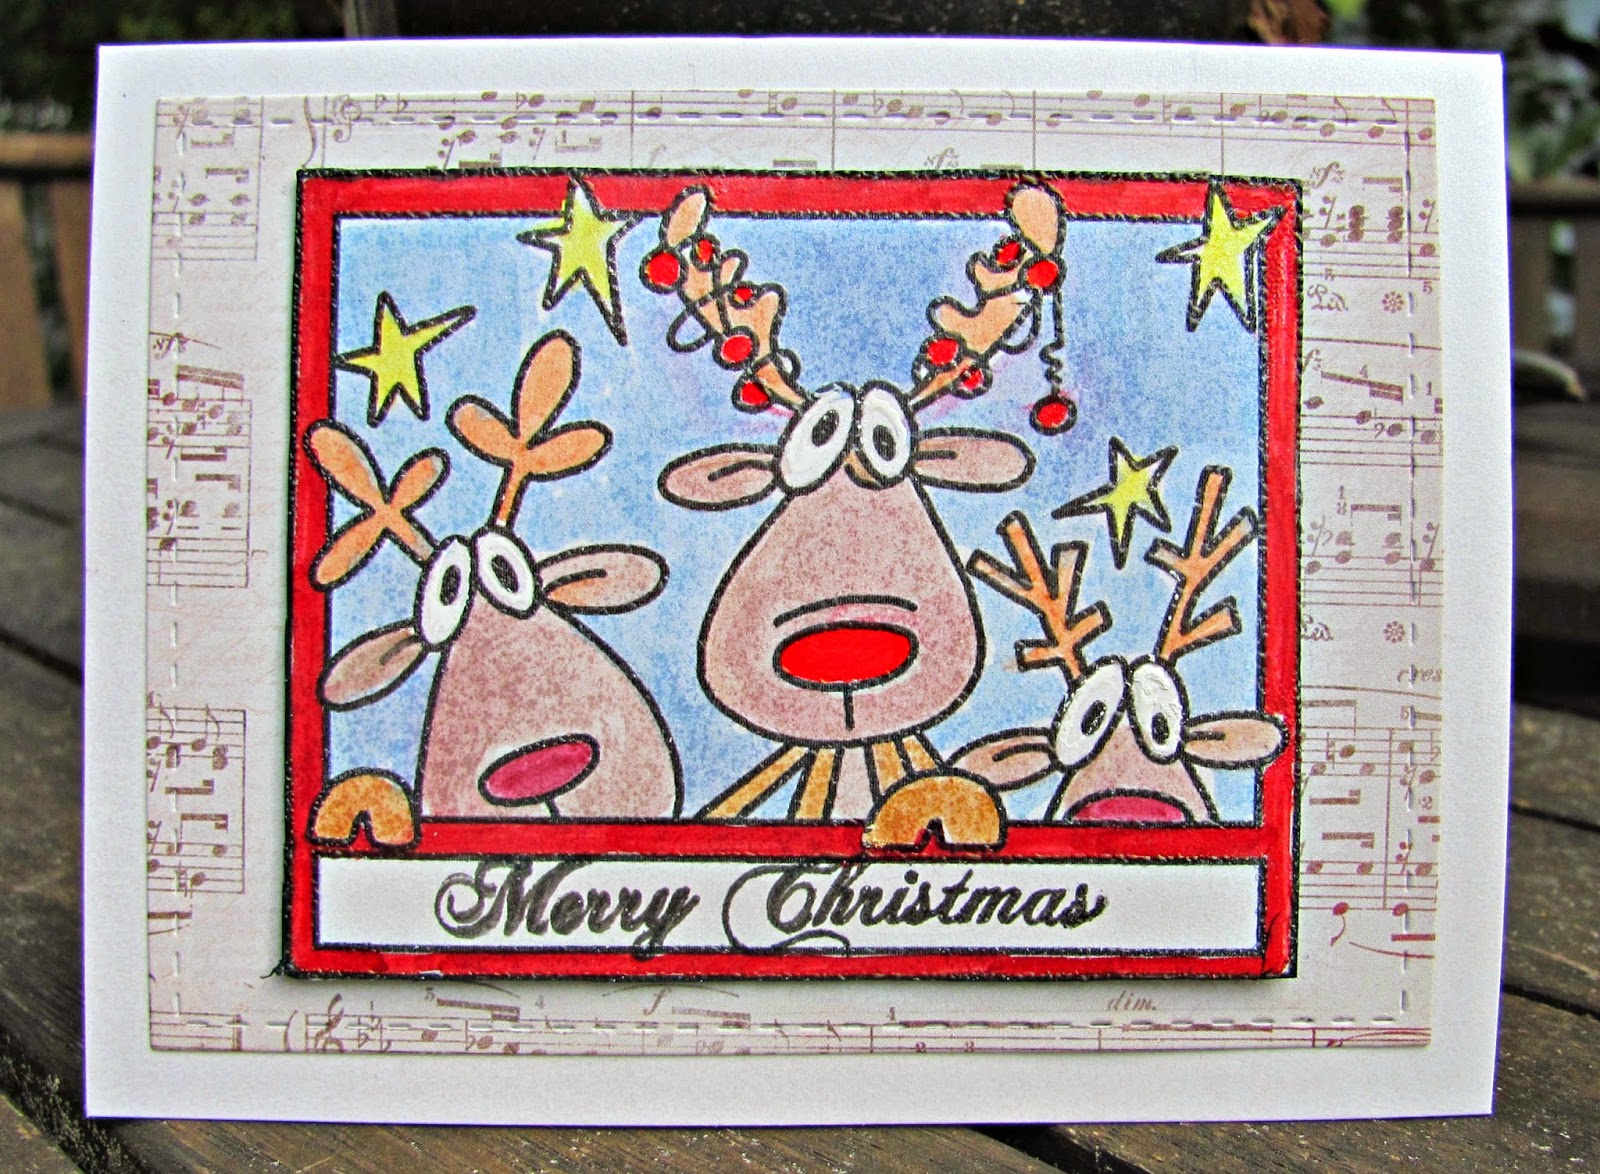
I used my Lil' Inkers die to cut the music PP for my background.   Just love these three little reindeer.

Do hop over to the blog and see another example of these three cuties.

Friday, 7 November 2014

Don't you just LOVE a freebie!

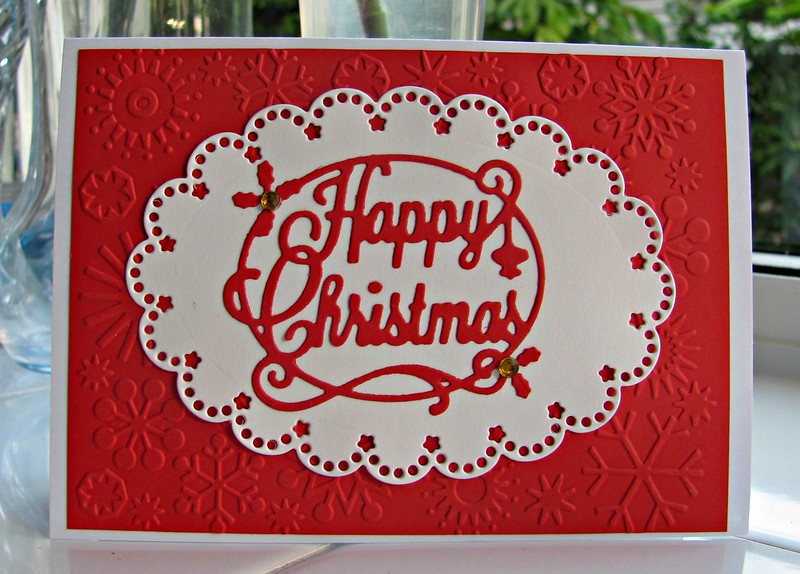
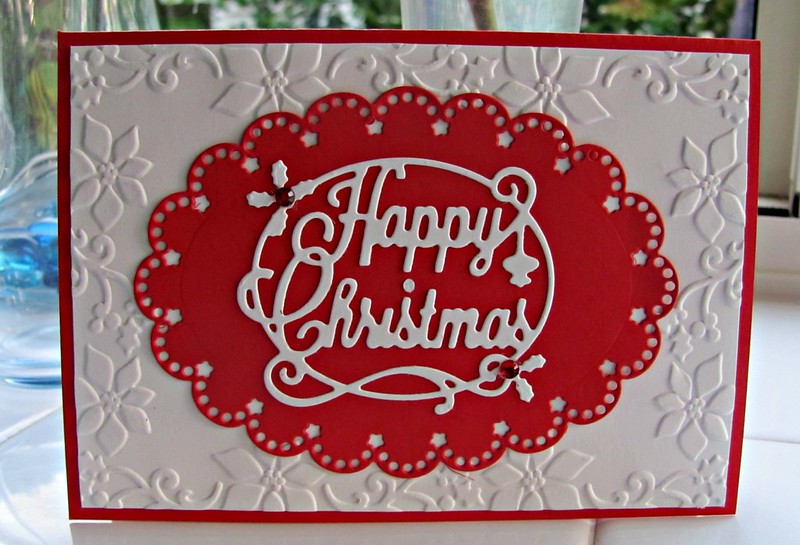
I'm addicted to crafting and cardmaking magazines and it's even better when they have a freebie with them.  I got the Australian Simply Cards last week and it had a fantastic detailed die cut sentiment.


In the magazine they used lots of blues and whites with the die so I gave it a go.

A blue Christmas

One of my colleagues saw it on Facebook and asked me to do a sample in red for her.  I did two different samples...

IMG_9210

Happy Christmas

She liked the second one and has ordered 20!  So got a bit of a production line going on... folded the red card bases, cut the white panel and then embossed it. Added double sided tape.   Die cut the red pieces (Nellie Snellen die) then die cut the white sentiment pieces.  Now just to put them all together.   I've got a few commissions to do as well... two box cards and an exploding box for a 40th wedding anniversary.   will be kept busy for a while, so if I don't get time to leave you a comment, please forgive me. I will be visiting.