Well I've finally got around to getting started on my Christmas cards and get a card for the Christmas Kickstart challenge done. The theme is Winter Wonderland - Create a scene
I had fun making this little scene.
I used a freebie stamp set from several years ago that hadn't been used before. I made my little snow banks so I could mask the trees. I then added the front trees. I used a variety of the other stamps to make a frame around the panel. I die cut the little Robin from brown and red and pieced together. I added some Stickles along the snow banks and on the trees.
I'm pleased to have got this one done.
I had a fun day to making cards today... I got two more done for upcoming design team work so I'm now a head.
Showing posts with label Christmas. Show all posts
Tuesday, 14 April 2020
Monday, 24 June 2019
You're so special Hyacinth and a Sparkly Poinsettia
I was not well this morning - achy and has a headache but a few hours sleep and a couple of Paracetamol and I felt better by lunch time. So into the craft room for a bit this afternoon.
First up is my Hyacinth card.
I knew I wanted a CAS card but with some texture so embossed my panel with a Couture Creations diagonal folder. I then put my Hyacinths onto the panel. The two big ones are on foam tape and the small bunch are adhered directly to the card. I used the same set of inks for stamping both bunches. The lighter ones used the first three inks in the Enchanted Garden set (Wisteria, Hydrangea, Ultraviolet) and the darker ones started with Hydrangea and finished with Andromeda. The centres of the flowers were in Heartbeat and I added a dot of clear Nuvo drops to each one. I used a sentiment from Versatile Vases to finish off. I matted with some purple card and added to a white base. I'm entering this into the SheepSki Designs challenge - For someone Special
And my second card is for Jo's Christmas Kickstart challenge- the theme this time - Glitter, Sparkle and Shine.
I used lots of glitter, sparkle and shine! My Poinsettia is cut with a Couture Creations die from some glittered foam. The green leaves and gold centre is cut from shimmery card stock. And my shine is the strips of gold washi tape. The background Patterned paper is from the pack I won at Jo's challenge a few weeks ago. The gold piece is Altenew ink Enchanted Gold direct to paper. The sentiment is from a Catherine Pooler Design set. I added a few gems to finish the card.
Just heard from my son, his partner Erin, is in hospital with appendicitis. Not what you want 6 weeks after a Caesarean. And to make things worse, they have lost her notes so she can't have her operation tonight - it will be tomorrow morning if they can find the notes. At this stage, Kieran is coping with Grace. I've offered to go help out if needed.
thanks for stopping by.
First up is my Hyacinth card.
I knew I wanted a CAS card but with some texture so embossed my panel with a Couture Creations diagonal folder. I then put my Hyacinths onto the panel. The two big ones are on foam tape and the small bunch are adhered directly to the card. I used the same set of inks for stamping both bunches. The lighter ones used the first three inks in the Enchanted Garden set (Wisteria, Hydrangea, Ultraviolet) and the darker ones started with Hydrangea and finished with Andromeda. The centres of the flowers were in Heartbeat and I added a dot of clear Nuvo drops to each one. I used a sentiment from Versatile Vases to finish off. I matted with some purple card and added to a white base. I'm entering this into the SheepSki Designs challenge - For someone Special
And my second card is for Jo's Christmas Kickstart challenge- the theme this time - Glitter, Sparkle and Shine.
I used lots of glitter, sparkle and shine! My Poinsettia is cut with a Couture Creations die from some glittered foam. The green leaves and gold centre is cut from shimmery card stock. And my shine is the strips of gold washi tape. The background Patterned paper is from the pack I won at Jo's challenge a few weeks ago. The gold piece is Altenew ink Enchanted Gold direct to paper. The sentiment is from a Catherine Pooler Design set. I added a few gems to finish the card.
Just heard from my son, his partner Erin, is in hospital with appendicitis. Not what you want 6 weeks after a Caesarean. And to make things worse, they have lost her notes so she can't have her operation tonight - it will be tomorrow morning if they can find the notes. At this stage, Kieran is coping with Grace. I've offered to go help out if needed.
thanks for stopping by.
Sunday, 27 August 2017
A Christmas One Sheet Wonder....
NB: PHOTO HEAVY
Have you heard of a One Sheet Wonder template? I have seen them for a 12 x 12 sheet of patterned paper to make a lot of cards.... but this week I found a template for a 6 x 6 sheet... (thanks to Meg Daves- I Teach Stamping) I don't have much 12 x 12 paper, but PLENTY of 6 x 6 pads!
I need to kick start my Christmas card making and thought that this would be a great way to get some done.
Usually I use A4 card stock (8.25" X 11.75") cut in half for my bases not US size which you need for these cards using the template. Luckily I had two sheets of Hero Arts card (8.5" x 11") and could use the A4 Kraft card to cut the mats - which were 4" x 5.25". The main 6 x 6 PP was from the Christmas This & That by Echo Park paper pack. I used a piece of American Crafts red card for my punched edges and layering mats. The Santa images were from A Vintage Christmas pack by Meg's Garden. The oval and rectangle with the stamped sentiments (A Kaisercraft stamp set) were scraps from cutting the mats. So a very economic way to make some quick cards.

I added a strip of embossing to the top of one of the cards, some ribbon on the Santa ones and some bakers twine on the other two.
And while I had my PP out I made a few more Christmas cards
The paper for this one is from Turtle Dove pack by Kaisercraft. I added a sentiment from a Catherine Pooler stamp and added a shimmery die cut in the corner.
If you've managed to get to here.... thanks very much for hanging in there. I do appreciate your visits. Leave me a comment and let me know what you think.
Tuesday, 20 December 2016
Bells and ornaments....
I was luckily enough to be online when Meetu at Krafters Cart (a NZ based online shop) put up that she had managed to get two Sunny Studio Holiday Style stamp sets and quickly purchased it...several of the overseas sites I'd been looking at it from were sold out...
After some Pinterest searching to gets some ideas I came up with two cards that I did some production line stamping....
I made 8 of this one using MISTI to help me. My bell is stamped with Altnew inks, Memento ink and Versafine black ink. It really went quickly making these.
My second set of cards used the ornament stamp
I used Catherine Pooler inks with this one. I used the red, blue and orange in various combinations for my ornaments. And the green ink did an amazing job of the tree with both first and second generation stamping.
So now I finally have my NZ family and friend's cards done and dusted and in the post.. a tad close to Christmas but done! And this set will be a definite one for next year!
thanks for stopping by.
Friday, 2 December 2016
Layered Christmas Wishes
It's a new month so a new challenge at Die Cut Divas. Our challenge theme is Layers or Layer it....and our sponsor is Die R Us
I used an embossing folder, Patterned Paper and stamp that was with a magazine I got this week. I layered my embossed piece and my PP with some red card. The stamp was die cut with a stitched circle die (Simon Says Stamp) and layered onto a red Spellbinders scalloped die (Spellbinders are sold by Die's R Us)
Had a lovely lunch out and then ended up going out for dinner as well... needless to say for dinner, I had an entree as my main as I was still fill from lunch. Now don't feel like doing anything but going to sleep! An early night me thinks.
I used an embossing folder, Patterned Paper and stamp that was with a magazine I got this week. I layered my embossed piece and my PP with some red card. The stamp was die cut with a stitched circle die (Simon Says Stamp) and layered onto a red Spellbinders scalloped die (Spellbinders are sold by Die's R Us)
Had a lovely lunch out and then ended up going out for dinner as well... needless to say for dinner, I had an entree as my main as I was still fill from lunch. Now don't feel like doing anything but going to sleep! An early night me thinks.
Labels:
Christmas,
Copics,
Die cut Divas.,
embossing,
freebies,
spellbinders
Wednesday, 14 September 2016
Another Poinsettia on a spray and splatter card
I'm just loving my new Hero Arts Antique Poinsettia. I decided to make another card for Virginia's View challenge.
I started with a piece of watercolour paper and stamped the poinsettia. I used Zig Markers to watercolour. I die cut it and added it to the card base. I then took the Hero Arts Peace stamp and die set, stamping the peace with red ink and then with MISTI's help, I then stamped some versamark over the top and clear embossed. Once it was heat set, I added the two little sentiments from the set. I cut a mask for the flower and then using my Tim Holtz Spritzer I sprayed around the flower with some Green Zig marker and then a Distress marker for the red spray.
Thanks for stopping by.
I started with a piece of watercolour paper and stamped the poinsettia. I used Zig Markers to watercolour. I die cut it and added it to the card base. I then took the Hero Arts Peace stamp and die set, stamping the peace with red ink and then with MISTI's help, I then stamped some versamark over the top and clear embossed. Once it was heat set, I added the two little sentiments from the set. I cut a mask for the flower and then using my Tim Holtz Spritzer I sprayed around the flower with some Green Zig marker and then a Distress marker for the red spray.
Thanks for stopping by.
Labels:
Christmas,
die cuts,
embossing,
Hero Arts,
Virginia's View
Thursday, 17 December 2015
Die Crazy over at Simon Says
Was excited to see the challenge at Simon Says this week is "Die Crazy".... I'm CRAZY for die cuts! I have SOOOO many - some that have never been cut and some have only been cut once or twice.... So here is a card I did tonight - for a friend's birthday
Just love this Quietfire Designs die (by Elizabeth Crafts) It's HUGE, so becomes the focal point on my card. The flowers are from the Winnie & Walter set that came with StampNation's first kit. A very simple but effective card. This is the one I've entered into the challenge..
And here's a quick card I made for my Holden loving son for his Christmas card.
The Holden Ute die is a new NZ one by Craft Concepts. My son loved it.
So looking forward to this weekend - Saturday my parents arrive and Sunday my daughter and her husband arrive.... so a full on next couple of weeks with family here for Christmas.
Just love this Quietfire Designs die (by Elizabeth Crafts) It's HUGE, so becomes the focal point on my card. The flowers are from the Winnie & Walter set that came with StampNation's first kit. A very simple but effective card. This is the one I've entered into the challenge..
And here's a quick card I made for my Holden loving son for his Christmas card.
The Holden Ute die is a new NZ one by Craft Concepts. My son loved it.
So looking forward to this weekend - Saturday my parents arrive and Sunday my daughter and her husband arrive.... so a full on next couple of weeks with family here for Christmas.
Wednesday, 7 October 2015
Christmas Tag Card
With Fall coming to the Northern Hemisphere and Spring in the
Southern Hemisphere that means Christmas is just round the corner. And
now's the time to visit the store at A2Z Scrapbooking and get some new items to start on your cards. All the Hero Arts Christmas stamps, dies and stencils are in stock.
Today I have a card that uses Hero Arts Merry & Bright Tag Die and Stamp Set.
Remember
when you go shopping to use code Dawn15 at checkout to receive 15% off
your purchase of $25 or more. And don’t forget that we are on Twitter, Instagram and Facebook. Follow us on these different social media outlets so you won’t miss out on any fun promotions!
Today I have a card that uses Hero Arts Merry & Bright Tag Die and Stamp Set.
I
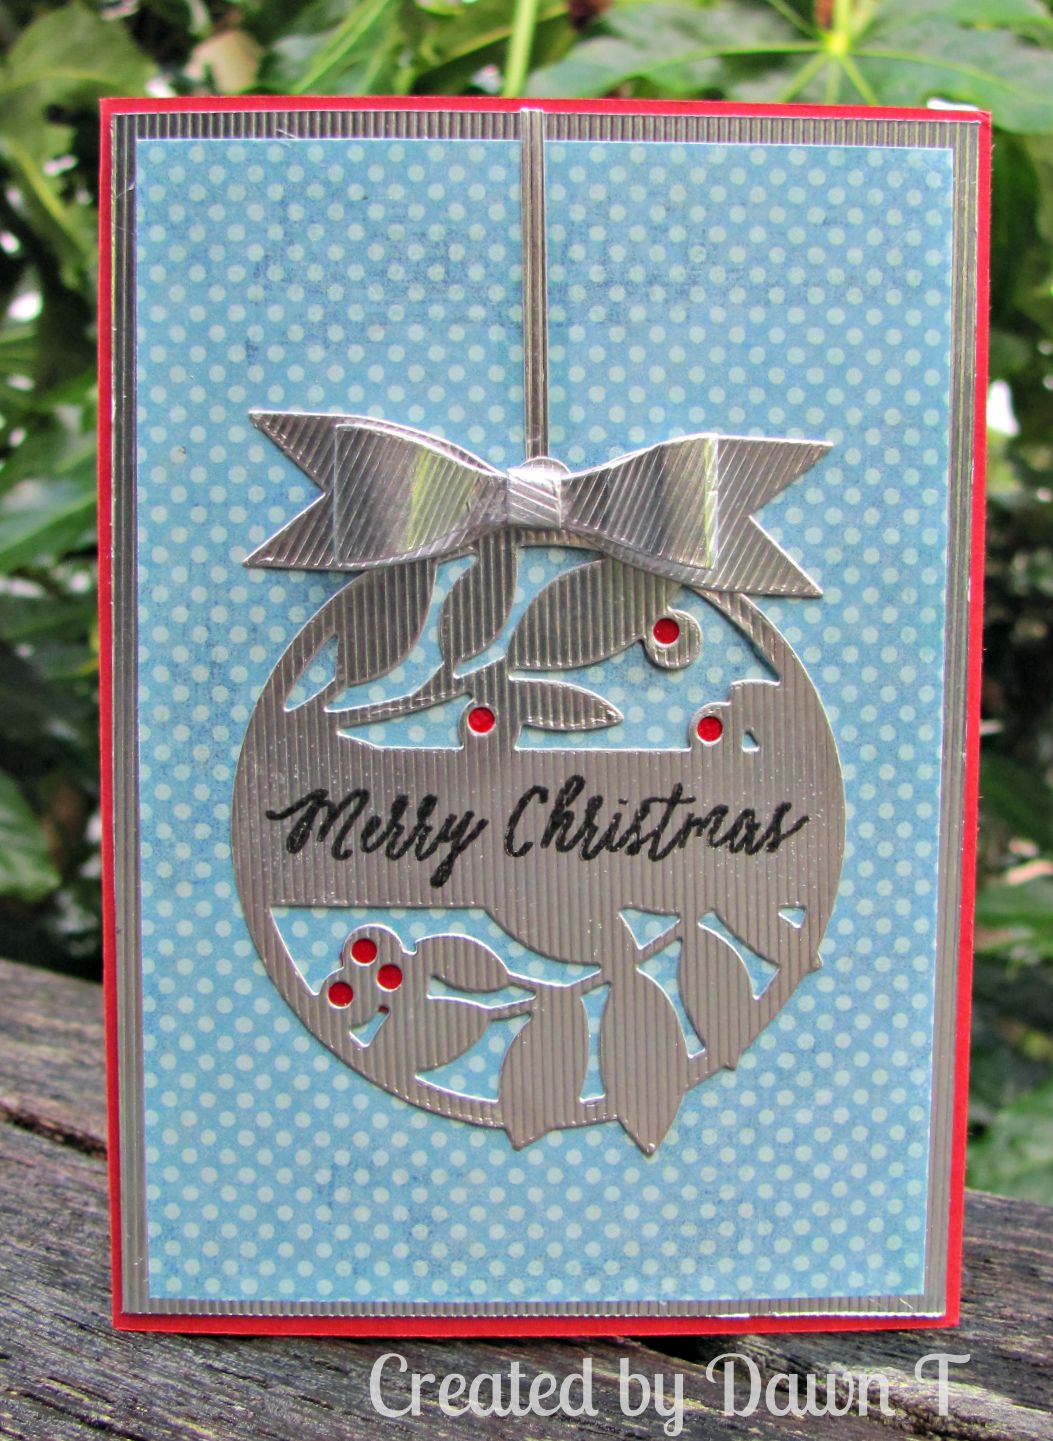
die cut the Tag from some American Crafts silver card stock. The
sentiment from the set was stamped with black ink and clear embossed.
Here I have used a bow die from Cheery Lyn but am pleased to let you
know Hero Arts has an awesome bow die which we are stocking at A2Z.
Don't forget that our challenge this month is all about Fall. Hope you can join us, there is a chance to win a $25 Gift Certificate to the a2z Scrapbooking Store.
Labels:
A2Z Scrapbooking,
Cheery Lynn dies,
Christmas,
cuttlebug,
die cuts,
Hero Arts
Saturday, 29 August 2015
Nothing beats creating with friends.
That's for sure. Our group has had a very busy winter and a number of us have been way, and simply been busy so today's gathering was the first for some time. 5 of us joined Lei at her house and spend a full day creating. I got there at 10.00am and left at nearly 5.00pm. Managed to get 6 cards done. as well as sharing an awesome lunch and lots of fabulous conversation.
I have had lots of new stuff arrived this week... an order from Simon Says Stamp that included some Altenew stamps, some SSS dies and a stencil or two plus my StampNation Stamp of Approval set arrived. It is totally full of goodness
Even with all this goodness, my brain was not working so I did some blog visiting and You Tube watching to get some ideas. So today's cards are all CASE'd or inspired by others.
First up are two cards that are CASE'd from cards by Sandy Allnock. She did an awesome video on using the Layering Christmas Trees from Hero Arts. just click on her name to link through to see it.
I used the same Hero Arts Layering Trees and the same Couture Creations Sentiment die on both cards. The tree was stamped with 4 shades of green distress ink and blended with water and a paint brush. Lots of Liquid Pearls around the oval one as well as on the trees with red and gold stickles.
My next card was inspired by Catherine Pooler.
I did an twisted inlay die cut using Simon Says Stamp stitched dies, The sentiment die and word are from Winnie & Walter as are the sequin stamps. The birthday is embossed on some adhesive backed vellum.
I had an awesome day and did get a couple more cards done. Two are for design work so can't share yet. And one is for a birthday on 9th September.
Hope you have a great weekend and get some time to create like me.
I have had lots of new stuff arrived this week... an order from Simon Says Stamp that included some Altenew stamps, some SSS dies and a stencil or two plus my StampNation Stamp of Approval set arrived. It is totally full of goodness
Even with all this goodness, my brain was not working so I did some blog visiting and You Tube watching to get some ideas. So today's cards are all CASE'd or inspired by others.
First up are two cards that are CASE'd from cards by Sandy Allnock. She did an awesome video on using the Layering Christmas Trees from Hero Arts. just click on her name to link through to see it.
I used the same Hero Arts Layering Trees and the same Couture Creations Sentiment die on both cards. The tree was stamped with 4 shades of green distress ink and blended with water and a paint brush. Lots of Liquid Pearls around the oval one as well as on the trees with red and gold stickles.
My next card was inspired by Catherine Pooler.
I did an twisted inlay die cut using Simon Says Stamp stitched dies, The sentiment die and word are from Winnie & Walter as are the sequin stamps. The birthday is embossed on some adhesive backed vellum.
I had an awesome day and did get a couple more cards done. Two are for design work so can't share yet. And one is for a birthday on 9th September.
Hope you have a great weekend and get some time to create like me.
Saturday, 6 December 2014
It's Chrismas Time.....
over at CCC Digi Creations ( and I forgot to post on the 1st!)
Our sponsor this week is
Mitzi has some lovely images and I chose to work with this cutie
As you all know I love my dies and this time I used a Spellbinders Timeless Rectangle to cut out my image. I sponged the edges to give it definition. My PP is from My Minds Eye. My stamped sentiment is from a Winnie & Walter set.
Do hop over to see what the other's have created. I am happy to say Rose's card is now sitting on my TV cabinet.... such a beauty.
Entering this into Virginia's View - all things distressed seeing as how I've distressed the edges.
Friday, 5 December 2014
Christmas treat boxes.
I got asked to make some little treat boxes for a work colleague. I used a design from Jennifer McGuire (see her video here)
Michelle requested 6 of these....little boxes
I used a variety of colours and PP to make them. For the bows I used a template I got with a magazine. She was really pleased how they turned out. And I had a lot of fun making them as well. Her idea is to fill them with cookies or fudge that she'll make with her 6yr old and 4 yr old. What a great idea.
I sold so many cards at work that I've got a heap more to make so I can send our NZ family theirs. I've got a few overseas ones on their way already and sent my local friends one's today. Working on a few CAS cards I can make in a hurry.
Just 17 more days till I head off on my overseas Christmas holiday.... going to spend some time with my daughter and her partner ( soon to be husband.... they are getting married on 31 December 2014) My whole family - Mum and Dad, son and his fiancée and hubby and I are going to Perth for 10 days. Getting very excited.
Michelle requested 6 of these....little boxes
I used a variety of colours and PP to make them. For the bows I used a template I got with a magazine. She was really pleased how they turned out. And I had a lot of fun making them as well. Her idea is to fill them with cookies or fudge that she'll make with her 6yr old and 4 yr old. What a great idea.
I sold so many cards at work that I've got a heap more to make so I can send our NZ family theirs. I've got a few overseas ones on their way already and sent my local friends one's today. Working on a few CAS cards I can make in a hurry.
Just 17 more days till I head off on my overseas Christmas holiday.... going to spend some time with my daughter and her partner ( soon to be husband.... they are getting married on 31 December 2014) My whole family - Mum and Dad, son and his fiancée and hubby and I are going to Perth for 10 days. Getting very excited.
Friday, 21 November 2014
Christmas Wreath
Today I popped into my local Warehouse store in Milford to pick up some tape runner and notice they had some new Couture Creation dies.... some $10 some $15. I simply couldn't resist getting a couple...
This is a card I made with a wreath die
It is a really intricate die but cut beautifully. I went for a very CAS look. The banner die is by Simon Says Stamp and the sentiment is white embossed. I finished with some red gems and rounded the bottom corners.
The other die is a holly one and I also found a beautiful paper pad from Couture Creations
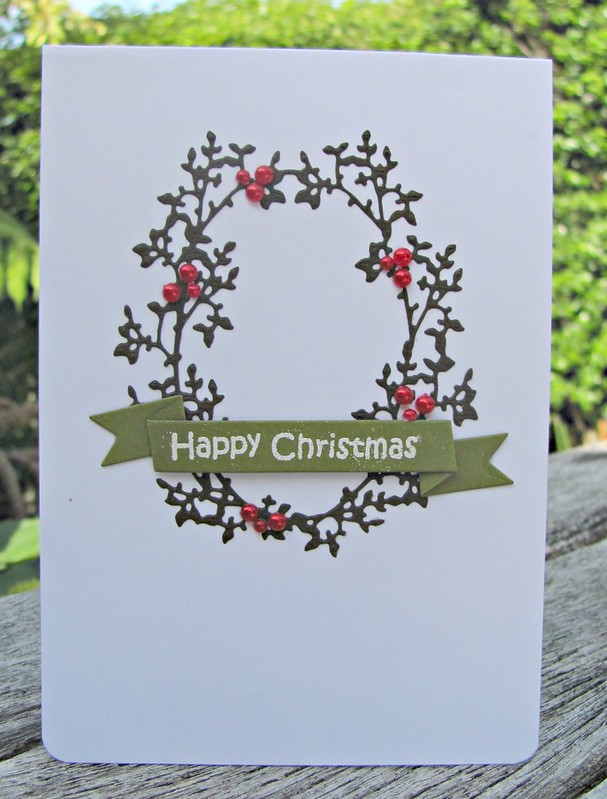
This is a card I made with a wreath die
It is a really intricate die but cut beautifully. I went for a very CAS look. The banner die is by Simon Says Stamp and the sentiment is white embossed. I finished with some red gems and rounded the bottom corners.
The other die is a holly one and I also found a beautiful paper pad from Couture Creations
$10 for a 48 double sided papers... that's around 20c a sheet. And they are really beautiful. I will be working hard to try my hand at Shabby Chic with these papers.
Hope you all have a great weekend.... I'm off to see The Rolling Stones on Saturday night. Excited much! However there is a bit of a down side... Hubby can't go as he is flying down country to attend the funeral of his older sister's hubby. Very sad, only 62. Another victim of Cancer. RIP Allan.
Saturday, 1 November 2014
Holiday Time at Die Cut Divas
I hope you are making good progress with your Holiday cards. I am sharing today a card I made for this month's challenge at Die Cut Divas and Chalk'n'Stock, using a lovely digi from Bugaboo.
Using a some non-traditional colours - aqua and pink. Using chalk ink to colour the colour stock to make the frame. Also chalk ink to colour the edge of the inner oval. Image coloured with my Derwent Inktense pencils.
Do come join us at both challenges.... Die Cut Divas - Holiday Time and Anything Goes at Chalk'n'stock as long as you use Chalk on your card somewhere - chalks, chalk ink either will do!
Labels:
Bugaboo stamps,
Christmas,
Die cut Divas.,
die cuts,
Nellie's Dies
Thursday, 25 September 2014
A Shabby Chic Christmas
It's a new challenge at Southern Girls Challenge today... Our theme is Girly/Shabby Chic.
Our 2 super fabulous sponsors for this challenge are.....

Our 2 super fabulous sponsors for this challenge are.....

I was lucky to get to work with an image from Lacy Sunshine called Curly Sue Victorian Christmas
Shabby Chic is a genre I find difficult but was really pleased with the results I got with this one. I found some pretty PP and a chipboard frame to show off my girl. I made the poinsettia with a couple of punches and some gems. Added some dark green die cut leaves and a Spellbinders fancy label.
Do come and join us with your Girly or Shabby Chic cards for the challenge. It's on for three weeks, so plenty of time to have a play.
Tuesday, 23 September 2014
Embossed Embossing
This month's technique swap I'm involved in was called "Embossed Embossing" I had a few disastrous attempts. So it was off to Splitcoast Stampers resource pages to find some instructions.
My issue was with trying to put the versamark in onto the top of the embossed piece. Using a pad directly just wasn't cutting the mustard. So out came my brayer and yeah - success.
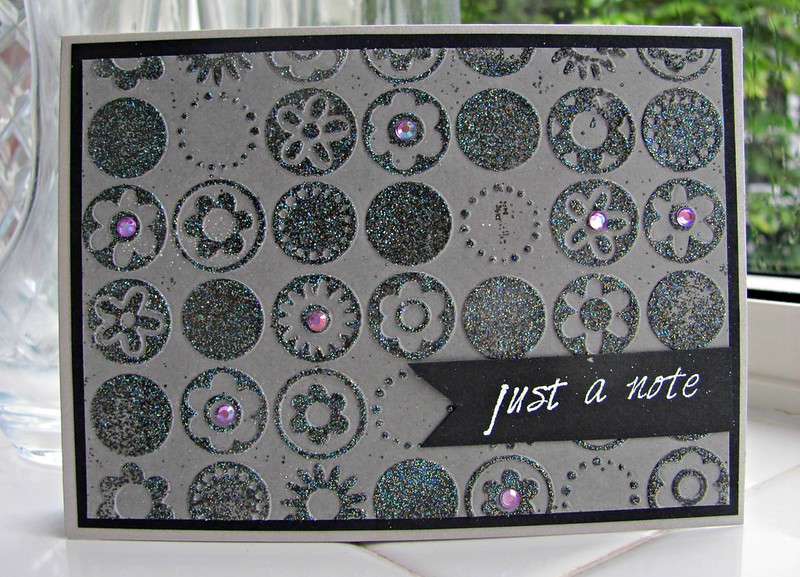
I used a grey card and dry embossed it. Using the brayer gets a nice layer of the versamark just on the raised embossed areas. I used an embossing powder called Poly Sparkle. It's super fine sparkly powder. After heating it appeared greeny. In real life it looks stunning. I made the piece the main focus of the card by just adding a little banner sentiment and some pink gems.
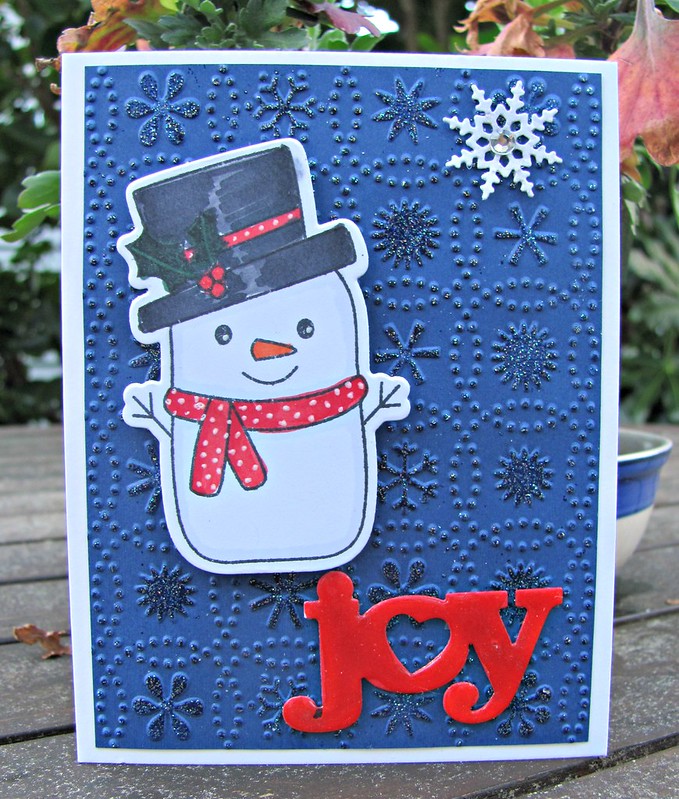
I also try out the technique on some dark blue card. I used an embossing folder with snowflakes.
I decided to make the embossed piece into a Christmas card with the addition of a Hero Arts Snowman and a sentiment die cut with a WPlus9 die. I used a Copic marker to colour it up... added some Wink of Stella and some Glossy Accents. The little snowflake is from the same WPlus9 die set.
This will be a technique that I will be using again.
My issue was with trying to put the versamark in onto the top of the embossed piece. Using a pad directly just wasn't cutting the mustard. So out came my brayer and yeah - success.
I used a grey card and dry embossed it. Using the brayer gets a nice layer of the versamark just on the raised embossed areas. I used an embossing powder called Poly Sparkle. It's super fine sparkly powder. After heating it appeared greeny. In real life it looks stunning. I made the piece the main focus of the card by just adding a little banner sentiment and some pink gems.
I also try out the technique on some dark blue card. I used an embossing folder with snowflakes.
I decided to make the embossed piece into a Christmas card with the addition of a Hero Arts Snowman and a sentiment die cut with a WPlus9 die. I used a Copic marker to colour it up... added some Wink of Stella and some Glossy Accents. The little snowflake is from the same WPlus9 die set.
This will be a technique that I will be using again.
Labels:
Christmas,
cuttlebug,
Embossed embossing,
technique swap
Friday, 12 September 2014
Make your own background
That's the latest Simon Says Stamp Wednesday challenge. Well my order from SSS arrived in the courier yesterday morning so I had a play last night. In my order were: Tim Holtz stencils, a Prima Doll, a watercolour tag pad, a Hero Arts stamp set amongst a few other bits and pieces. I decided to use these items to make a tag with my own background.
I started with the Prima watercolour paper tag and I sponged it with Peeled Paint distress ink. While the ink was still a bit damp I used some Ranger Texture paste through the Holly Bough stencil. The paste soaked up the ink colour, but once it dried I enhanced it with Pine Needles ink and some Festive Berries ink. I distressed the edges with some of the red and green inks mixed together. I stamped the Prima doll stamp onto white card and some PP by Kaisercraft so I could paper piece the dress. Sundresses are the order of the day here in NZ for Christmas Day as it is mid summer. I then used the sentiment from the Hero Arts set trimmed up and distressed with black ink.
As I used some Patterned Paper I am entering this into the challenge at Virginia's View.
And as I used texture paste and made a tag, I am entering this into the Textured Tag at Beyond Grey Challenge
Hoping to get a few more cards and tags done this weekend. Hope you do to!
I started with the Prima watercolour paper tag and I sponged it with Peeled Paint distress ink. While the ink was still a bit damp I used some Ranger Texture paste through the Holly Bough stencil. The paste soaked up the ink colour, but once it dried I enhanced it with Pine Needles ink and some Festive Berries ink. I distressed the edges with some of the red and green inks mixed together. I stamped the Prima doll stamp onto white card and some PP by Kaisercraft so I could paper piece the dress. Sundresses are the order of the day here in NZ for Christmas Day as it is mid summer. I then used the sentiment from the Hero Arts set trimmed up and distressed with black ink.
As I used some Patterned Paper I am entering this into the challenge at Virginia's View.
And as I used texture paste and made a tag, I am entering this into the Textured Tag at Beyond Grey Challenge
Hoping to get a few more cards and tags done this weekend. Hope you do to!
Monday, 2 December 2013
Colourful ornaments
Had a superb day on Saturday making cards with my friends Helen, Sandie, Janet, Marisa and Sandie's friend, Jackie. We missed Lei who was laid up at home with a broken foot. We got a lots of cards done. I made 5 on the day
Here is a closer look at my two ornament cards
Both use the same technique. Using PearlEx powder mixed with some water to make a paint. I die cut a Poppy Stamps die with some silver foil card. For the first one I used some glue to stick down the die and then some blue PearlEx paint to colour in the ornaments. I then used a Hero Arts sentiment which I silver embossed. I used some Peelcraft stickers for the strings. I sprayed the card with hairspray to set the PearlEx. My second card used some red PearlEx to make the paint. I finished it with a sentiment sticker. I also stuck the silver card to some Jak paper before die cutting it, which made it much easier to stick down. Wish I had thought of that for the first one!
Thanks for stopping by today.
Here is a closer look at my two ornament cards
Both use the same technique. Using PearlEx powder mixed with some water to make a paint. I die cut a Poppy Stamps die with some silver foil card. For the first one I used some glue to stick down the die and then some blue PearlEx paint to colour in the ornaments. I then used a Hero Arts sentiment which I silver embossed. I used some Peelcraft stickers for the strings. I sprayed the card with hairspray to set the PearlEx. My second card used some red PearlEx to make the paint. I finished it with a sentiment sticker. I also stuck the silver card to some Jak paper before die cutting it, which made it much easier to stick down. Wish I had thought of that for the first one!
Thanks for stopping by today.
Friday, 22 November 2013
Snow much Joy.... Christmas in November Day 6 at Little Blue Button Stamps
Today it's my turn to host the blog in Little Blue Button Stamps' Christmas Event.
Also today we release this stamps set "Hooray Its Christmas!" which is available in rubber
And don't forget you can get this stamp for 50% off, just for today over at Little Blue Button Stamps with this code ~ dwn55 Attention: you must be logged in to use coupon! Otherwise it will not work! It's only for these two stamps and only for today so be quick.
Also in the end of this event will be two random winners picked up among those who will make order during this event - they will receive a small kit of Christmas digital stamps which weren't included in this event! So stay tuned!
Hope you take the time to visit our Event... full of inspiration.
Monday, 11 November 2013
A few Christmas cards.....
Over the past few weeks, I've done a few Christmas cards. I have two to share today ~ so hang in there with me while I show you what I've been doing.
My first card was inspired by Betty who made a few cards with poinsettia's on them together with some little berries.
I'm hoping to get a few more Christmas cards done... I was lucky enough to win a place in the latest On-line classes class... Holiday Card Workshop and am really looking forward to the class. Thanks to Joy who picked me for a place.
My first card was inspired by Betty who made a few cards with poinsettia's on them together with some little berries.
I used a Tim Holtz/Sizzix die to make my flower, some rose leaves, the berries from WPlus9 Fresh Cut Florals die and stamp set and a background with a Couture Creations embossing folder. This one has been entered into the challenges at Simon Says Stamp and CAS-ual Fridays
and a quick card I made for Chupa's Saturday Sketchbook #109
I really liked the sketch and used a new pad of PP from American Crafts called Peppermint Express to co-ordinate the colours. The sentiment is from Kaisercraft. My snowflakes are from a Marianne's die set and a punch. The large one is cut with glitter tape stuck to some card and the rest were cut and punched and Stickles added. Added some Stickles to the houses and snow and finished with some silver gems. The whole card took me less than 20 minutes to finish and then that long for the stickles to dry.
I'm hoping to get a few more Christmas cards done... I was lucky enough to win a place in the latest On-line classes class... Holiday Card Workshop and am really looking forward to the class. Thanks to Joy who picked me for a place.
Have a great week
Saturday, 2 November 2013
Let's Celebrate at Die Cut Divas.
As promised, I'm back with my sample for the challenge at Die Cut Divas...Paula and I have decided to combine the November and December challenges and give you two months to Celebrate.... Holiday cards or any other celebration. We have one sponsor for each month but cards for both months will be in the running.
This months sponsor is Crafty Sentiments Designs. They have some adorable images. I chose to use a Christmas image
I used my Spellbinders circle die to cut out the Copic coloured image and added to my snow globe. The sentiment is from Kaisercraft, stamped with Hero Arts Poppy ink and cut out.
So please come and join us with Die Cut Divas over the next couple of months.
Thanks for visiting today. Hope your weekend is going well.
Subscribe to:
Posts (Atom)