Showing posts with label Texture pastes. Show all posts

Saturday, 6 June 2026

A Masculine Mixed Media Card for Sweet Stampin' Challenge

If I’m honest, masculine cards are probably one of the hardest things for me to make. I always seem to drift toward flowers, pretty layers, and all the softer details, so coming up with something for a guy usually takes me a bit longer! But this fortnight’s Sweet Stampin’ Challenge gave me the perfect excuse to step out of my comfort zone and have a play with a more textured, mixed media look.

I’ve been watching quite a few mixed media videos on YouTube lately, and they’ve inspired me. All those grungy layers, bits of texture and slightly industrial details had me wanting to try something a little different. It also gave me the chance to use one of my newer buys—an All & Create stamp set called Dynamics—which felt just right for this kind of project.

This may contain: a stamp that has been used to create an art and craft project with stamps on it

So here’s how the finished card came together.

I started with a mid-grey square card base and blended Evergreen Bough and Lost Shadow Distress Oxide inks over the background. From there, I built up the texture by stamping with the Dynamics set in black ink, Lost Shadow, and Vintage Photo Distress Oxide, which gave it that nicely worn, layered look without making it feel too busy. After that, I added some texture paste through Tim Holtz’s Clockwork stencil, and I loved how it picked up hints of the green and brown underneath. To finish it all off I added a dark grey die-cut clocks (another new purchase from my local bookstore) and splattered on some grey and white Dina Wakely acrylic paint for a bit more grunge, then added a pre-printed sentiment from Paper Roses.

I’m really happy with how this one turned out, and it’ll soon be heading off to a friend for his birthday. It’s always nice when a challenge pushes me to try a style I wouldn’t normally go for, and this card certainly did that. I’m sure it won’t be my last.

Wednesday, 19 November 2025

More Christmas cards using the mixed media background.

 Well over the last few days, I've made up three more cards using some of the mixed media masterboard I made. 


I had used Gina K Master Layout 2 to cut the panel.  I then used some texture paste through a star stencil and sprinkled with some Diamond Dust glitter.  Matted it with the dark green card and added the gold die cut sentiment (minus the shadow layer) and some gold dots. 

Next I used a square panel of the background 


Matted the square panel with the dark green (looks black in my photo) and used a strip to add my red die cut sentiment.  Added some little red star embellishments.   A very quick card. 

And the last for today 


This panel was a smaller one cut with one of the dies and matting layer dies from Gina K Master Layouts 2.  The background panel is a white embossed panel (Christmas words) matted onto a white layer and added to the top folding dark green card base.   Added the panel to the base layers and then used a Hero Arts stamp and die set called Holly Jolly to make the leaves.  Used Catherine Pooler inks - Eucalyptus and Green Tea.   Stamped the sentiment from the Hero Arts set in Altenew Forest Green Crisp Dye ink and used a circle from Pinkfresh Studio's Mini slimline Essentials die set.  Added the die cut circle over the Holly leaves and finished with some dark green dots. 

Still two pieces of the background to make into cards.  


Saturday, 3 April 2021

Homework for Erum's Creative Colouring class

 Happy Easter to you all.  I'm spending some time up at my friend's place in Mangawhai and happily have brought some crafty supplies and a couple of WIP projects from the my class at Altenew Academy.  I'm doing Creative Coloring with Erum - Advanced Techniques Online Class


The other day on my Facebook I showed this WIP 


Yesterday afternoon I finished it off.  

This was Day 3's class - Watercolouring and Stencils.  I used this gorgeous stencil called Rose Bouquet and after stamping it with Vanilla Cream ink, I used some of the Woodless Watercolor pencils.  Added some splatters for texture.   I had forgotten my coloured card so used a darker pink ink to blend some ink around the edge of my layer piece.  Turned out perfect.  Finished with a black sentiment from Sentiment Stripes 2 stamped directly on my main panel. 

My second project started last Wednesday with me adding some Texture paste and sparkle glitter Embossing Powder to my white card.  Once it dried, I used the heat gun to set the powder.  Another one I completed yesterday 


This one was inspired by Day 2 - Playing with Textures.  I used the same stencil as my first card.  I added some WOW Sparkle Embossing powder over the paste.  I then took some purple watercolour paints (from the 36 pan set) and added it all over the watercolour card.   I case'd Erum's idea of stamping a sentiment in black on white card and fussy cutting around it for a shadow layer.   I got the Birthday stamp set this week... I was tired of trying to find a Happy Birthday sentiment so was super pleased to see this one on sale.  I added a little "girl" sentiment to finish

Our Easter weekend has had lovely weather so far.  We travelled up north Good Friday morning.  After finishing these two cards in the afternoon we headed to a local beach to enjoy the afternoon sun and even I managed to hit the water.   Then today after doing two more cards we "beached" again.  We went a little later in the day but still got some sun and yes another swim for me.  Two more days of the holiday break so hoping the nice weather continues. 

Happy Easter to you all.  


Saturday, 29 June 2019

3D Floral Focus class - Altenew Academy

After seeing the delightful cards made by my friend, Betty, I signed up for the Altenew Academy class, 3D Floral Focus being tutored by the amazing Therese Calvid.   I only have two Altenew 3D floral dies... one was  a freebie with a magazine a while back and the other is Floral Fantasy. 


Day one was about basic layering of the 3D dies.   I don't have any of the Altenew card stock and not a lot of matching colours... have heaps of card but often in random colours.  So I got around that by using my inks to colour the dies


For this card I CASE'd Therese card.  I used the freebie die and cut all the layers from some pink card and then used Altenew inks - Pink Pearl, Coral Bliss, and Heart Beat.   I swapped up the second and third layers for the rose that sits on the top.  I used the leaves from the die to make the smaller leaves, and used the leaves from Build a Flower - Roses for the larger single layer leaves.  Added some branches die cut with a Memory Box die.   I added some texture paste through the Altenew Broken Chevron stencil on my background.  I used a sentiment from Adore You set to finish off.  

I've done Day 2 - monochromatic - homework but still need to take a photograph of it.  I still have a couple of days worth of videos to view as well. 

And to finish off here's the latest pic of Grace..... 7 weeks now

 Such a wee sweetie.   Mum is doing well after having her appendix removed early Tuesday. 

Friday, 7 August 2015

Rainbow texture.

It's my turn at A2Z Scrapbooing again today.  And I have a  card using a stencil, Texture Paste, watercolour Zig Brush markers and a die cut to share.

Rainbow embossed background

I used the Leaf and Flourish stencil with Ranger Texture Paste .  Once it dried I coloured with the Zig Markers and totally spritzed with water to mix.  I left it overnight before trimming it and backing with the black card.  I die cut a tag from black and white embossed the sentiment and heart from the Hello Stamp and Die. I used a Copic marker to colour the heart.  I coloured a scrap of watercolour paper and die cut the Hello.  This card is heading off to my Mum who is not well.  As she lives in another country, this is my HUG to here - the one I wish I could give her right now!

My card was inspired by the Craftsy class I took.  It is a class by Catherine Pooler and I can highly recommend it.  21 different techniques.  One lesson is on Stenciling with Creative Mediums.

As I used some twine to tie on my tag, I'm entering this into the Tie it Up challenge at Simon Says Stamp

Remember if you are in need of any items from the a2z Scrapbooking store  you can use code Dawn15 at checkout to receive 15% off your purchase of $25 or more. (before tax and shipping)  And don’t forget that we are on Twitter, Instagram and Facebook.  Follow us on these different social media outlets so you won’t miss out on any fun promotions!   Also, the a2z Store now has the 2015 Hero Arts release in stock. So now there’s even more reason to go shopping!!!!!!

 Dawn

Sunday, 2 August 2015

Texture challenge at A2Z

 If you're looking for my Die Cut Divas post it's HERE
      *******************************************************

Hi there   New challenge up at A2Z today and I've got a card to share.  Our challenge is all about using Texture Paste....


I started by colouring my background with Zig Clean Colour Real Brush Markers.  I then added some Ranger Texture Paste through the Hero Arts Birds and Leaves
stencil.  The paste picked up some of the colours of the paint.  Added the Hero Arts sentiment (from this set) by white embossing on the black strip.  Added a variety of Pretty Pink Posh sequins and matted with blue and then onto a pale blue base.

Do come and join us at A2Z Scrapbooking and play with your texture paste and Hero Arts products.


Remember if you are in need of any items from the a2z Scrapbooking store  you can use code Dawn15 at checkout to receive 15% off your purchase of $25 or more. (before tax and shipping)  And don’t forget that we are on Twitter, Instagram and Facebook.  Follow us on these different social media outlets so you won’t miss out on any fun promotions! And look out for the latest release from Hero Arts... coming soon to A2Z.


Thursday, 30 July 2015

Anything Goes at Southern Girls Challenge

Hi all.  A new challenge is up at Southern Girls Challenge Blog.  It's an ANYTHING GOES challenge.  So I'm hoping to see you all there with your projects.

Our sponsor is PPinkydolls


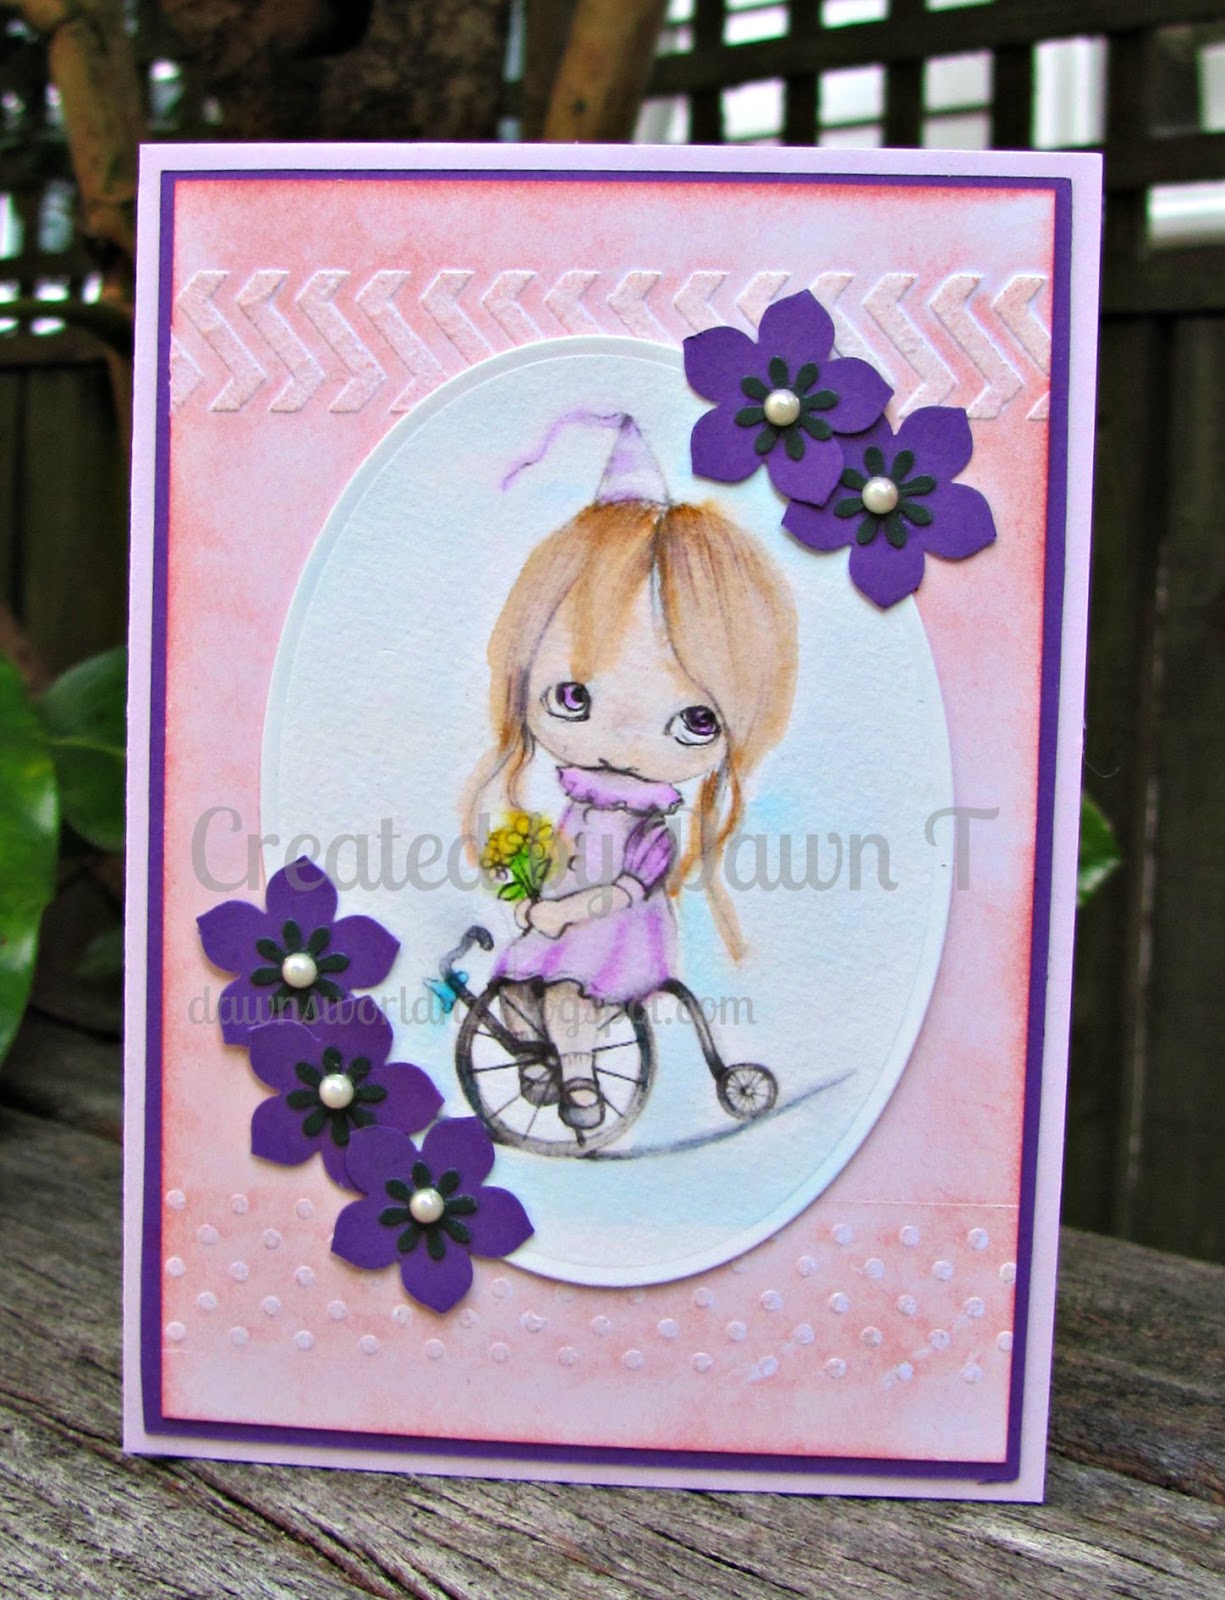
I printed the image onto some watercolour paper and used my Zig Clean Color Brush Makers to colour her in.  I then die cut with a Spellbinders Oval die.  Next step was to add some texture to my card base with a stencil and some texture paste. Once it dried I used some Victorian Velvet distress ink to sponge the card.  I then layered it onto some dark purple card and onto a soft lilac card base.  I added some punched flowers topped with some pearls.  I haven't added a sentiment as yet.

So with a ANYTHING GOES theme there's lots of scope to join us.


Friday, 12 September 2014

Make your own background

That's the latest Simon Says Stamp Wednesday challenge.  Well my order from SSS arrived in the courier yesterday morning so I had a play last night.  In my order were: Tim Holtz stencils, a Prima Doll, a watercolour tag pad, a Hero Arts stamp set amongst a few other bits and pieces.  I decided to use these items to make a tag with my own background.


I started with the Prima watercolour paper tag and I sponged it with Peeled Paint distress ink.  While the ink was still a bit damp I used some Ranger Texture paste through the Holly Bough stencil.  The paste soaked up the ink colour, but once it dried I enhanced it with Pine Needles ink and some Festive Berries ink.  I distressed the edges with some of the red and green inks mixed together.   I stamped the Prima doll stamp onto white card and some PP by Kaisercraft so I could paper piece the dress.  Sundresses are the order of the day here in NZ for Christmas Day as it is mid summer.  I then used the sentiment from the Hero Arts set trimmed up and distressed with black ink.

As I used some Patterned Paper I am entering this into the challenge at Virginia's View.
And as I used texture paste and made a tag, I am entering this into the Textured Tag at Beyond Grey Challenge

Hoping to get a few more cards and tags done this weekend.   Hope you do to!

Thursday, 14 August 2014

It's all about the Texture

Today is the start of a new Challenge over at Southern Girls Challenge and as it's Louise's team to share with you... that means it's my turn.  Our challenge to you is to use TEXTURE... whatever that means to you... fabrics, ribbons, texture paste, embosing.... the options are limitless.

We have three lovely sponsors this month...

http://2.bp.blogspot.com/-GxwK1ZWqVi8/UOfLfcdTDaI/AAAAAAAAGmY/89RNTcqozYI/s320/Website-Banner.jpg 

- 

. 


My card on the blog uses a Dilly Beans Digi Stamp called Ginger

My texture is the embossing folders I used.. a background one and the edging stripe as well.  

I also used two images from our other sponsor ~ All Dressed Up.  There are some freebies on the blog site (HERE)so I had some fun doing some cards with texture paste and stencils

 For this one I used some embossing paste with a stencil and added some holographic embossing powder over it.  I set heat it once the paste had dried.  Use a Spellbinders die for the card base and some Prima flowers in the corner


Have to say was extremely pleased with my textured background here.  Used a brick stencil and the embossing paste.  Once it dried I sponged with Hero Arts Wet Cement ink.  My little dog is coloured with Copics and cut with a Spellbinders circle.  Added a flourish and some punched flowers.  The centre of the flowers are a stamp from a Winnie & Walter set.  

We would love to have you join us at Southern Girls for the challenge.

Tuesday, 28 January 2014

Stenciled Day 3 ~ Texture and Dimension

 
Back with a card I did using stencils and some texture paste.

IMG_7737

I used a Dreamweaver stencil and some translucent paste.  I added some embossing powder over the paste and left it dry.  I used a maroon colour for the sail and brown for the boat and birds.  For the water I used a sparkle embossing powder.  Once it dried, I heated the embossing powder and then did a bit of resist watercolouring with Pearlescent paint.    I used some PP from a Rosie's Studio paper pack for my background.  The little stamp is from a date stamp type stamp with lots of little sentiments.

And here are some of other techniques I tried


Embossing powder on the paste (DIY stencil used from a die cut of the Simon Says Stamp Falling Hearts die) Translucent paste (to do a resist technique) and a bit of watercoloured stenciling (had the paint too wet) 

Today was the last day of the class but Jennifer did a bonus class as well and there was a SVG/PNG cut available for the class participants.   Not sure when I'll get time to finish my home work.