Showing posts with label embossing paste. Show all posts

Sunday, 13 January 2019

Using something New

My NZ swap group theme for this month is to use something new..... something you received for Christmas, bought at a craft fair, etc that you haven't used yet !  I got a lovely gift pack from my son and his partner that included some stencils, washi tapes, and flowers.  I chose to use one of the stencils.

.
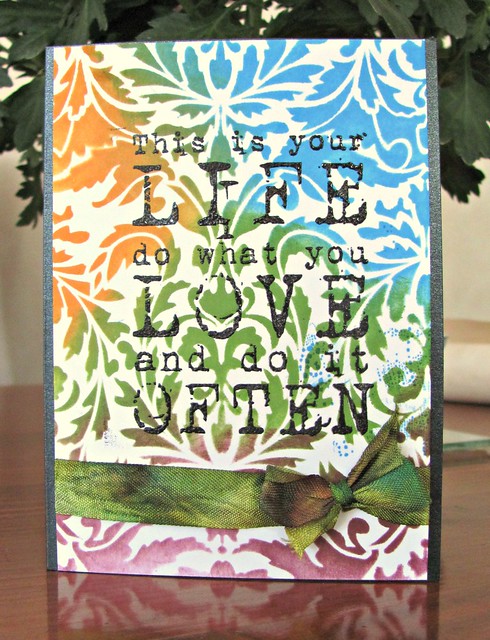
I sponged some Altenew ink through the stencils and then added some translucent embossing paste on top.  I cut it and layered with some very dark navy card.  I white embossed a sentiment from Altenew  "Engraved Flowers" set.  I also stenciled part of the flower inside the card and made a matching envelope.  


 I am entering this into the Card & Matching Envelope challenge at Simon Says Stamp Wednesday challenge
and the new challenge called "CAS stenciling" which has a theme of sponging.

 I haven't done much crafting this weekend as our son and his partner moved into their new house.  They have been living with us since early November.   We helped them moving yesterday - I dusted and cleaned the furniture before it went into the house.  It's been sitting in my garage so had got dusty.  We spend most of the day there and today, hubby went over after lunch with our lawn mower and did the lawn.  I took over my son's washing that I'd had on the line and a few odds and sods that got left behind.  They are so happy to finally be in.  It's in a nicer area and close to several of their friends.   
 

I'll be busy this week making sure I'm ahead with my Design Team work as we head off on the 20th to so our West Coast bike trail.  Not sure I am ready for it but will give it a go.  It's only for 4 days - biking between 24 -34 kilometres a day (about 3-4 hours cycling a day) plus I've hired an E-bike to make it a bit easier for me.  

Thanks for stopping by. 

Tuesday, 17 April 2018

Stamped and Stencilled backgrounds

I have another couple of card for my AECP classes.... First a card for Celebration: Stencil Techniques.   I LOVED this class.  There was so much inspiration from Laurel Beard.  She is the funniest, happiest of tutors.  I really got so many great ideas.  I had so many ideas floating around in my head... but was very inspired by Laurel's use of inks to colour up embossing paste. 


My background was made by mixing embossing paste with Parrot ink.  I used Altenew Layered Medallion B stencil and spread the paste through it.  Once it dried I added it to a pale green layer and then onto the dark grey card.  I took the Parrot from the Parrot Paradise stamp set.  I used Zig Markers to colour the parrot and then fussy cut and used some 3M mounting tape to pop it up.    The sentiment was white embossed onto the grey card.    I learned so many great techniques to use with stencils in this class.  I can totally recommend it. 

And my second card is for Clean and Simple Boutique Cards - I chose the Stamped Background lesson and was totally inspired by both Jennifer Rzasa and Yana Smakula.  I have already shared this background but here it is again.

I learnt that even a CAS card can be full of beautiful colour.  Jennifer is a great tutor as well.  Each of the classes is inspiring and really good value for money. 

Two more cards ticked off - I'm having great fun doing  the AECP class. 

Thanks for stopping by. 

Sunday, 8 October 2017

World Card Making Day

I have been spending some time today in my craft room.... taking my mind off things....
It's WCMD (or weekend in my case!)

I've been doing some of the challenges over at StampNation...based around a travel journal

Challenge 1 - Canada - make a scene card.... I showed this one yesterday....

Challenge 2 - Alaska  - create a card using Embossing Paste, Texture paste or something similar.


I used a Kaisercraft stamp and then added some paste through a stencil and then freehand at the base of the lamp.   I then used some distress inks to sponge the night sky.   The sentiment is from a freebie set I got last year with a magazine.


Challenge #3 - Australia... a gorgeous mood board - sea creatures or mermaids, or just be inspired by the colors in the graphic!


I used this cute little mermaid from The Greeting Farm.  It's a digi stamp so I printed it out and coloured with Copics.  My background was made with Distress Oxides in green and blue.  I added water splatters and some sparkle pen.  The black circle doily is a Catherine Pooler Design's die.

Challenge 4 - Ancient Rome - use something old (from your stash, a vintage style stamp set or design style, age your creation by distressing the edges or make a birthday card for someone getting older) 
I still working on this one

Challenge 5 - Spain. The traditional Flamenco dress is inspiring in itself. Use the photos to inspire your design  - I was one of the designers for this challenge.... here's a peek of my card 

 The colours and flounces of the flamingo dresses inspired my card. 

It's off to work tomorrow - till I find out when Mum's funeral is and we can book our flights.  I'll stay a few days after to help Dad sort through Mum's stuff.  Both my children are coming.  Our son and his partner with us, and our daughter and grandson will fly over from Perth.  
 

Monday, 20 March 2017

Tag You're It! - and some colouring....

Had a fabulous weekend just playing with my stash... I did some colouring, embossing paste and Pixie powders, and made a tag for the Tag You're It challenge. 

The guest designer for Tag, You're It this time is Marion Vagg and here is her delightful sample


Here's the tag I was inspired to make

I took my inspiration from her embossing paste background, focal flower, and use of black labels for the sentiment. 

I took a manilla tag and used a Hero Arts stencil and some light modelling paste and covered some of it.  I then gathered together some already cut die cut elements... blue vellum leaves, some green sprigs and an Altenew flower coloured with iridescent paint and fussy cut, and added them to my card.  I used my computer to print the sentiment which I trimmed and added to my tag.  All in all very happy with the result. 

And here is the technique piece I did with some embossing paste and Pixie Powders (similar to ColorBursts) - following a video by Ingrid Blackburn I watched.


It really shimmers in real life as the Pixie Powders have a lot of mica in them.   I also pulled a pattern off the watercolour on the stencil.  It's much less as bright and graphic, more smooshed and abstract but will use it for something.  Not sure what I will do with this one yet but it is too nice to cover up!

And finally I did some pencil colouring using Gamsol (mineral spirits) after watching a Gina K video, 


I did this on some 200GSM watercolour paper but feel it would have been better on a smoother card.  However, the result looked quite amazing.   I splattered some black ink on the background and white embossed the sentiment onto black card.  All the stamps are from an Altenew set. 


I'm entering this into the challenge at City Crafter Challenge - Spring is around the corner.  From the inspiration photo I took the word flowers and thought about spring flowers and also another entry into The Flower Challenge.... Anything Goes.   They generously allow you to enter up to 5 times... this will be my 4th entry. 

Hope your weekend was as much fun as mine... with all this crafting as well as quite a bit of socialising with friends! 

Sunday, 3 August 2014

July CCC reveal.

Hi there... over at Deborah's CCC post she has reveal all the cards that were made and sent for her monthly Card Chain Challenge.  I had the pleasure of sending my card to Cat in Maryland USA.  I chose to use embossing paste on my card and the theme of Friends

July CCC

I started by using a stencil and some embossing paste to make my background.  I then used distress inks to colour the background and wiped the paste while the ink was still wet to keep it white.  The sentiment is from a Kaisercraft set and stamped onto the white Spellbinders die cut.  Finished with a die cut butterfly.  I also sent Cat the little Kaisercraft set that I used to stamp the sentiment.  I had picked up a number of the word sets from Kaisercraft and got a second set of the Friends one.  Just love finding reasonably priced sentiments.   Always good for RAK for someone.  

And I got an awesome card from Gail in Norway

http://dominodebi.typepad.com/.a/6a00e550066280883301a511edbf55970c-pi

If you want to join the monthly CCC and receive a great card you sign up on Deborah's blog HERE.


Sunday, 29 June 2014

Two for the price of One....plus one extra

Well at least two cards from one stencil and another from left over ink....

I had a great afternoon playing with my inks, stencils and stamps.  Recently I was lucky enough to win a Memory Box stencil on a blog hop - it's this one 


I pulled it out today and made one background with some embossing paste and then I decided to use some Distress inks to sponge.  I used vibrant colours - Mowed Lawn, Spiced Marmalade, Seeded Preserves and Salty Ocean.

This is your life....

I used a Stamp-It sentiment as my focal point, but letting the background take pride of place.  I coloured up my ribbon with the inks but once I spritzed it, the green sort of took over... a bit more about that later! 

Before making up the card, I took the inky stencil and gave it a good spritzing with water and then used a piece of cardstock to "stamp" the stencil.  I think it's called reverse stencilling.  Tim Holtz showed in during the Stenciled Online class earlier this year.  The resulting negative of the stencil turned out very soft and airy looking.

Shine Every Day

Once again, I wanted the beautiful background to take pride of place.  So just added a sentiment.  This one was from two Winnie and Walter sets and did involved a little stamp surgery... the every started life as everything.   Finished with a few iridescent flat sequins.

And my final card came about from the ink left over from my ribbon.  I had beads of ink on the craft sheet so grabbed a piece of white card stock to sop it up.  As it was very wet, as the card stock picked it up, little bobbles appeared.  I added a little more blue and orange inks to the sheet to fill in the gaps on the card.  Once it dried, a very interesting background resulted.  

IMG_8713

I decided to simply play and see what would happen.  Started by stamping the Scribbly Bird from a Dina Wakley set and enhancing it with some Copic markers.  Then stencils, inks, paints, some washi tape and the sentiment from the set.  A mixed media card resulted.   I am entering this into the Anything Goes Challenge at Simon Says Stamp

And I still have my embossed piece to do something with... a very successful day's crafting!


Thursday, 15 May 2014

Combining two techniques ~ stenciling and watercolouring


I got a new stencil this week ~ from Memory Box and I wanted to combine my two favourite techniques... using stencils and embossing paste and watercolouring.


I started by using some embossing paste through the stencil and once it dried, did a watercolour wash in a variety of green paints.   Next step was to use Distress Markers to colour the stamp.  Once spritzed with water, it was stamped and more water used to "paint" the flower.  The stamp is a Penny Black one called "Brush Rose" so half the work was already done!  Once it dried, I used a Fancy Oval Spellbinders die to cut it.  While still in the die, I used some shimmer paints to make the background.  Add a few pearls and a little Stampin' Up sentiment.

This is being entered into the challenge at
 Simon Says Stamp ~ Die Crazy
 Crafting When we can ~ Dies
Penny Black and More ~ anything goes 
Penny Black Saturday Challenge - Favourite PB Stamp...this is my new favourite one!


I really am enjoying my crafting at the moment.  So much inspiration Cratfrom the classes.  And this weekend, I'm having some friends over for a days card making.  Hoping to catch up with my homework.

Do pop back tomorrow as I have a card to share that I made for a new challenge blog I am a designer for.